
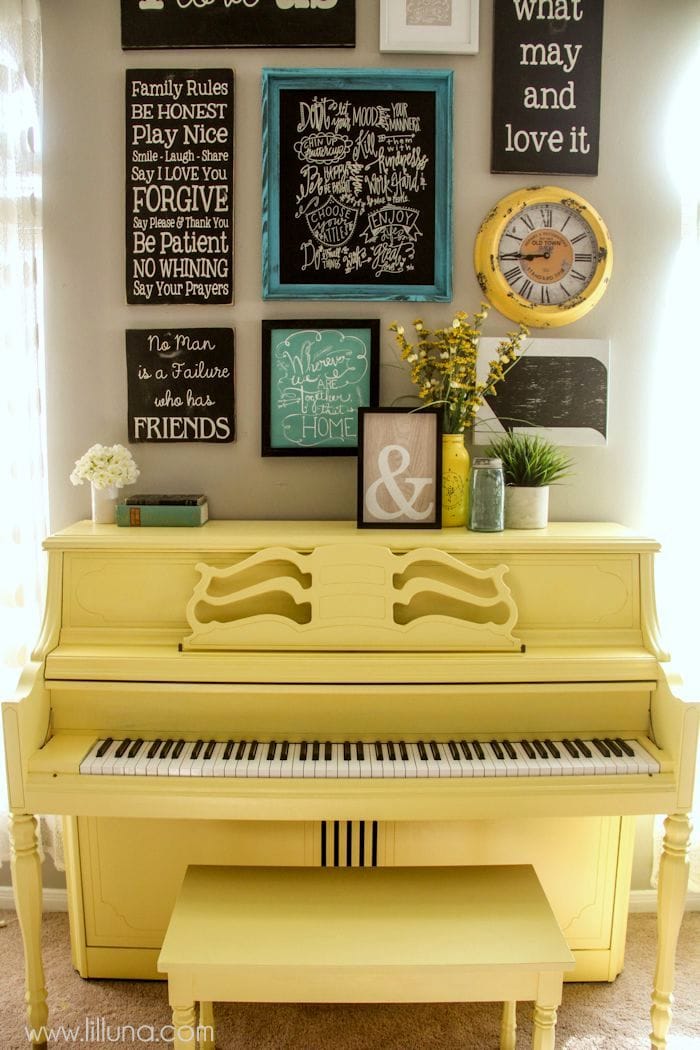
I have wanted a piano for the longest time. I don’t play and never really had the opportunity to learn, so it was decided long ago that I would have a yellow piano and that the kids would take lessons. Well, guess what?! We finally have our yellow piano! I cannot tell you guys how happy it makes me!! The kids are so excited too, and we already have everything set up to start lessons when school gets out. The best part? I’ve decided to take lessons myself! Pretty crazy, but I just feel like it’s something I’ve always wanted to do, and it’s never too late to learn, right?!
I’ve been posting a few preview pics on Instagram, and it seems like there are many of you out there who have been contemplating whether or not to paint your piano. I’m here to tell you today to DO IT!! It takes some time and patience, but it is easy, especially if you have a very supportive husband like mine who will actually let you (AND help you) do it.
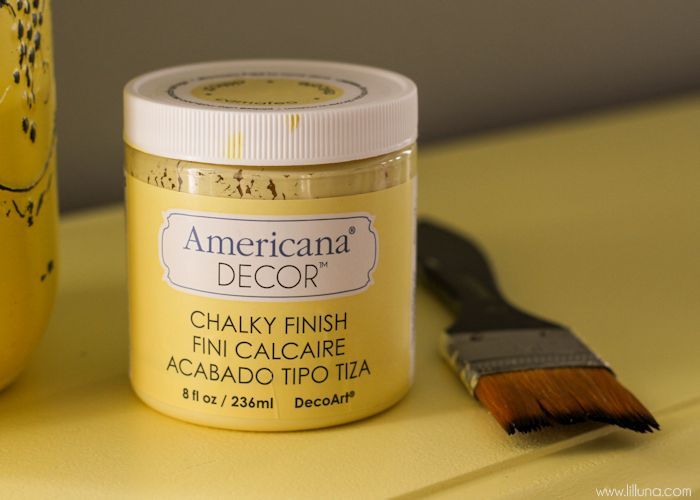
The paint used for the project was DecoArt’s Chalky Finish Paint. It did a great job, and I was ecstatic that they had the perfect butter-y yellow that I was looking for. I would have liked to have a made a tufted piano bench but ran out of time, so I’m hoping to do it and share that tutorial with you in the future. I did add a new gallery wall above the piano though that I’m quite find of. It includes signs I made along with ones I purchases from Hobby Lobby of sayings and quotes that I love. It’s the perfect addition to my living room!!
I also must mention that we feel very lucky finding a great piano. We found ours on Craigs List, and the couple selling it were even willing to deliver (the best selling point). This is what it looked like before:
BEFORE PICS:
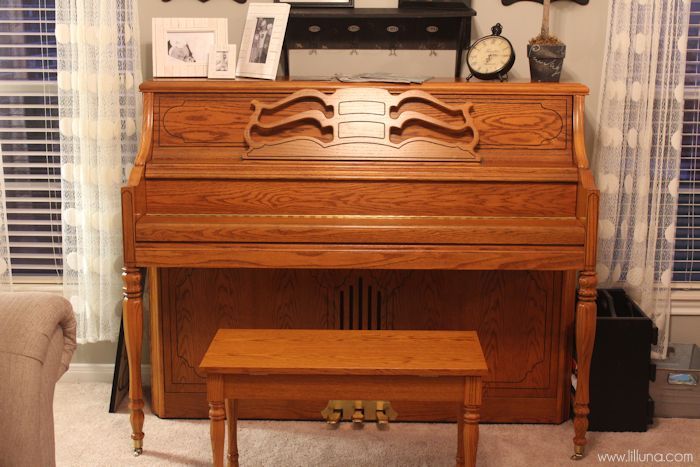
This little piano is a beauty, but I knew a little color would make it even more lovely and the perfect addition t our colorful home. 😉
Here is what you’ll need if you’re thinking of painting your piano too!
SUPPLIES:
- Americana Decor Chalky Finish paint (we used the butter-y yellow color called DELICATE)
- Polyurethane (Americana DuraClear satin Varnish)
- Mineral spirits (Thinner found at hardware store)
- painters tape
TOOLS:
- fine bristled paint brush
- sandpaper (150 grit or higher)
- screwdriver
INSTRUCTIONS:
1. We began by disassembling the various pieces of the piano. We were amazed at how many panels easily came off. There was only one peice that we needed to use the screwdriver to remove, and that was the bridge across the keys. We originally just taped this off, but found it was much easier to remove it and paint it separately.
2. Once everything was disassembled, we took an old rag, doused in mineral spirits, and wiped down all surfaces that we were going to paint. Mineral spirits is great at cleaning off all the excess dirt and grime on the surface.
3. We taped off or removed any brass accent fixtures, such as the plate around the pedals, hinges, or the wheels at the bottom of the legs.
4. We painted the surfaces using the fine bristled paint brush. It took about three layers for good solid coverage. We found with this paint that it was critical to not paint layers that were too thick, and to let each layer dry completely before moving on to the next one. Otherwise, the paint can crack. The paint when on easily and had great coverage with each layer. There was no need for a primer, or for sanding the original surface. However, If you have the time, sanding the original surface will always give slightly better adhesion to the paint.
5. Before adding polyurethane for protection and a nice satin finish, we sanded the major flat surfaces. This removed most of the paint brush texture. This is very messy and time consuming. You do not absolutely have to do this, but it does give a slightly smoother finish. When doing this, be careful of any edges. It is very easy to sand through all layers of the paint on the edges.
6. Once we sanded and cleaned the major surfaces, we applied the polyurethane using the same paint brush. It went on easily and quickly. We applied a second layer before the first completely had dried. In areas that would see extra wear (such as the bench, the bridge, etc…) We applied a third and fourth layer, to keep it from wearing off too quickly.
7. We removed the painters tape and scraped the paint off of any of the rubber bumpers because it would come off any ways and enjoyed the end result.
NOTE:
If you do not like the look that a paint brush leaves, you can roll the paint using a fine textured cabinet or door paint roller. This will still leave a slight texture, but it will be a little smoother than the paintbrush. You will still need to sand slightly before applying the protective finish.
ALSO, we ended up using 3 – 8 oz. containers of the chalky paint and had just a little bit left over, so I’ll probably order 1 more to have as back up in case of scratches. 😉
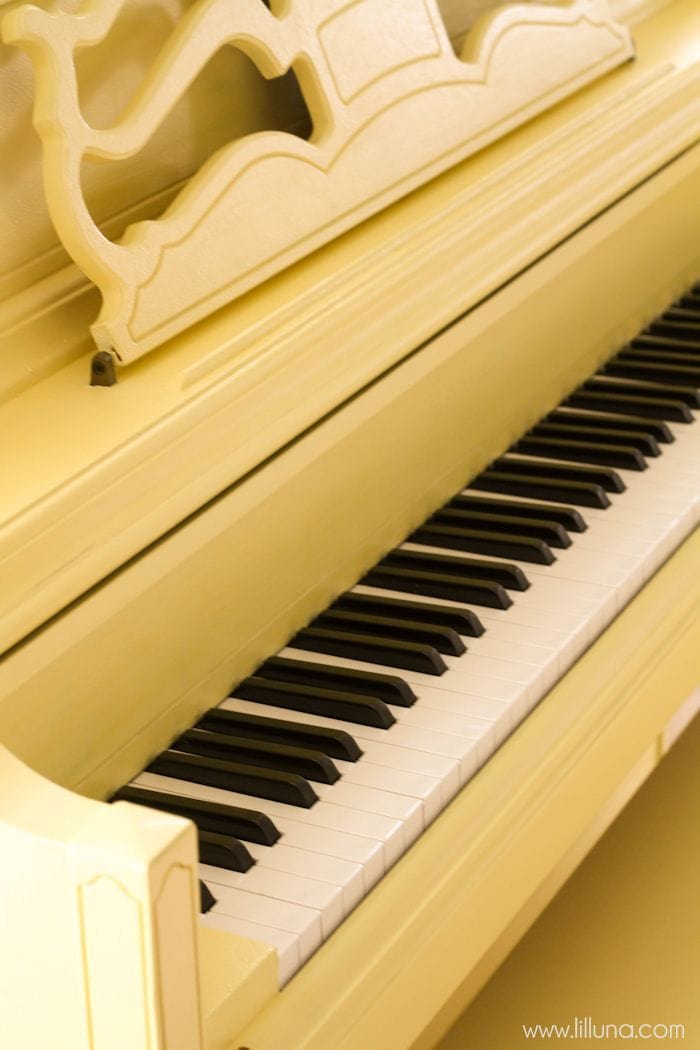
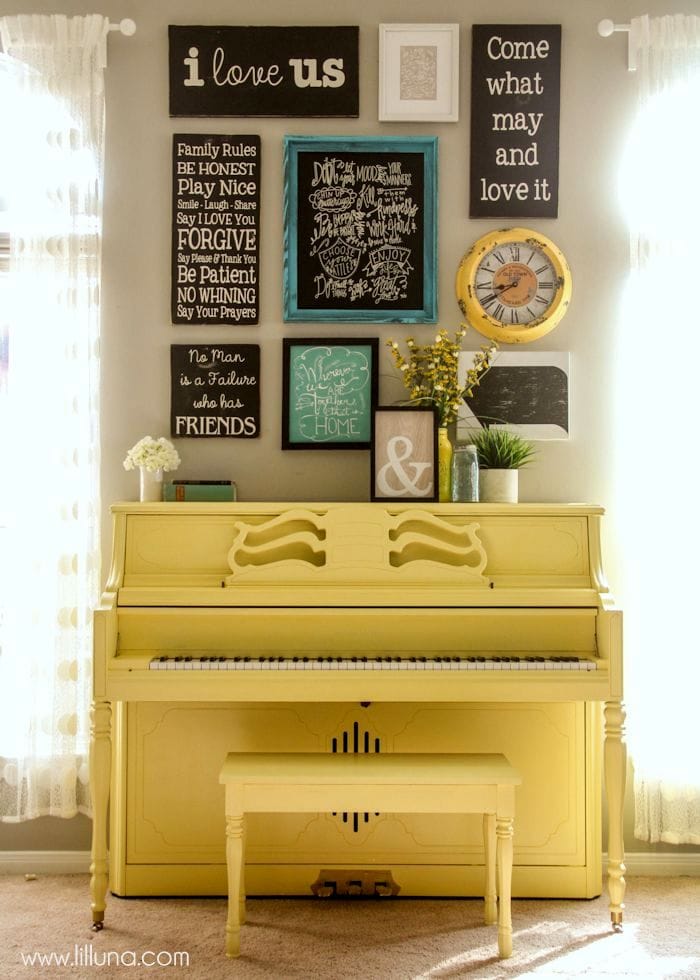
THE RESULT…

I seriously think I could stare at her all day long. And it makes me so happy to know that it will bring music into our home!
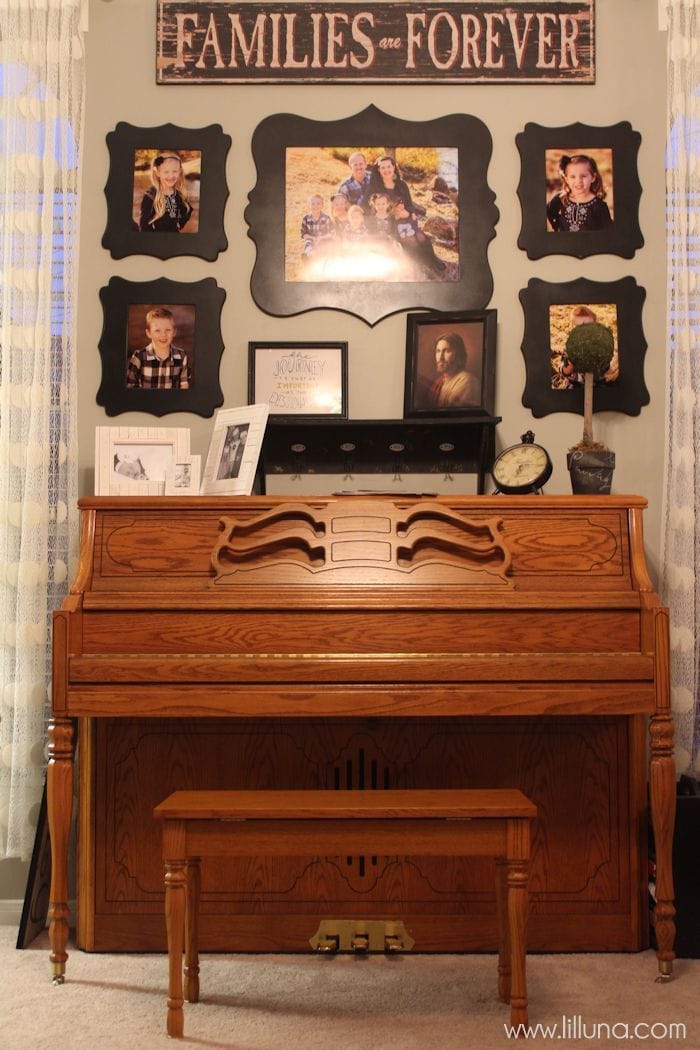
With the painted piano, I knew I wanted to spruce things up on the wall and decided to add a new gallery wall design above it.
Here is what I came up with:
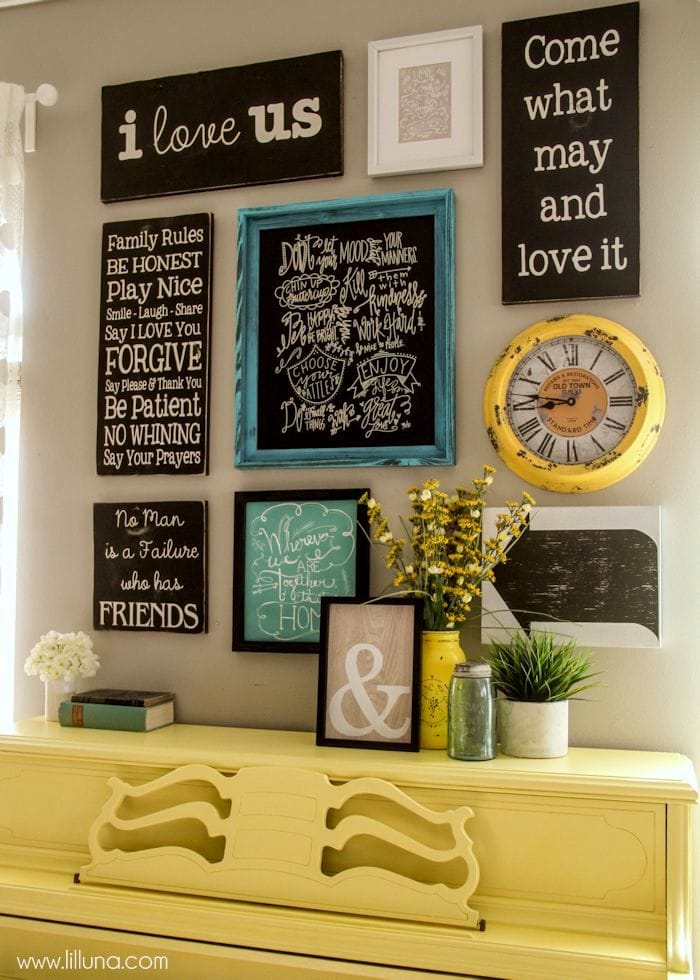
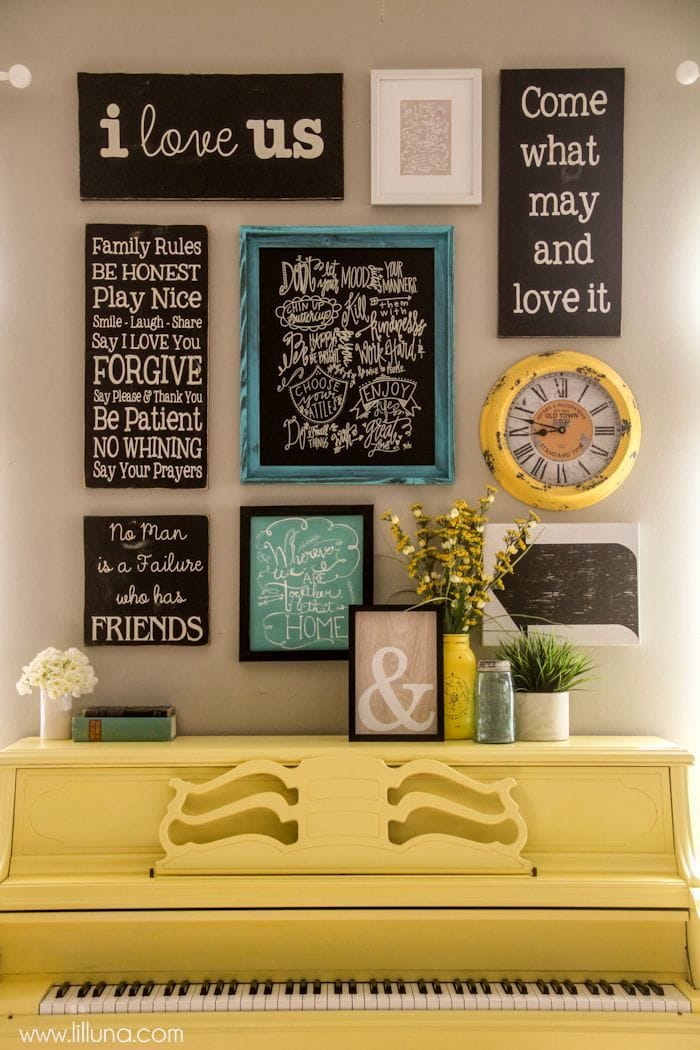
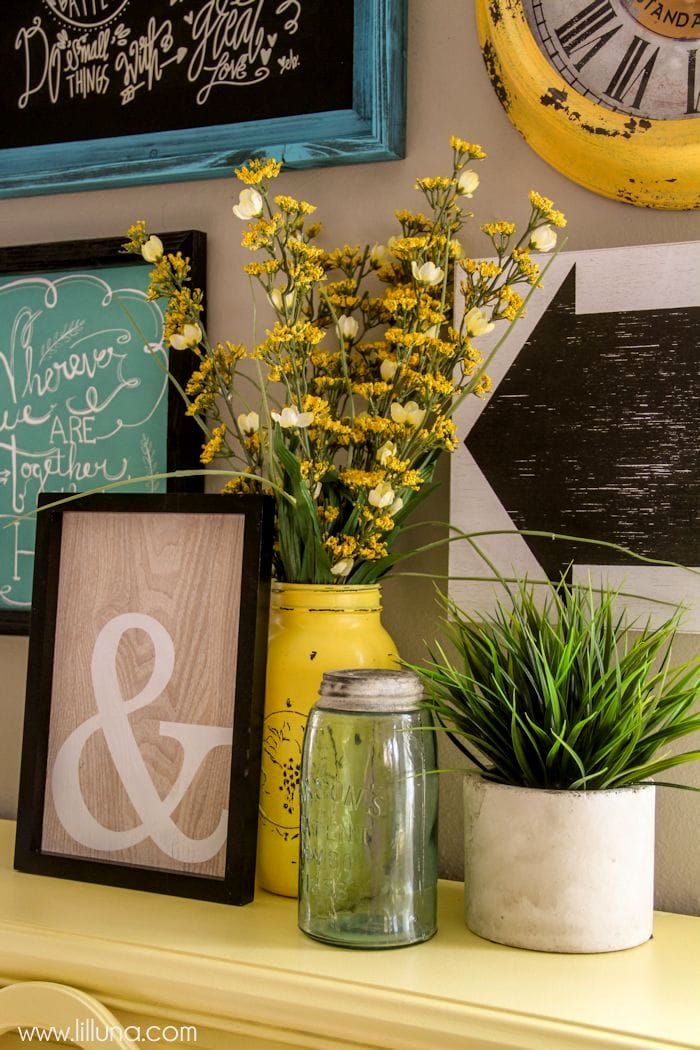
All the un-framed black signs were ones I made. You can go HERE to see how I did it. The rest were ones purchased from Hobby Lobby. The little planter is from HomeGoods and the other odds and ends were picked up in random places here in Houston.
I just love this new little section of my home and can’t wait for the music that will come with it in the coming years!
Along with this simple tutorial, I also wanted to make sure you knew about the:
“All About Second Chances” Chalky Finish Contest

That’s right!! $200- is up for grabs!! Awesome, right?! For more info about it go HERE.
Visit the DecoArt Chalky Finish Website for more chalk paint ideas and inspiration.
For all tutorials on the site go HERE.
I’d love to know what you think about the piano!! I hope you like it. 😀
ENJOY!


Your piano looks beautiful Kristyn.
THANKS, Liz!! 😀
I LOVE IT , SO CHEERY A YELLOW PIANO AWSOME
Thank you!! XO
I love the piano. Yellow is my favorite color, and I can see why it makes you happy. Thanks for sharing.
Thank you, Vickie! Yellow is definitely a happy color… the piano is just one of many yellow items in my house. 😉
Love the piano! I am also wondering what color your walls are in this photo with the piano?
It’s Mindful Gray from Sherwin Williams. 😀
I love this! I’ve wanted a red piano but haven’t had the right Craig’s list find yet. This is awesome. Glad I stopped by your blog today!
Keep looking at Craigslist. We were super lucky!! ;D I Hope you get your red piano one day. 😀
This is beautiful! Your piano has some great character! How long did you wait between coats for the paint to fully dry? Also, were you able to paint it with one jar of paint? How much paint did you end up needing? Thanks!
Thank you!! We ended up using about 3 jars, but only had a little left. We’ll order 1 more container in case of scratches and such. 😉
I love this project! It is one I am doing when we move into our new home. You guys did a beautiful job.
This is beautiful! So did you saND at all before painting? How has the paint held up since you did this? I’m about to start refinishing my piano!
We did slightly, but you don’t need to. It just makes the paint adhere a little better, but with this specific paint, no sanding or priming is required. We sanded afterwards to just give it a smoother look, but then again, it isn’t required. It’s just what you prefer:) Good luck!!
Your piano is GORGEOUS! After reading your thoughts on painting furniture I think we are kindred spirits, lol! I have an old baby grand that I would like to paint also. Did you find that painting it altered the sound quality?
Thank you 🙂 I love painting furniture! No, it didn’t change anything with the sound. You should do it!! I’d love to see how it turns out, if you decide to paint it!
I love it!! I am starting my piano project this week!! I’ll take pics and post it on your site!! Thank you for the tips!!
Awesome!! I’d love to see pictures!! Good luck!
did you take the large front panel off and paint it separately?
We took all the parts off to paint them separately 🙂 A lot easier that way! Thanks for stopping by!