Don’t miss a thing – Sign up for the Lil’ Luna Newsletter today!
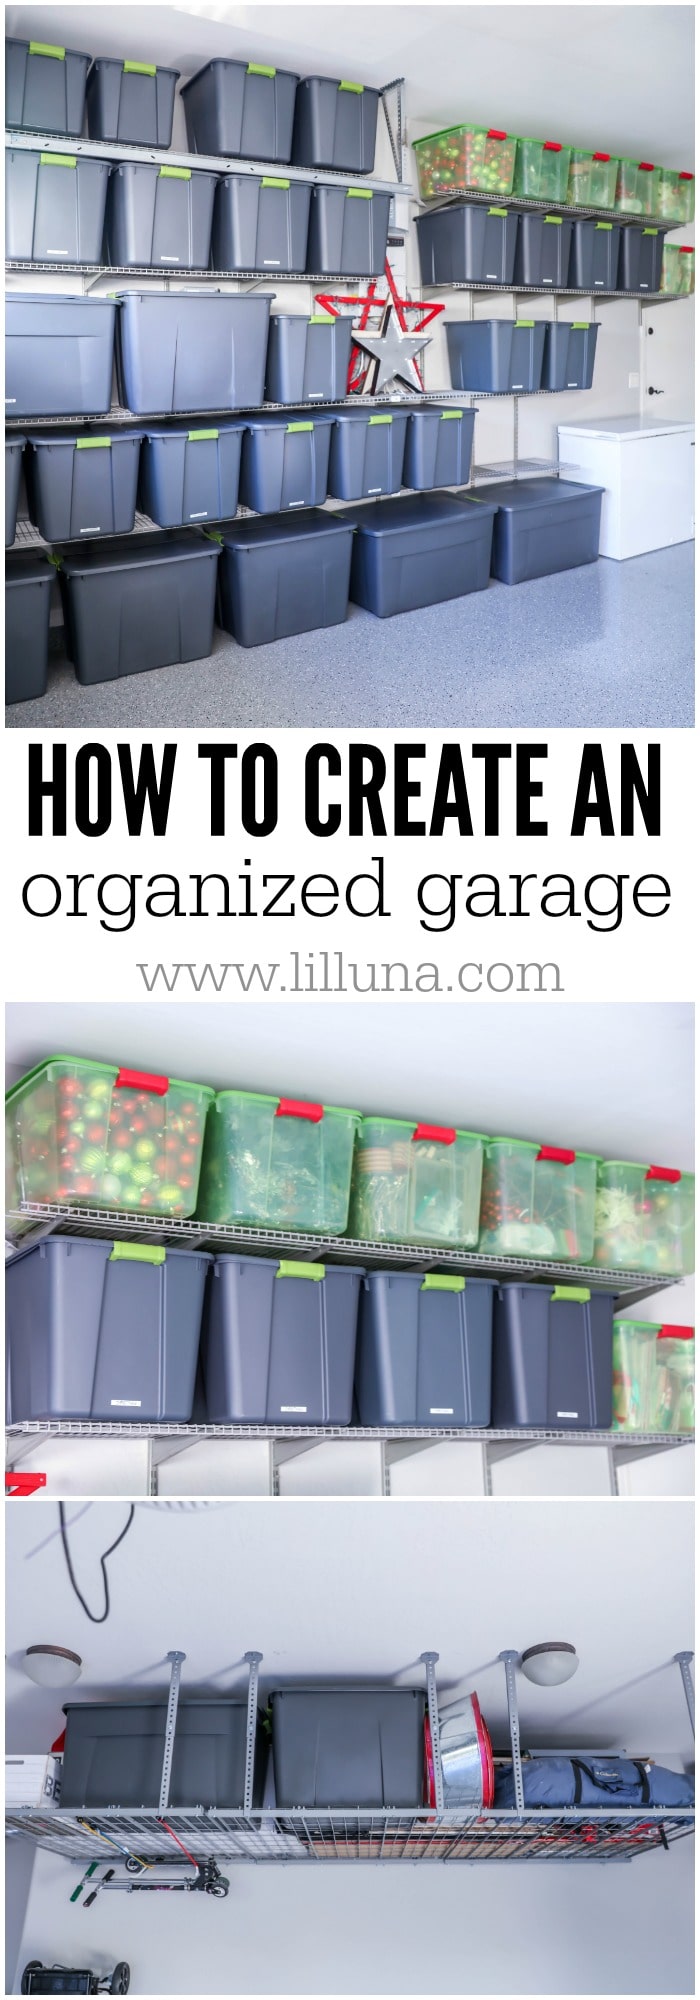
I’ve dreamed of having an organized garage for as long as I can remember. Unfortunately, we just never made the time to get things in order, until recently. The kids’ closets were exploding with bins and boxes, and it was driving me absolutely crazy. I knew those bins would be perfect in the garage, but we didn’t have any shelves in there and the garage was already filled with all sorts of “stuff”. With that in mind, the hubby and I got to work coming up with a plan to add some shelving units and get things in order in the garage. Before we began, we decided what our goals for the garage makeover would be:
- We wanted it to look organized.
- We wanted to make sure we could easily fit at least one car in it.
- We wanted to provide places to store ALL THE BINS from our home (freeing up our bedroom closets).
- We wanted everything labeled, so things could be easily found.
- We wanted it to be functional, neat and not cost an arm and a leg.
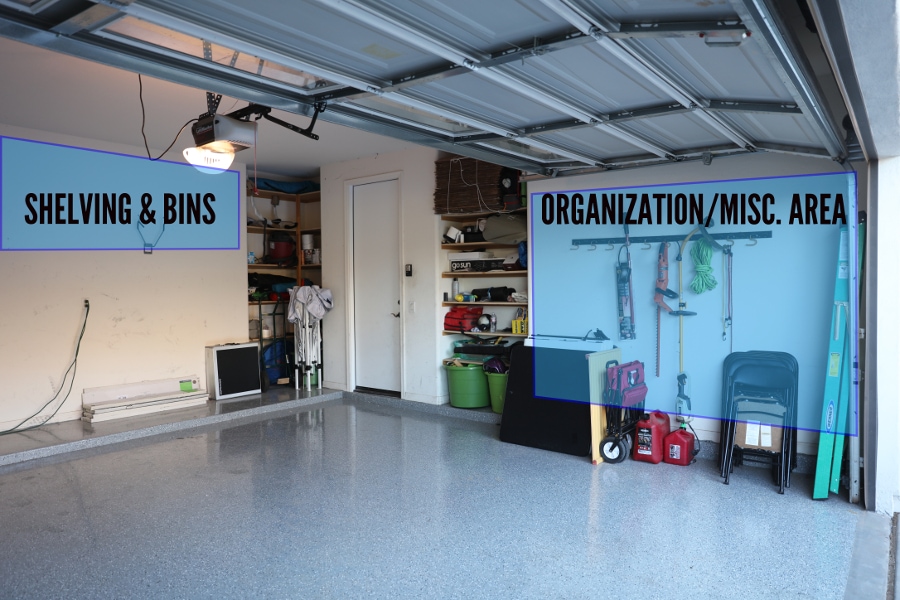
This is what the garage looked like before:
BEFORE:
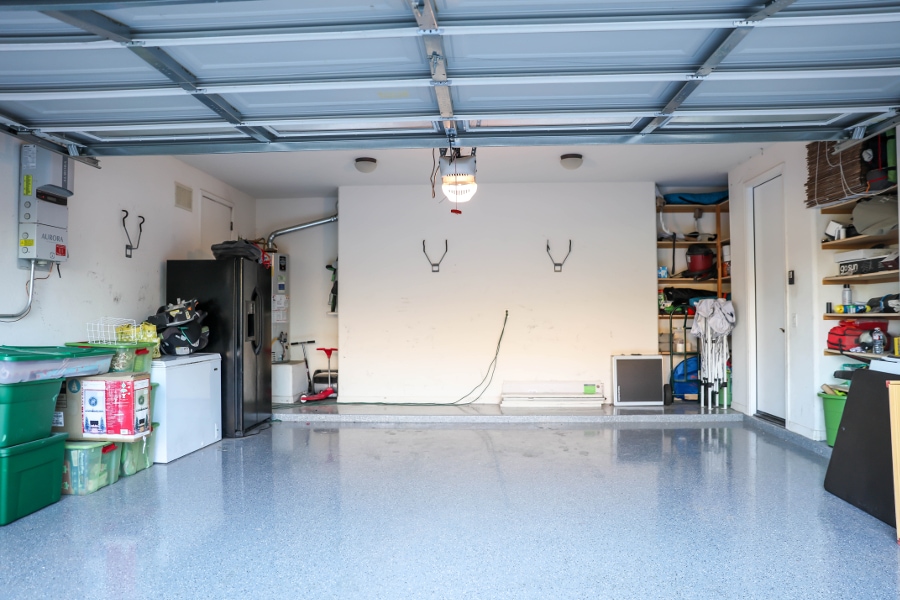
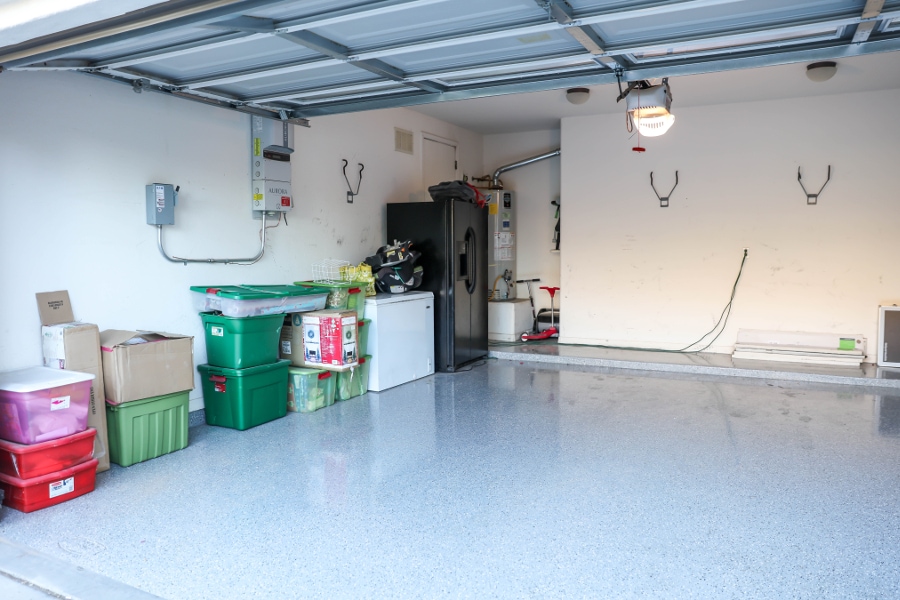
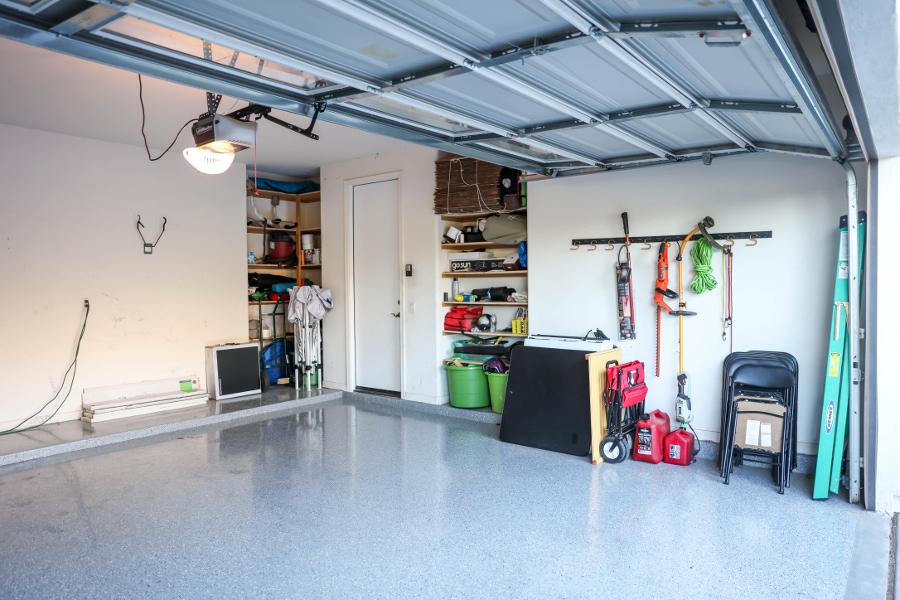
Dirty, unorganized, messy…
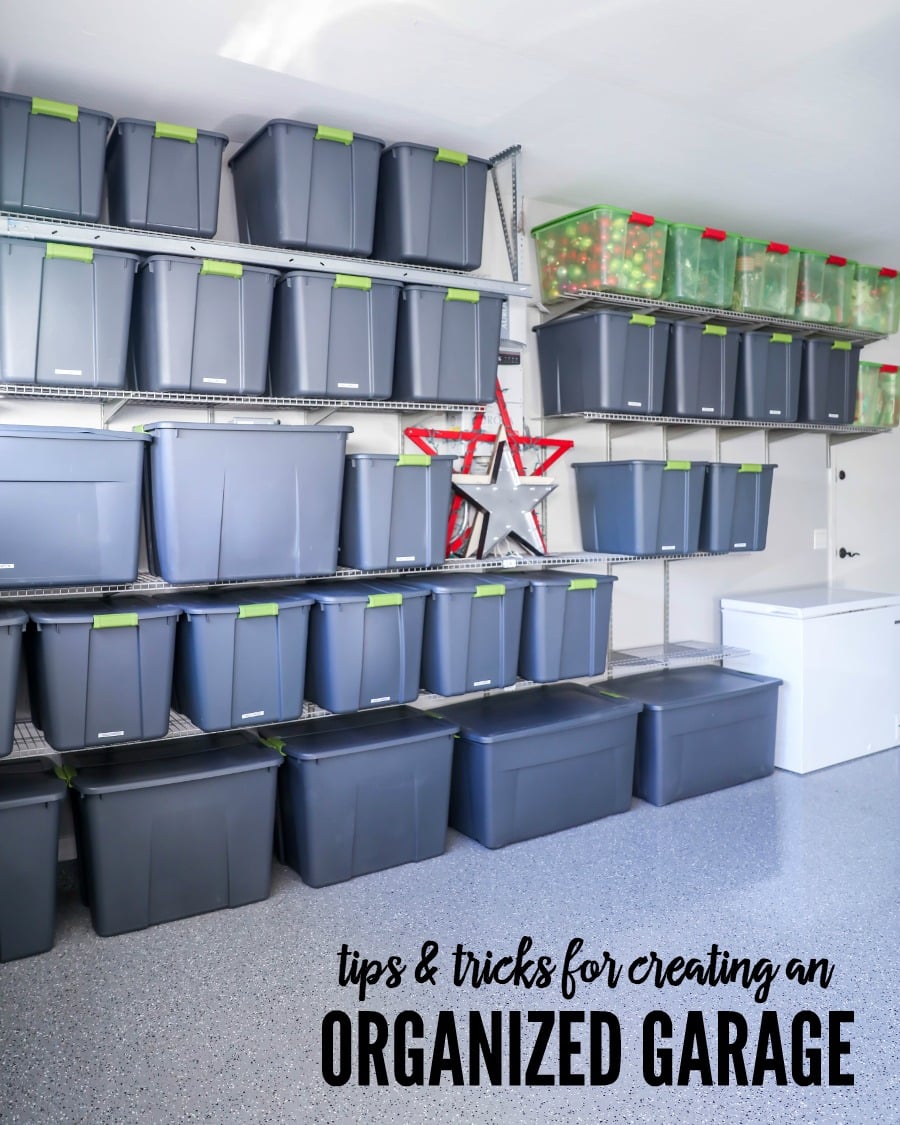
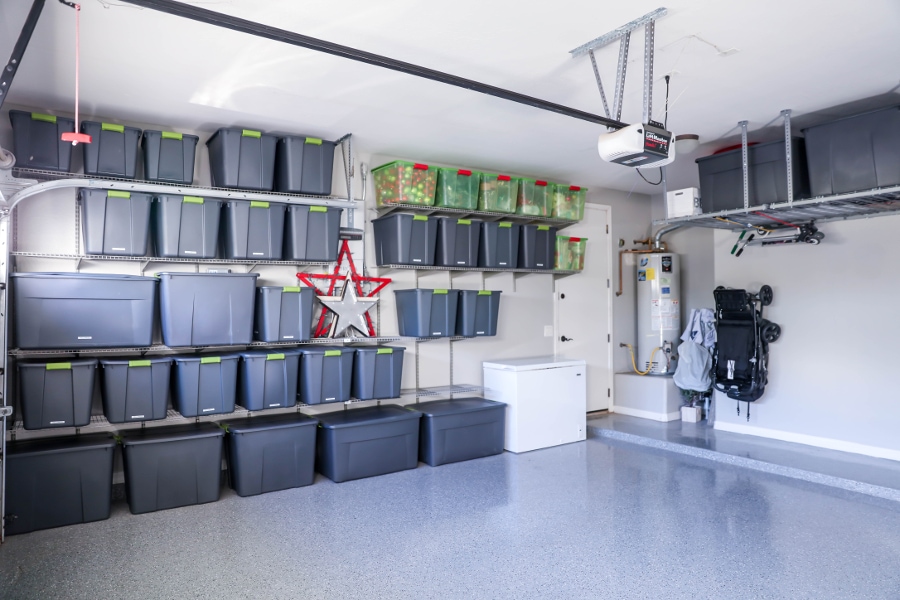
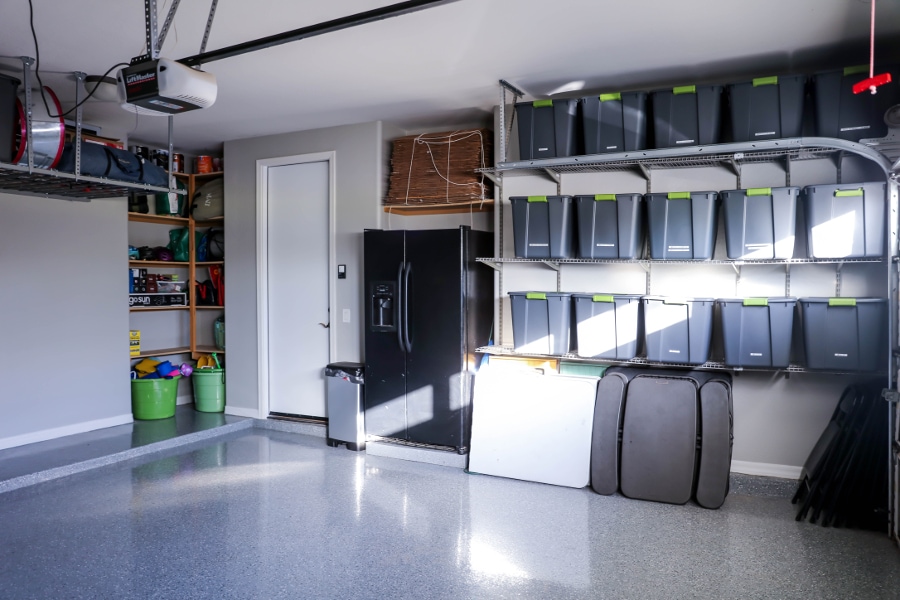
AFTER:
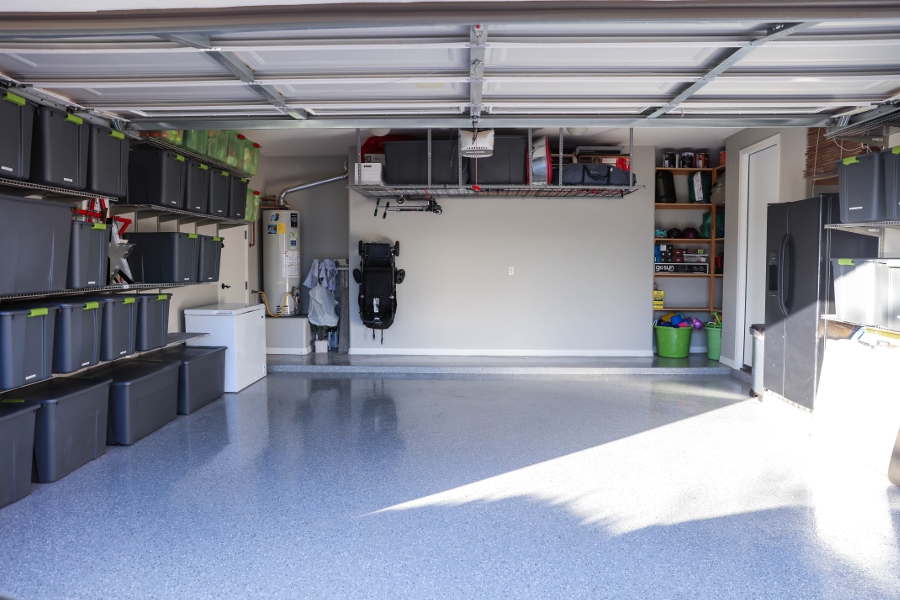
Clean, organized and neat!
We love how it turned out and feel like things are in order and can be easily found. We first thought we could use a store for buying organization items and shelving, but we realized most of the systems bought at organizational stores were very expensive. We turned to our local hardware stores and Target and eventually found everything we needed to create an organized garage. It was at Target that I found all of these gray/lime green bins and I knew I wanted to buy a bunch to use in the garage. They were on sale most of January so I spent the month putting all of our stuff in bins and figuring out how many we actually had that we wanted to store in the garage. After that, we took out all previous hanging items in the garage and painted it a light gray (to hide the scruff marks that usually show up). From there we shopped shelving systems and ended up going with the ClosetMaid shelving system that can be found at Home Depot (they come in white and gray). We decided that the gray shelving looked the best in our garage. The system is made up of tracks that run vertically and are attached to the studs by screws (ClosetMaid Silver Shelving Standard). Brackets are then locked into these tracks at adjustable heights. Shelves then lock into these brackets.
PART 1 – PLANNING:
We had a good idea of what we wanted to do in the garage, but we went ahead and took pics and made “plans” of where we wanted shelving and storage areas. We ended up changing things a bit when we realized how many bins we actually had, but in the end we were happy to have planned this all out so we knew how much product to get.

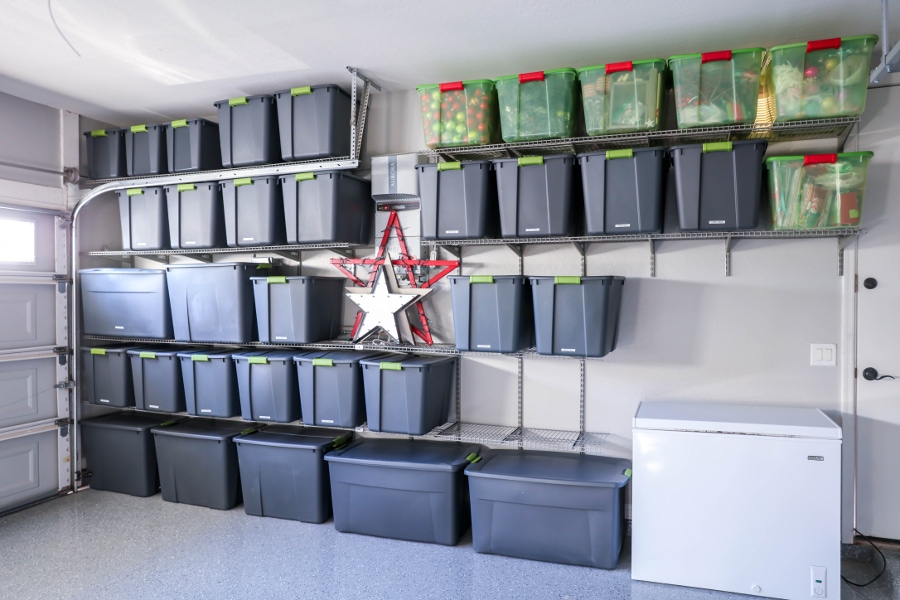
The first step is to plan on where you want shelves. We knew we wanted as much shelving as possible on both sides of our garage. This meant that we would have to build them around a solar converter, and some conduit on one side. This actually was easier than we thought.
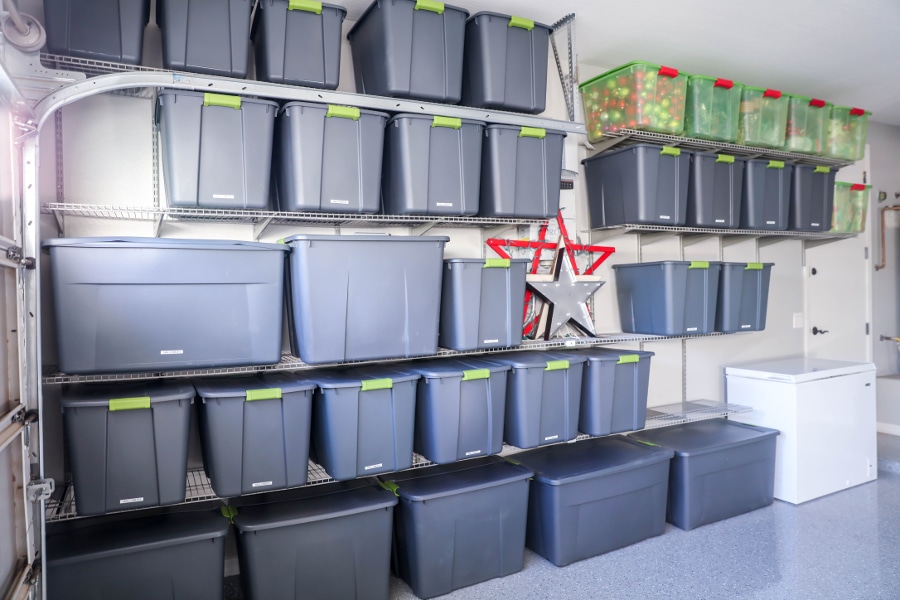
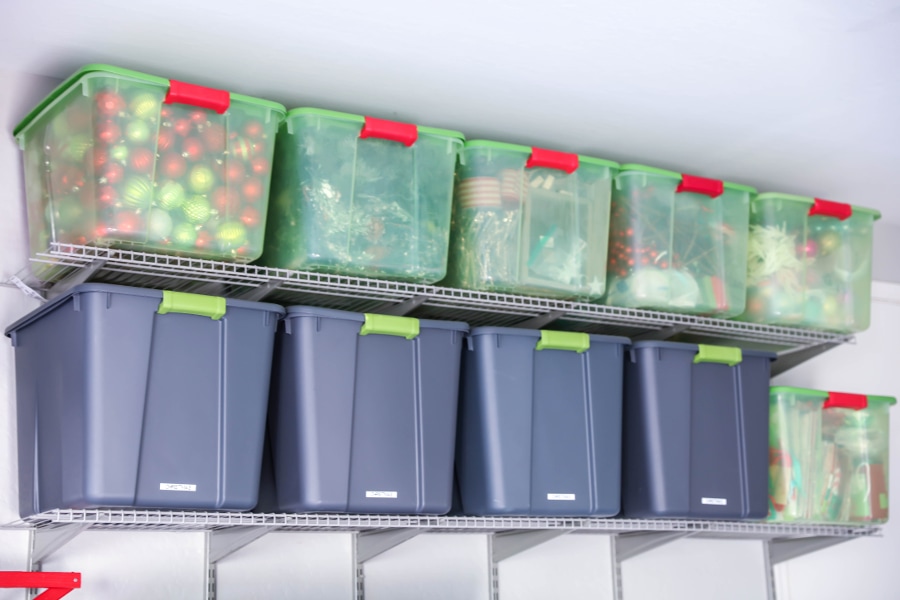
The second step is to pick the depth of your shelves. There are multiple options, but we decided to go with 16″ heavy duty shelves. This was perfect length for the bins that we were looking to store.
The third step is figuring out how many tracks you need. If you are putting anything that has some good weight to it, then you will want to add shelf tracks on every stud. Studs are typically 16 or 24 inches apart. Ours were not that uniform since we have walls that join on the opposite side of our garage walls. The most difficult part of the whole project was finding the studs in the wall. We used a cheap stud finder, but it was not 100% accurate. Once you have found all the studs, the rest of the process was extremely easy. Mark the studs around the area where you want your top shelf to be.
Step four is to figure out how many brackets you need. You need one at every point where the shelf crosses the vertical track.
Step five is to determine your shelving length. These shelves come in 48″, 72″ and 96″. Luckily, if you need a more specific length, Home Depot has cutters and measuring areas for you to easily cut them to the length that you need. In some ares, we needed to link two shelves together to make them long enough. In order to do this the right way, we used a joiner plate to bind them together.
PART 2: INSTALLATION:
The first step is to install the tracks. This is simpler than you might imagine. Using 2″ dry wall screws, I lined up the track, so the top hole was about 2″ lower than where I wanted my first shelf. This ended up being about 20 inches below the ceiling. I created a cardboard template that I could hold flush against the ceiling with a hole 20 inches down. I used this to mark the first location for each of my screws at each of the studs. I screwed in the top screw, but not all the way. I made sure that the track could still swing loosely. This insured that it stayed perfectly vertical, while I installed the remaining screws. Doing it this way insured that I hit the stud every time, and I did not have to worry about using a level.
After all the tracks were installed, step 2 was to install the brackets. This was done by snapping them into place. This again took some planning to make sure they were all at the right height for the bins.
After all the tracks were in, the last step was to lay the shelves in place and snap them into the grooves on the brackets. We also installed the joiners at this time to hold the extra long length together.
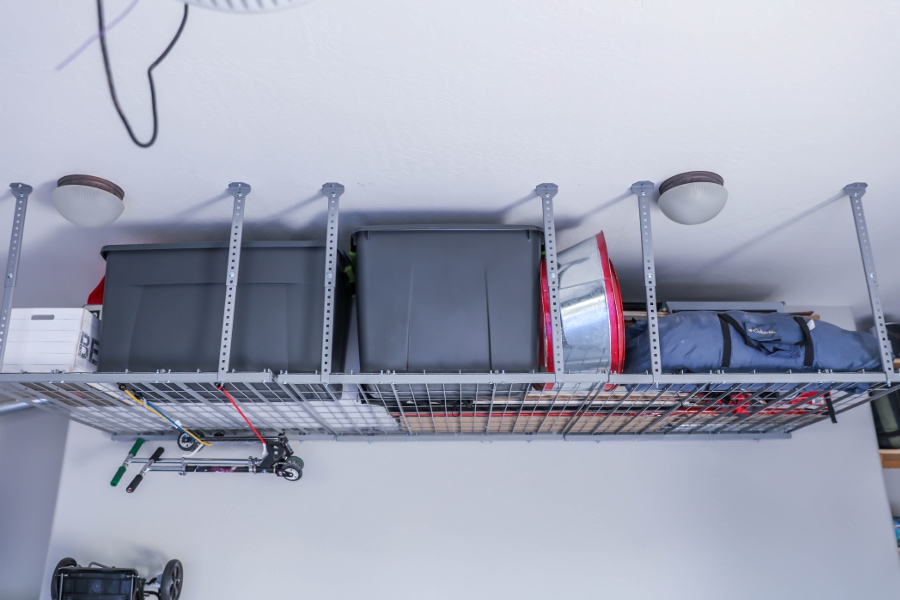
Another storage item that we installed were some overhead shelves. These have been amazing for us. The installation was pretty straightforward, but again, the hardest part was first finding the over head beams and planning where to install the brackets. These can be purchased at almost any hardware store (we got ours at Lowe’s).
Last but not least, I bought a Label Maker and used it to label all of my bins. It’s been so handy and has been put to good use already!!
As you can see, it took some planning and time to get our garage in order, but we’re so glad we did this. Some people may not care about how orderly their garage is, but I love having my entire home in order. I like this because it makes me happy and helps us have established places of where things should be meaning I know exactly where everything is in my home (ain’t no body got time to spend hours looking for things!) 😉
PRODUCTS USED TO ORGANIZE GARAGE ALSO FOUND ON AMAZON:
- ClosetMaid Silver Shelving Tracks
- ClosetMaid Silver Shelf Bracket – 6 pack
- ClosetMaid Silver Shelf Bracket – single
- ClosetMaid 16″ heavy duty shelves
- ClosetMaid Joiner Plate for wire shelving
- Overhead Garage Storage
- Epson LabelWorks Label Maker
- Sterilite Gray and lime storage bins
I hope this post can help you as you get your garage organized. Yes, it will take time, money and effort but I think it’s so worth it to have it organized and clean. 😀
For all HOME ideas go HERE.
For all organization ideas go HERE.
For even more great ideas follow Kristyn on Facebook – Pinterest – Instagram – Twitter – Periscope–Snapchat.
ENJOY!!


Awesome project! Congrats! This is inspirational. I’ve wanted to do this in my garage for ages!
Thank you! It was a process, but I’m so glad we did it. Hopefully, I inspired you to do yours..you’ll be so glad if you do.
That is one super neat garage!! 🙂
Thanks! Just know it wasn’t always so neat!! It’s taken a long time!
Haha, I hear ya. Well I’m sure it was a huge relief once you finished!
This is garage goals!! Wow I need to do this
Take small steps & by the time you are done, it will be organized!!
Ok… what is on your garage floor? Did you do that yourself or did you have someone do it? Ours is cracking and chipping and we need something to fix that and make it look pretty like yours… p.s. totes jealous!!!
enjoy your ideas
Thanks so much!!