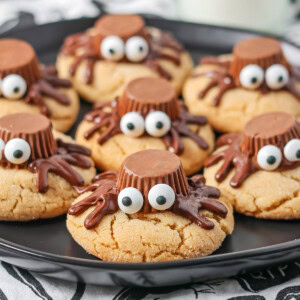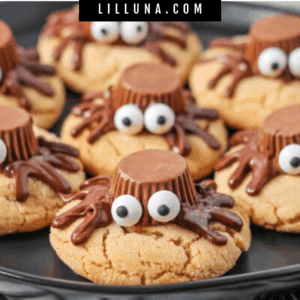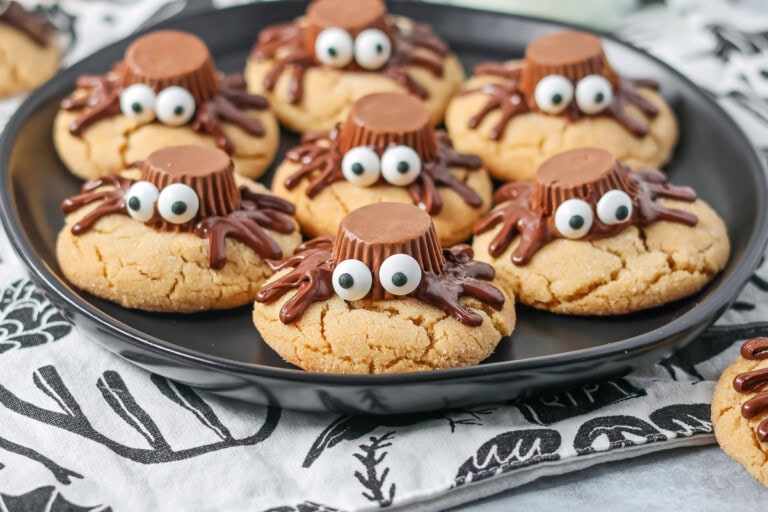
Our Peanut Butter Spider Cookies take a classic peanut butter cookie and turns it into a super fun, spooky dessert that’s perfect for Halloween parties or a chill afternoon of baking with the kids. Seriously, they’re so easy to decorate that even the little ones can get in on the action.
The best part about these cookies is that you don’t need any fancy skills. A little melted chocolate and some candy eyeballs are all it takes to turn a regular cookie into an adorable, Halloween version of our Peanut Butter Kiss Cookies.
For more spider treats, check out our Chocolate Oreo Spider Cake and Chocolate Pudding Spider Pie.
Why we think you’ll love it:
- PB & Chocolate. Enjoy the classic, comforting, and delicious duo of peanut butter and chocolate.
- Kid Friendly. Not only will kids love helping make these, but they’ll enjoy eating them too.
- Cute. The adorable spider design makes them perfect for parties and holiday fun.

Spider Cookies Ingredients
- Granulated sugar, divided (1 cup) – Sweetens the dough and helps create a soft, tender cookie.
- Brown sugar (½ cup) – Adds sweetness with a touch of caramel flavor and keeps the cookies chewy.
- Creamy peanut butter (½ cup) – Brings rich, nutty flavor and that classic peanut butter cookie taste. For the best results, use a standard creamy peanut butter like Jif or Skippy, as natural peanut butter tends to be oilier and can result in a crumbly texture.
- Butter, softened (½ cup butter) – Adds flavor and makes the cookies soft and buttery. You can use salted or unsalted butter. For a dairy-free option, a dairy-free butter alternative or shortening will work.
- Egg (1) – Binds the dough together and gives the cookies structure.
- All-purpose flour (1½ cups) – The base of the dough, providing structure and texture. You can also use a 1:1 gluten-free baking blend if needed.
- Baking soda (¾ teaspoon) – Helps the cookies spread just enough while baking.
- Baking powder (½ teaspoon) – Gives the cookies a little lift for a soft, puffy bite.
- Round mini Reese’s peanut butter cups, unwrapped (24) – The star of the show, creating the “spider body.” Other small, round candies like chocolate Hershey’s kiss, Lindt Lindor truffles, or even Rolo candies can be used to create different flavors for the “spider” body.
- Candy eyeballs – For the fun spooky spider look! If you don’t have candy eyeballs, you can create your own with small dabs of melted white chocolate and a tiny dot of melted dark chocolate or a black decorating gel for the pupils.
- Semi-sweet chocolate chips (½ cup) – Melted down to pipe spider legs.
- Coconut oil, melted (1 tablespoon) – Mixed with the chocolate so it melts smooth and shiny for easy piping. If you don’t have coconut oil you can use vegetable shortening
How to Make Peanut Butter Spider Cookies


PREP. Preheat oven to 375°F. Line a baking sheet with parchment paper. Set aside.
DOUGH. In a large bowl, beat granulated sugar, brown sugar, peanut butter, butter, and egg until well blended. Stir in flour, baking soda, and baking powder until dough forms.
BAKE. Shape dough into 1-inch balls; roll in remaining white sugar. Place on ungreased cookie sheets, about 2 inches apart. Bake for 8 -10 minutes or until edges are light golden brown.


COOL. Wait for 10-15 minutes, then press 1 Reese’s cup in the center of each warm cookie and let cool on the cookie sheet for 10 minutes before transferring to a wire cooling rack to cool completely.
MELT CHOCOLATE. Melt chocolate chips with a little coconut oil by placing them in a small microwave-safe bowl and microwaving for 2-3 minutes, stirring occasionally. Pour into a Ziploc bag and cut a small piece of the corner of the bag (or use a piping bag with a small round tip).
CREATE SPIDER. Using the melted chocolate, draw 4 spider legs onto each side of the spider. To attach the candy eyes, pipe the chocolate onto the Reese’s and then add the eyeballs. Let cookies cool completely before serving.


Kristyn’s Recipe Tips
- Chill the dough. If it feels too soft, pop it in the fridge for 20–30 minutes to keep the cookies from spreading too much.
- Unwrap the Reese’s ahead of time. Have them ready so you can press them in quickly while the cookies are still warm.
- Let cool. Let the cookies cool completely before you pipe on the chocolate legs to prevent the chocolate from melting and running off.
- Set the eyeballs quickly. Attach them while the chocolate is still soft so they stick well.

Spider Cookies
Video
Ingredients
- 1 cup granulated sugar, divided
- ½ cup brown sugar
- ½ cup creamy peanut butter
- ½ cup butter, softened
- 1 egg
- 1½ cups all-purpose flour
- ¾ teaspoon baking soda
- ½ teaspoon baking powder
- 24 round miniature Reese’s, unwrapped
- candy eyeballs
- ½ cup semi-sweet chocolate chips
Instructions
- Preheat oven to 375°F. Line a baking sheet with parchment paper. Set aside.
- In a large bowl, beat ½ cup sugar, brown sugar, peanut butter, butter, and egg until well blended. Stir in flour, baking soda, and baking powder until dough forms.
- Shape dough into 1-inch balls; roll in remaining granulated sugar. Place on ungreased cookie sheets, about 2 inches apart.
- Bake for 8 -10 minutes or until edges are light golden brown.
- Wait for 10-15 minutes, then press 1 Reese’s in the center of each cookie and let cool on cookie sheet for 10 minutes before transferring to a wire cooling rack to cool completely.
- Melt chocolate chips with a little coconut oil (1 tablespoon) by placing them in a small microwave safe bowl and microwaving for 2-3 minutes, stirring occasionally. Pour into a Ziploc bag and cut a small piece of the corner of the bag.
- Using the melted chocolate, draw 4 legs onto the spider. To attach the eyeballs, pipe the chocolate onto the Reese’s and then add the eyeballs. Let cookies cool completely before serving.
Notes
- For the best results, use a standard creamy peanut butter like Jif or Skippy, as natural peanut butter tends to result in a crumbly texture.
- If the cookies spread too much in the oven, chill the cookie dough for 30 minutes in the fridge.
- Let the cookies cool completely before you pipe on the chocolate legs to prevent the chocolate from melting and running off.
- Dough: You can prepare the cookie dough up to 2-3 days in advance and store it in an airtight container in the refrigerator, or freeze cookie dough balls for up to 3 months.
- Baked, undecorated cookies can be stored in an airtight container at room temperature for up to 3 days before decorating and serving.
- Decorated cookies can be stored in an airtight container at room temperature for 1-2 days before serving.
Nutrition
Nutrition information is automatically calculated, so should only be used as an approximation.
Recipe FAQ
Dough: You can prepare the cookie dough up to 2-3 days in advance and store it in an airtight container in the refrigerator, or store cookie dough balls in the freezer for up to 3 months.
Baked, Undecorated Cookies can be stored in an airtight container at room temperature for up to 3 days before decorating and serving.
Baked and Decorated Cookies can be stored in an airtight container at room temperature for 1-2 days before serving.
To keep the cookies fresh, store any leftovers in an airtight container at room temperature. They will typically stay fresh for 3-5 days. If you’re stacking them, you can place a piece of parchment or wax paper between the layers to prevent them from sticking together.
More Like This
Halloween Cookies

Halloween Oreo Cookies
10 mins
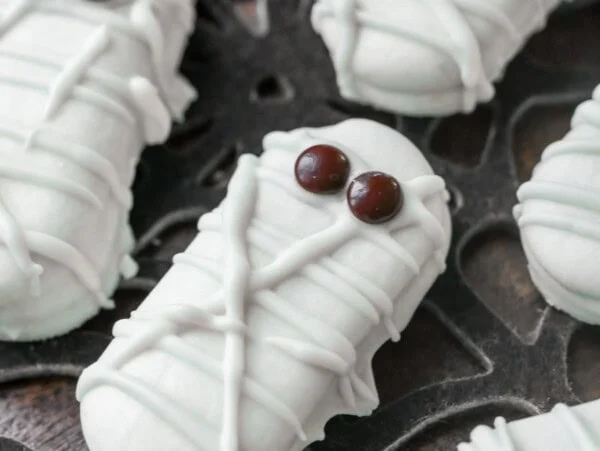
Mummy Cookies
45 mins

Gooey Monster Cookies
20 mins

Witch Hat Cookies
5 mins
Spooky Treats

Halloween Cupcakes
1 hr 5 mins

Oogie Boogie Sundae
15 mins

Strawberry Ghosts
15 mins

Monster Rice Krispie Treats
15 mins