Hi Friends!!
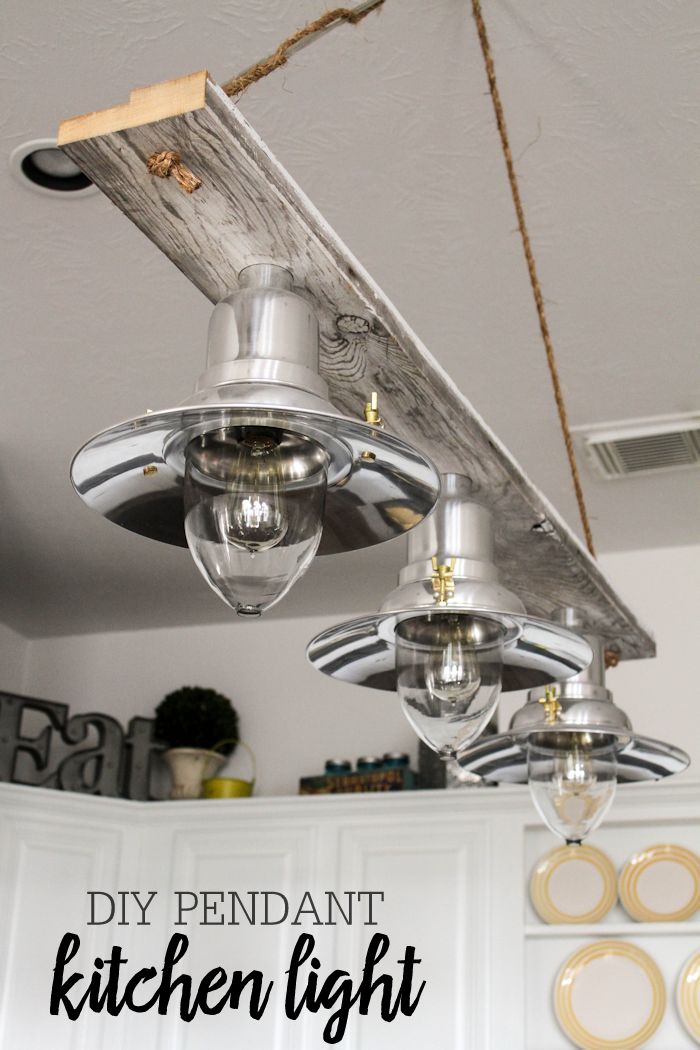
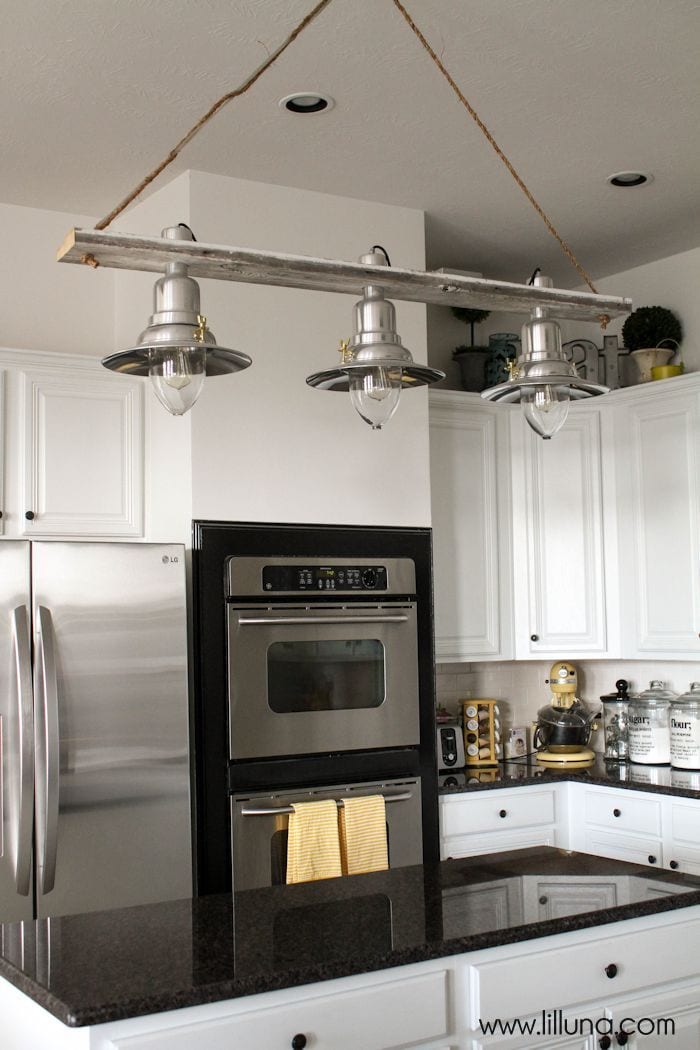
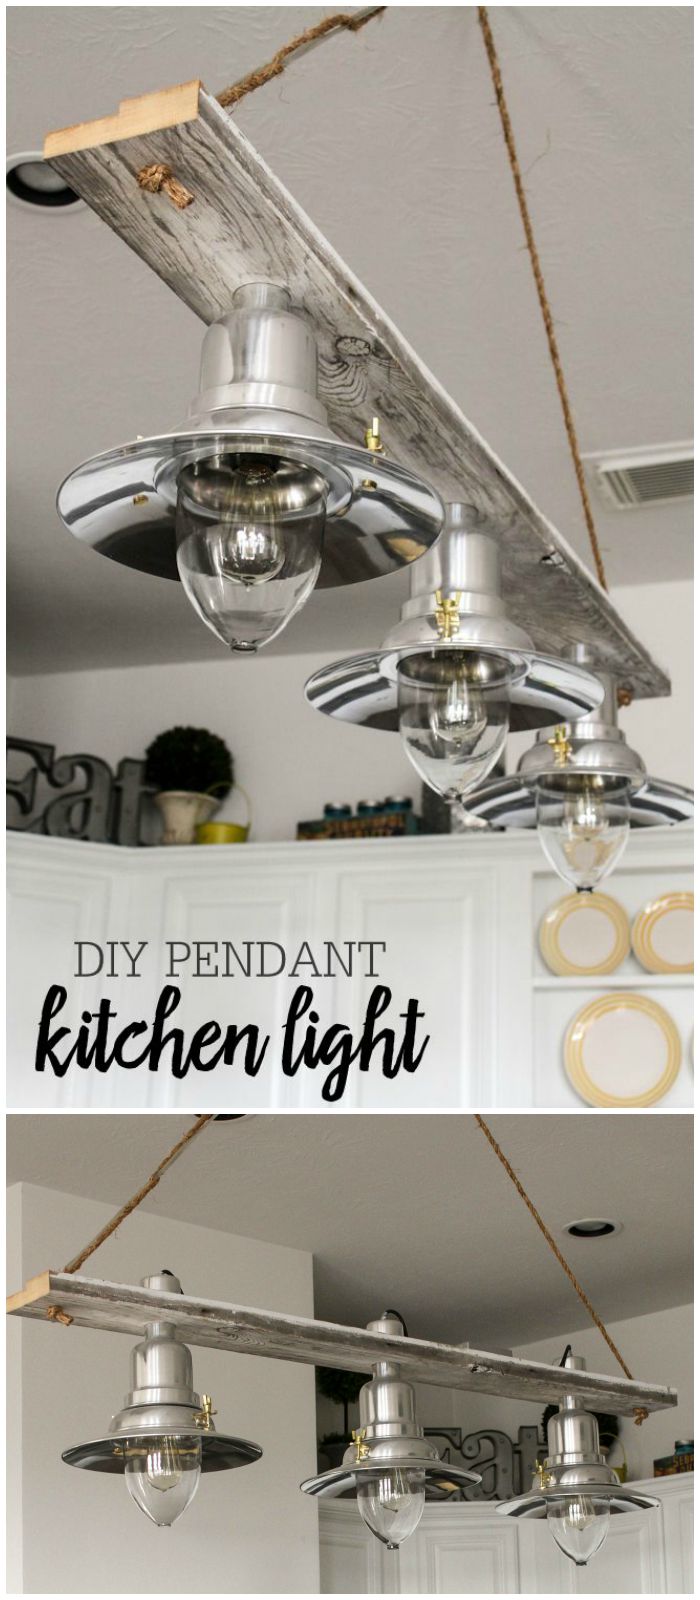
I’m so excited to be sharing our DIY Pendant Light tutorial with you today. We’ve been wanting to add a light to the kitchen but hadn’t been able to find the “perfect” one. I had found a Hanging Basket Light I fell in love with but found out it was $500!! Yup – no thanks. We wanted to build one ourselves but had a hard time finding vintage baskets. Fast forward a few weeks when we were on a family outing to IKEA and we spotted their awesome Ottava Lights. The hubby pointed them out and said he liked them, and then I suggested we make a kitchen light using 3 of them. He was totally on board since he didn’t love the basket idea too much. 😉 Within the next few weeks, the hubby got to work on the light and it turned out FANTASTIC!!!
We had already collected the vintage piece of wood it would be on, and we had most the supplies, so the light only ended up costing about $100. SCORE!!! I know if we found something like this in a store it would have been at least $500 (yay for having a handy hubby!!)
I LOVE how this turned out and think it’s the perfect piece for our kitchen. It matches the stainless steel kitchen appliances and has touches of vintage and modern in it too. I posted a pic awhile back on Instagram, and several people asked how to make it. We have lots of instructions and pictures to make it as thorough as possible. Here’s what you’ll need…
TOOLS:
Before we began, we had an electrician install a reinforced or fan electrical box in the ceiling. If you are using a box that is already existing, you need to make sure that it can withstand the weight of the light.
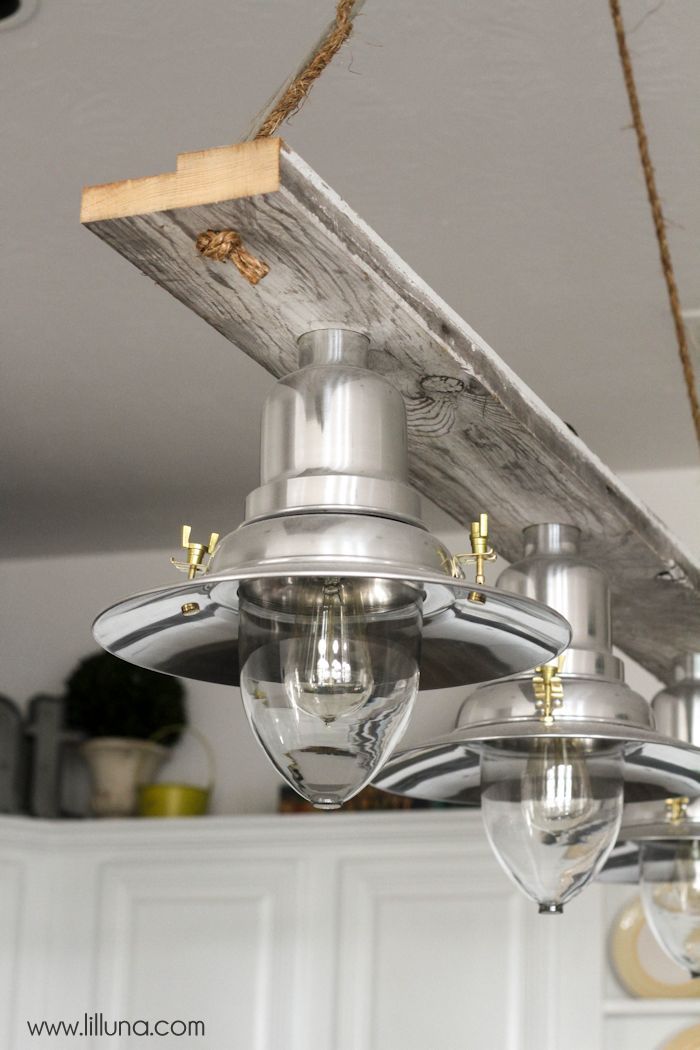
We started by finding the piece of wood that we wanted to use. We knew we wanted something vintage. We found this in a salvage yard. It was the side of a door frame, so it was straight, but the back was not flat. One half of one side was cut ½″ thinner. We decided we would work with it for the price. You can also purchase a new pine 2×6 and distress or antique it using whitewash or our wood aging tutorial found HERE.
1. We cut the wood to 56″ in length (a tid shorter than our Kitchen island).
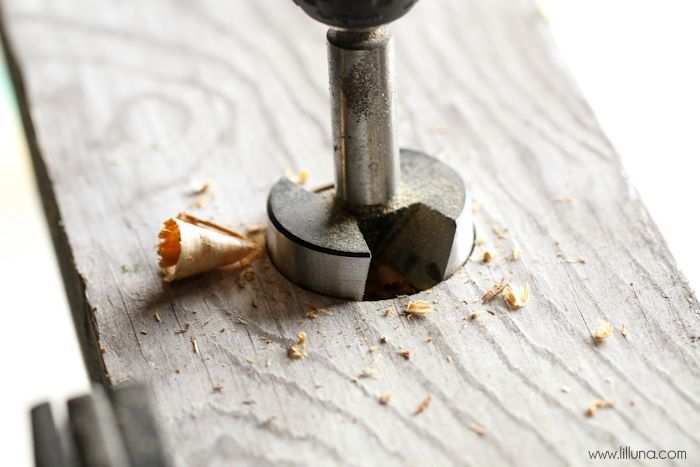
2. We then drilled the holes for the lights to go in, and for the rope. The lights holes were drilled with a 1 ⅞″ forstner bit.
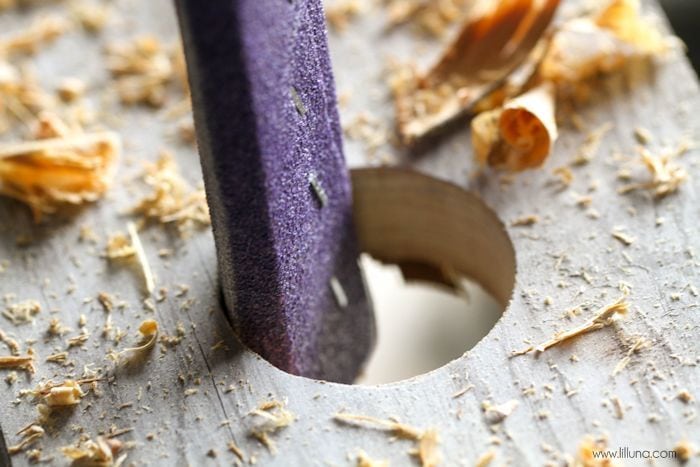
This size was just barely too small for the light, so the hole was widened slightly by sanding around the edges. If you don’t mind a slightly looser fit, you could use a 2″ bit with no problem. This hole could also be cut with a scroll saw if not forstner bits are available.

These holes were drilled 18.5″ off center (see diagram)
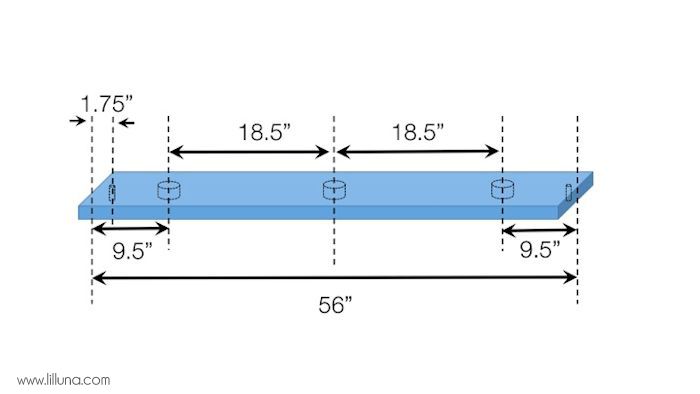
The holes for the rope were drilled with a ½″ drill bit. These holes were drilled 1 ¾″ from the edge (see diagram).
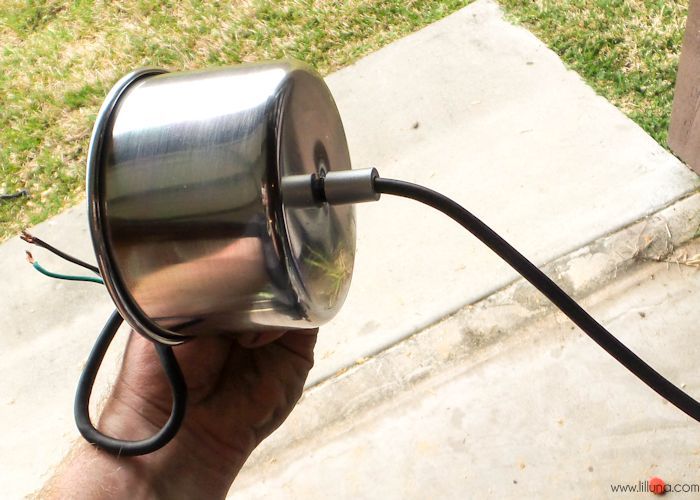
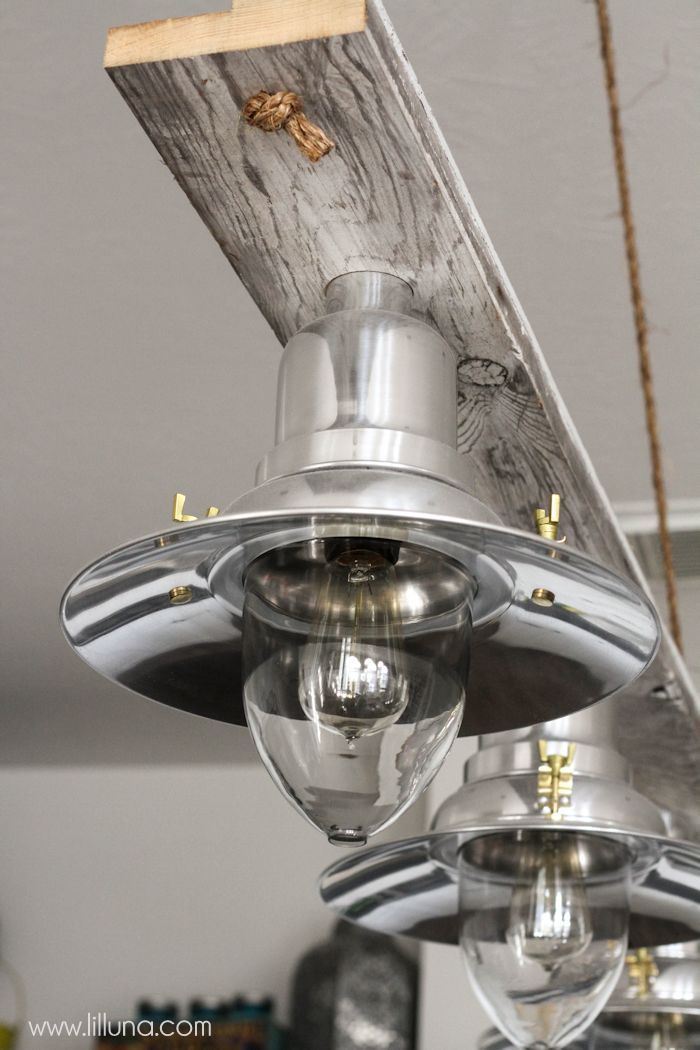
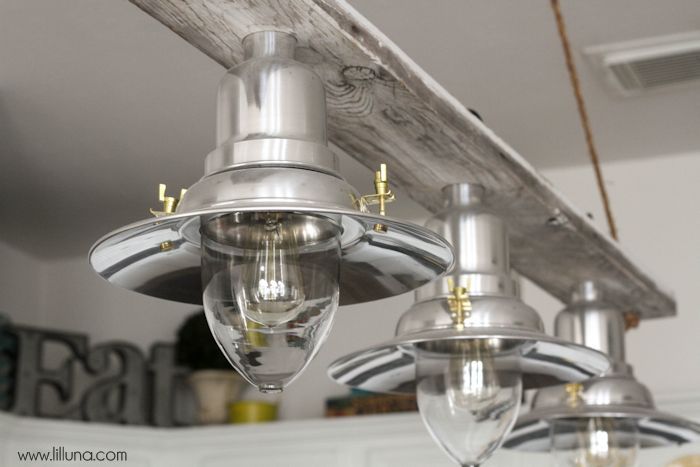
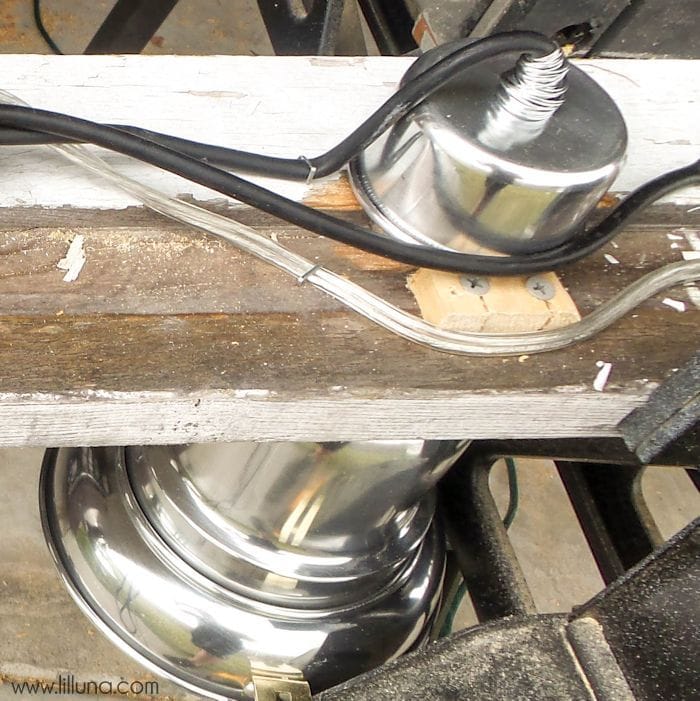
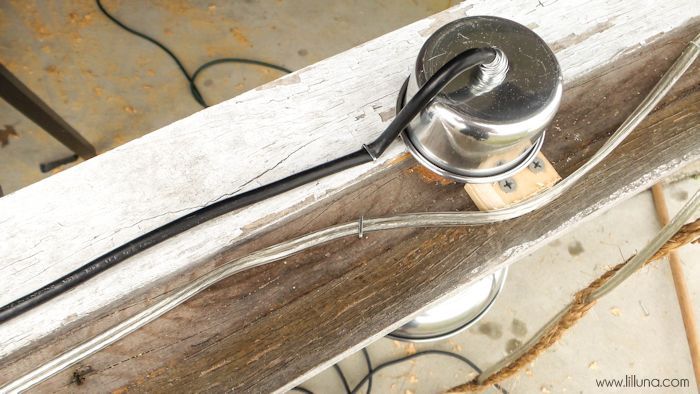
3. We partially assembled the lights. The top cap (see picture) is what is used as the nut to hold the light onto the board. The three lights were assembled with the cap holding it on.

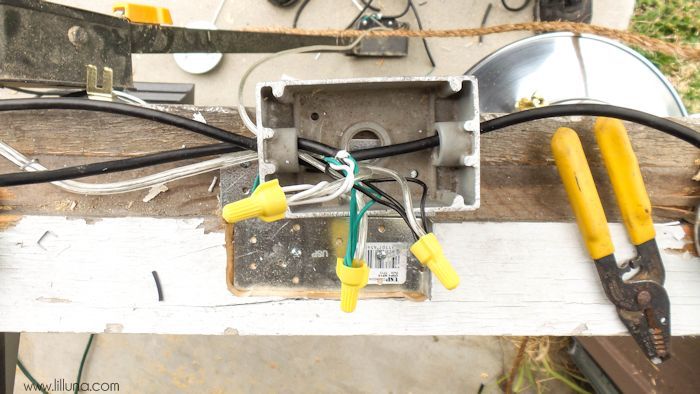
4. The next step is to connect all the wiring to a central box, and then connect a single wire up to the electrical box in the ceiling. Whenever any wires are connected there a few things that must be done for safety. Always use appropriately sized wire nuts for the connections. These wire nuts can also be taped and sealed using electrical tape for extra safety if preferred. Also, any time wires are connected, they must be inside an enclose container that is made of non-combustable material such as PVA or metal. These boxes are called junction boxes, or j-boxes. We preferred to use a low-profile j-box like the one pictured here. However, these were not available when we went to the store, so we purchased a simple metal j-box to use and run all the wires in.

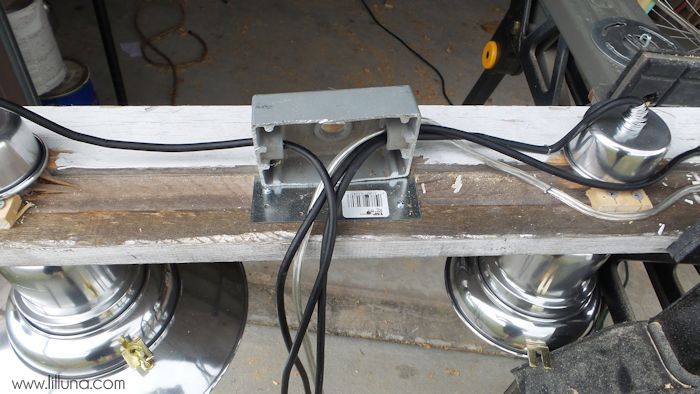
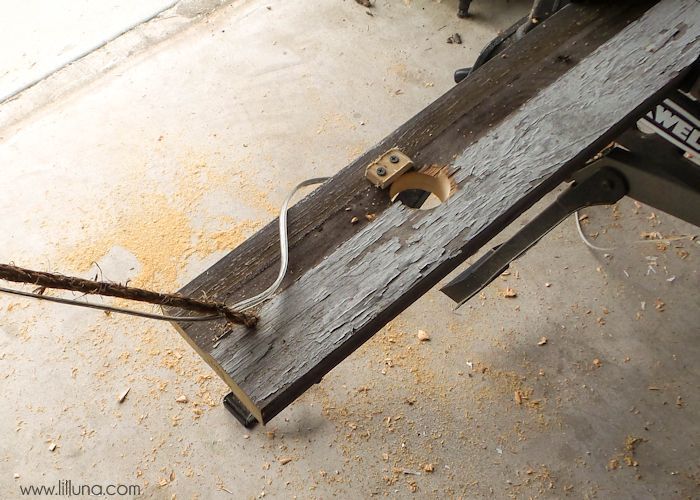
5. The wires were run so they would be least visible and were stapled in place. They were then run into the metal box.
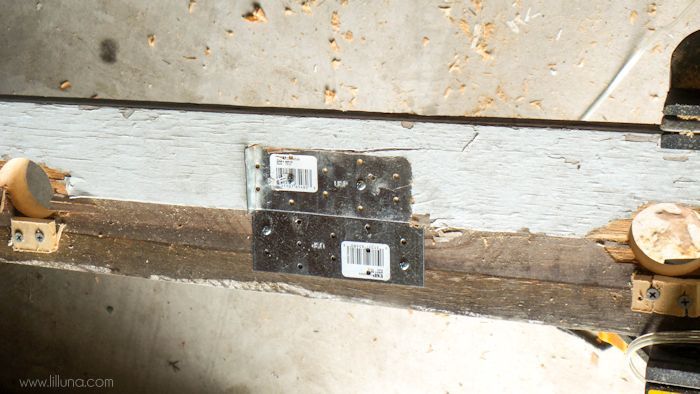
Because the entire box needed to be non-combustable, the bottom was lined with metal plates.
6. The wires were cut so there was a little extra slack in case any slight changes were needed. The last .5″ of the wires were stripped.
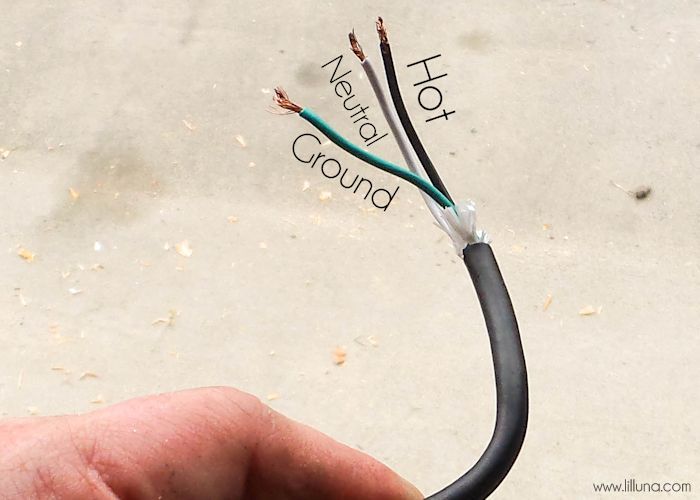
The black or “hot” wires were all twisted together, and then to the “hot” wire running to the ceiling box. The clear lamp wire has a neutral and a hot wire. The neutral wire is marked by ribs that run the entire length of the wire. It is hard to see sometimes, but it is almost always there to keep track which wire you connect on either end. The white or “neutral” wires were all twisted together. The green or “ground” wires were then all twisted together along with a ground wire up to the box. This ground wire sometimes comes as a bare wire. I used an extra length of one of the lamp wires as a ground wire, so we just had three clear coated wires running from the board to the ceiling box.
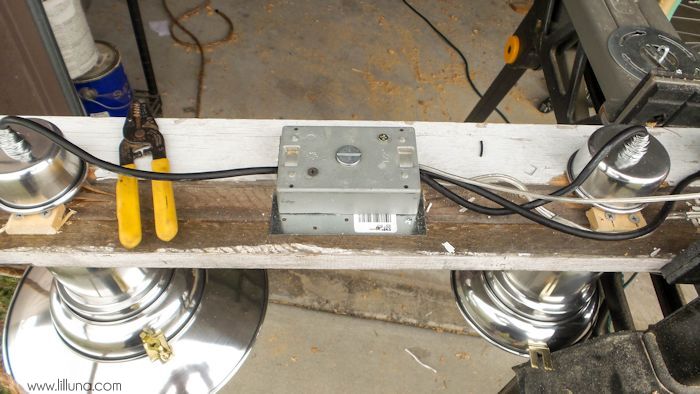
7. Once all the wires were connected, we closed the box.
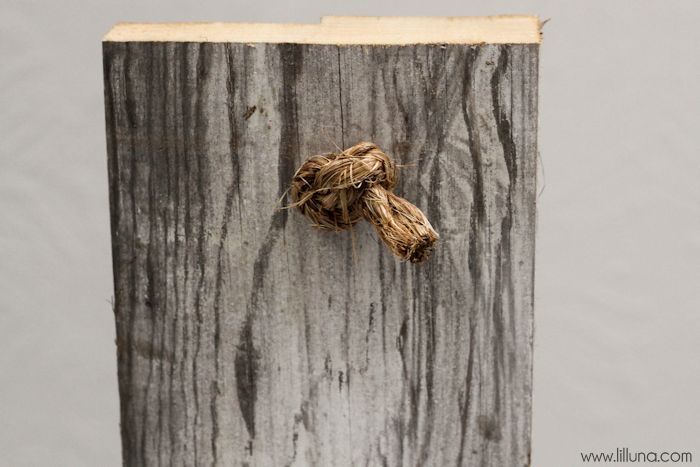
8. The next step was to set up the rope to support the board. we cut 100″ of rope and tied an overhand knot and one end. To secure that the knot does not slip, you can drop a few drops of super glue into it.
This rope is then run up through one of the ½″ holes and into the electrical plate for the ceiling box. For the height that we wanted, the rope ended at 82″ from knot to knot. To help center everything, I put a small piece of electrical tap in the center, so I know where this should fall within the ceiling box.
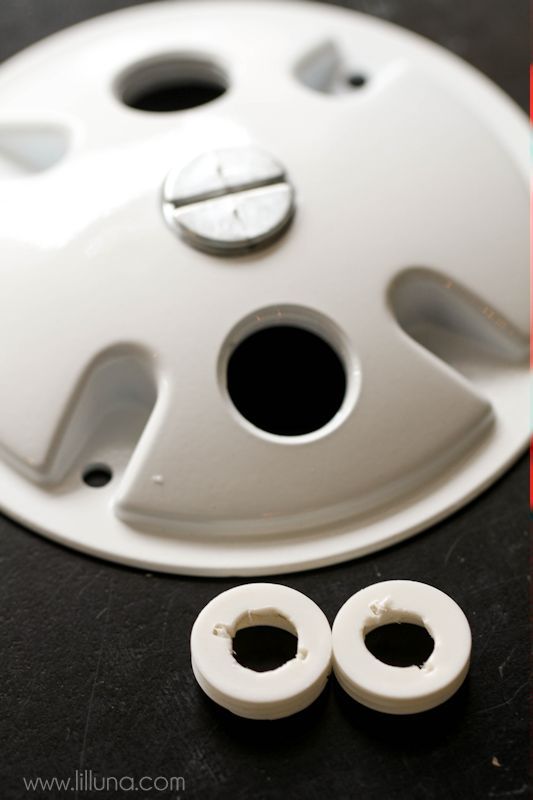
9. The rope was fed through the cover plate that will be attached to the ceiling box. We purchase plugs to go into the plate. We drilled .5″ holes through the middle of two of the plugs.
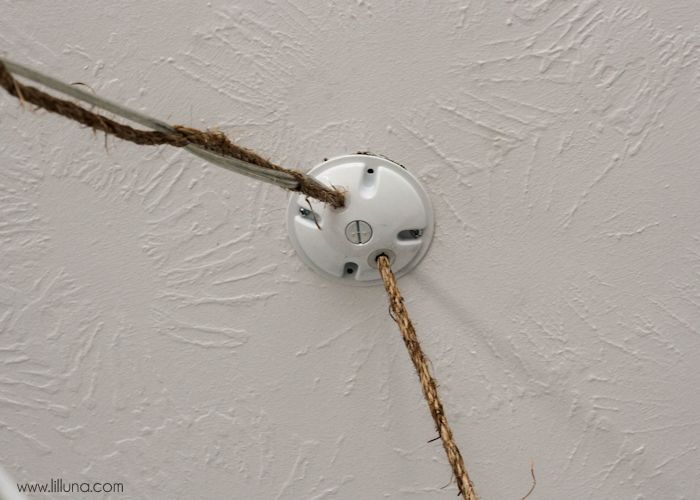
Once the rope was fed through the cover plate, we then fed it back through the other hole in the board and tied off the knot at the desired length.
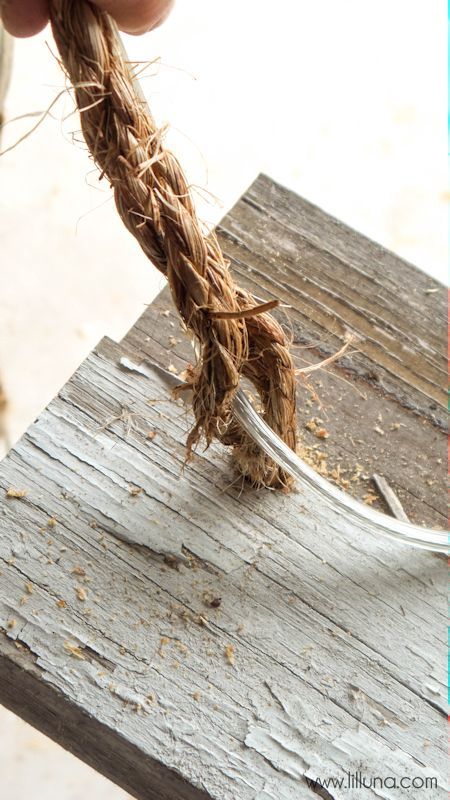
10. The last step before installing the light was running the clear wire up from the j-box up the rope to the ceiling box. I slightly untwisted a section of the rope to open the braid and fed the wire through the rope about every 6″ up into the cover plate.
We need a total of about 88″ of lamp wire for our height.
11. Once the ropes are secured and running through the cover plate, and the wire is run, then I needed some help from someone holding the light up, while I wired the light up. I then secure the cover plate to the ceiling box using the screws provided with the ceiling box.
12. After the light was installed, I finished assembling the Ikea lights, and installed the Edison bulbs.
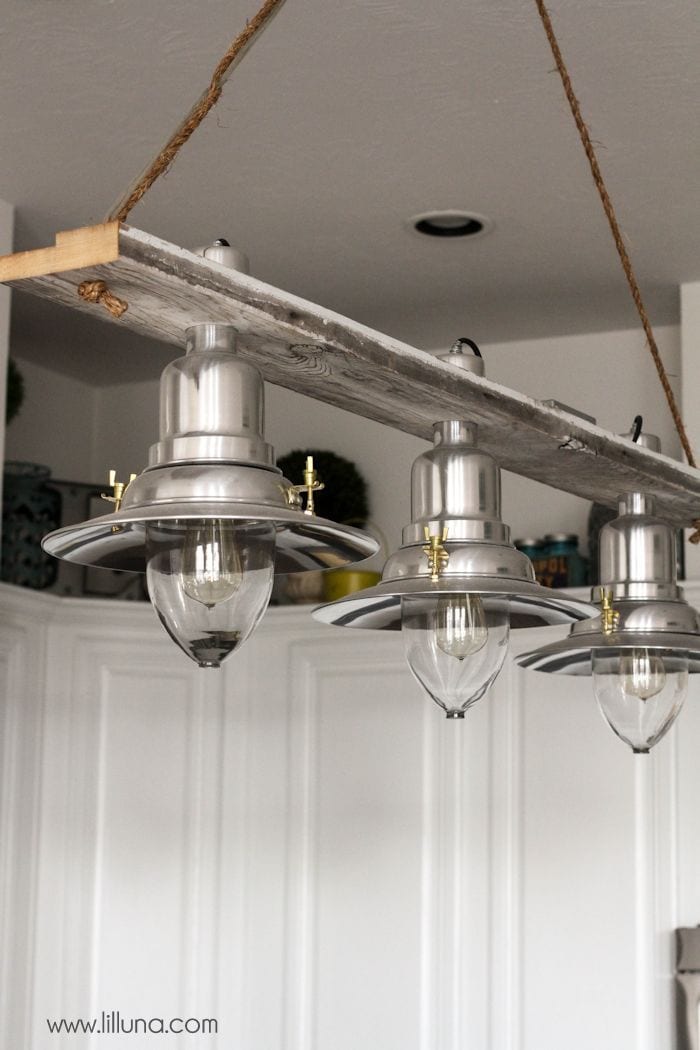
OH BOY! I just love this!! We always get so many compliments on this light when friends come into our kitchen, and they’re surprised to find out Lorin made it and even more surprised when we tell them we made it for about $100!! 😀
Lorin and I LOVE doing projects together and I love that we are such a good team. I usually have the ideas and he’s the one that can execute them all. Perfect combo!!
For more great tutorials for your home, check out:
I hope you like these projects and can use these tutorials for your own home.
For all tutorials on the site go HERE. 😀
For all Decor ideas go HERE.
And get weekly emails with monthly freebies by signing up for the Lil’ Luna newsletter. 🙂
For even more great ideas follow me on Facebook – Pinterest – Instagram – Twitter – Periscope – Snapchat.
Don’t miss a thing – Sign up for the Lil’ Luna Newsletter today!
ENJOY!


That turned out really great! I love how the chrome looks next to the wood, such great pairing.
Thanks, Stephanie!! The chrome and vintage wood look great together. It definitely matches the rest of the kitchen and gives it that “special touch” we were looking for. Thanks for stopping by. 😉
Very cool, I love how this turned out
Thank you, Lisa!! 😀
Love the light!! Way better than anything you could of bought. Great job!!
Thank you, Crystal!!
That looks so cute in your kitchen and what a good idea. I love that you used salvage wood that’s a odd profile, it looks great, and adds to that vintage look. To mimic the white washed look on the edges, a couple of drops of craft paint and about triple of water. Start with your darker grey brown, sop up the watery paint in a rag or paper towel, wipe on the end of the board, do the same with a lighter and then a lighter grey brown, purposely missing spots with the lighter color. It’s just adorable.
Thanks for the tip, Jennie!! And thanks for stopping by. I love the touch of vintage and modern that the light adds. 😉
I love your creativity and appreciate you taking the time to share your ideas. I have had two of these same pendants from IKEA in the boxes for many years now and was just looking for ideas on how to use them. I really like this idea you had!! Your home is lovely. Thanks again.
I’m glad you found these ideas!! We love them! Good luck & thank you!!