Hi friends! It’s Bev from Flamingo Toes here with a fun new sewing project today!
I don’t know about you, but when I’m in the middle of a sewing project, the end of my ironing board usually ends up being a hot mess. With scissors, pins stuck every which way, marking pens and measuring tapes, it can be pretty messy, and all those things take up a ton of space too! (You can totally tell I’m not a tidy crafter here.)
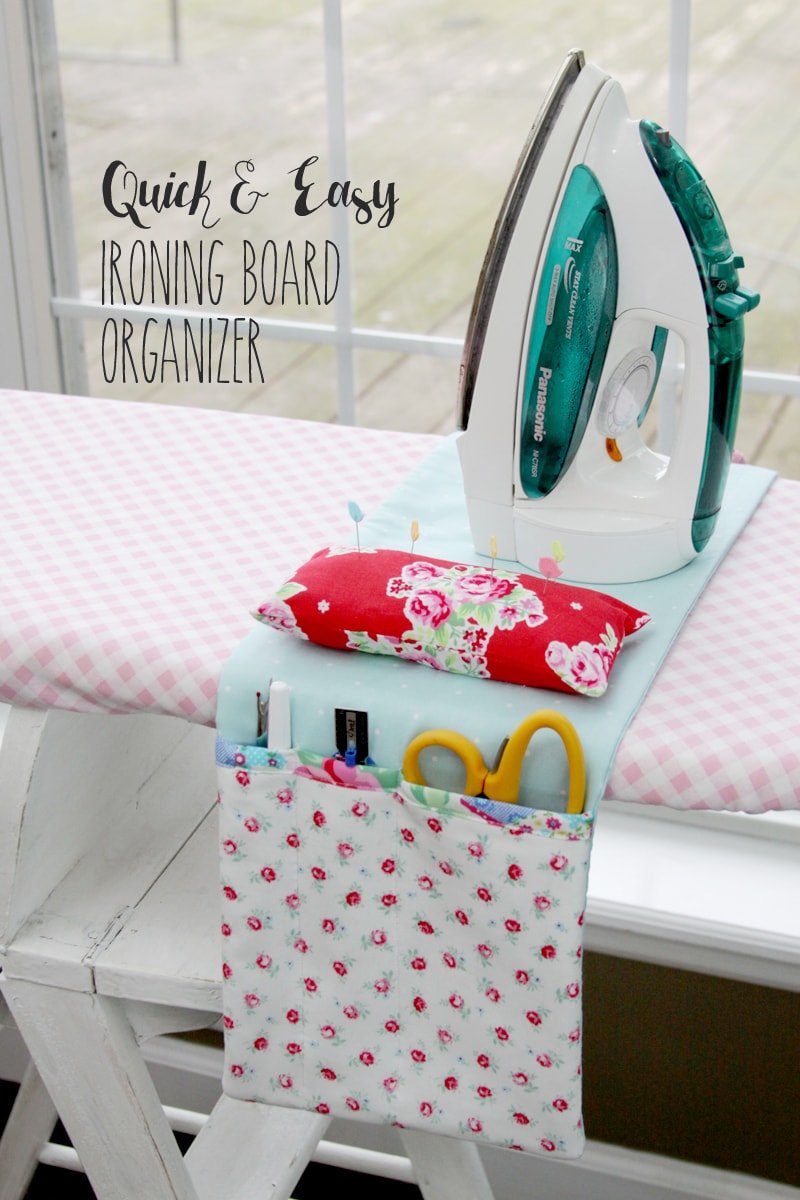
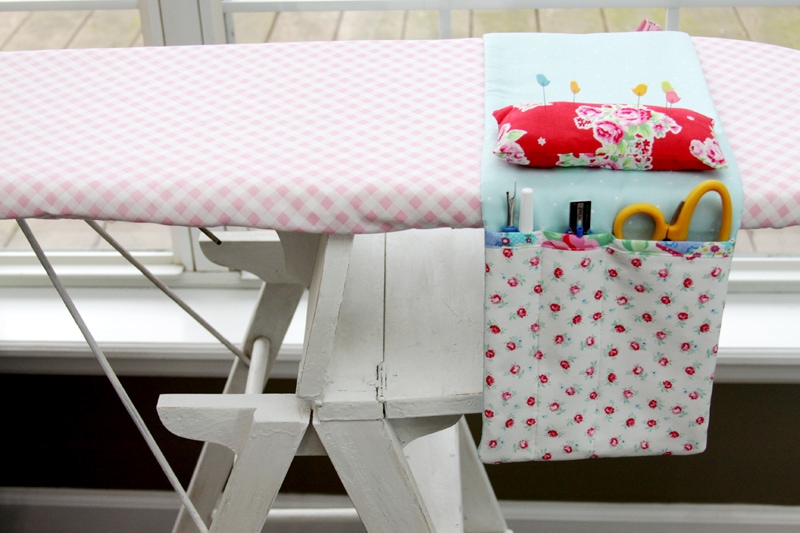
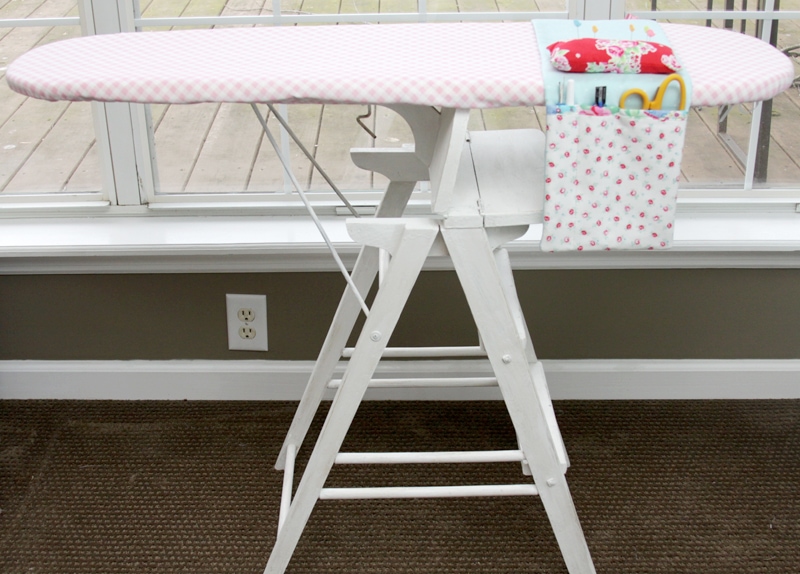
If you’ve got the same problem, I have the perfect solution! This quick and easy ironing board organizer is super simple to sew up – and it looks so cute sitting on the end of the ironing board!
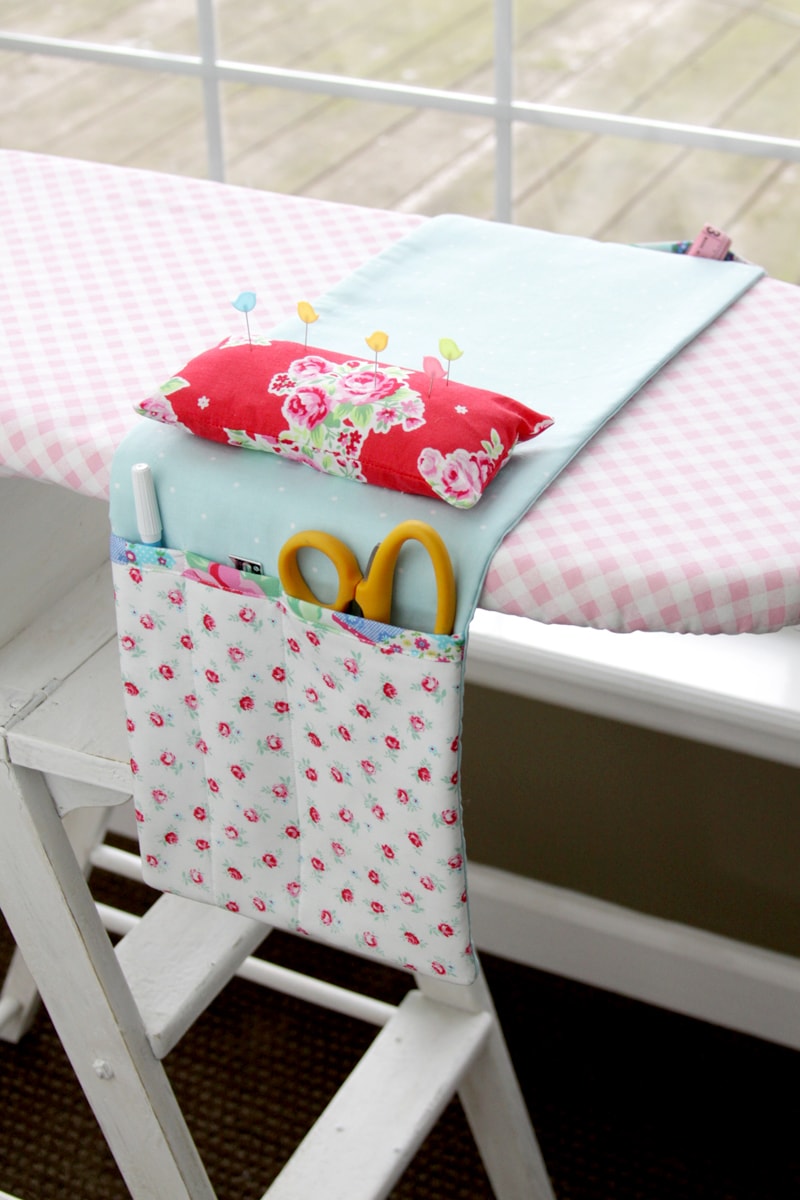
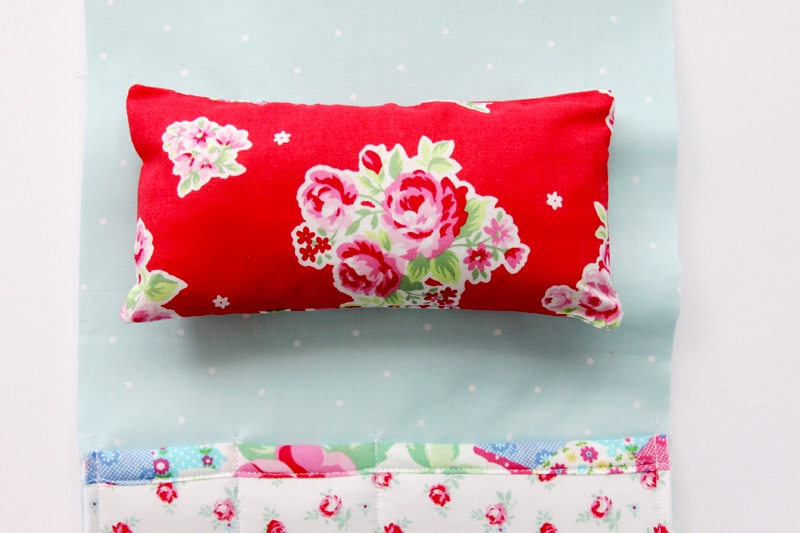
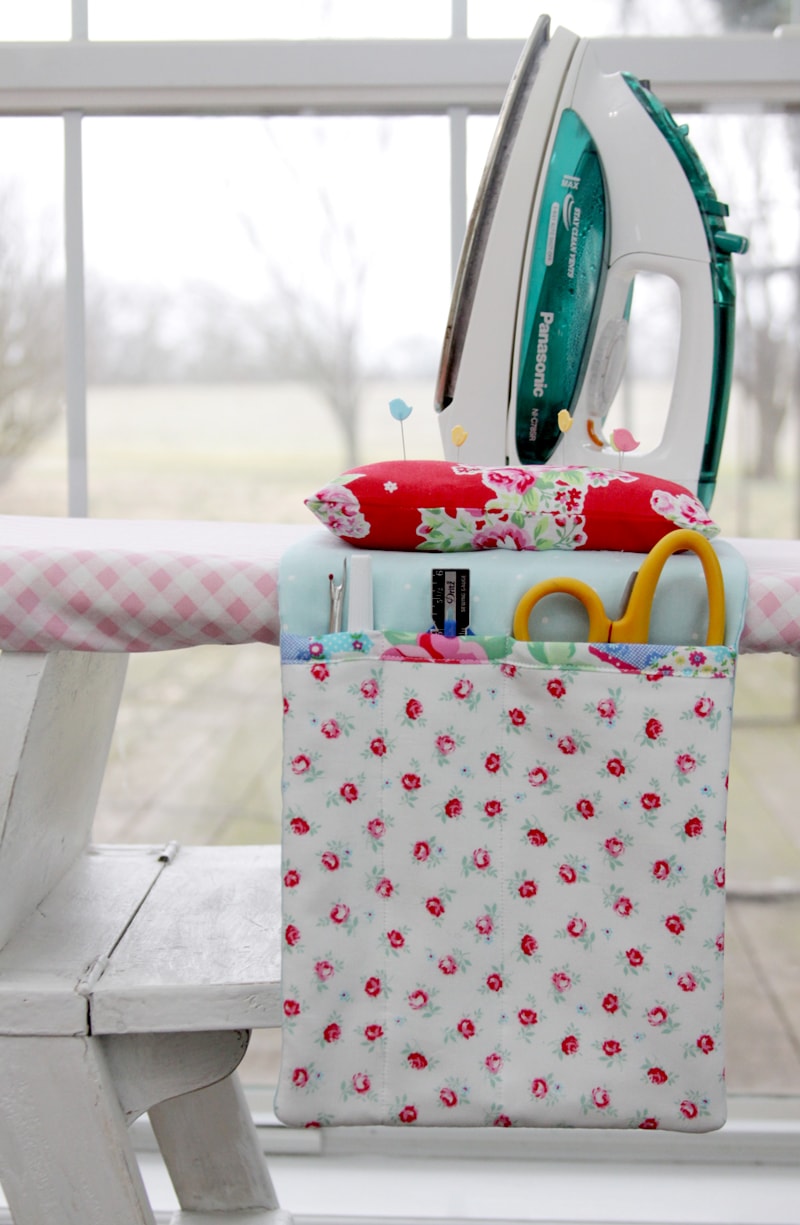
It has pockets on each side, a long one in front for scissors, pens and more. There’s a little pincushion in front too!
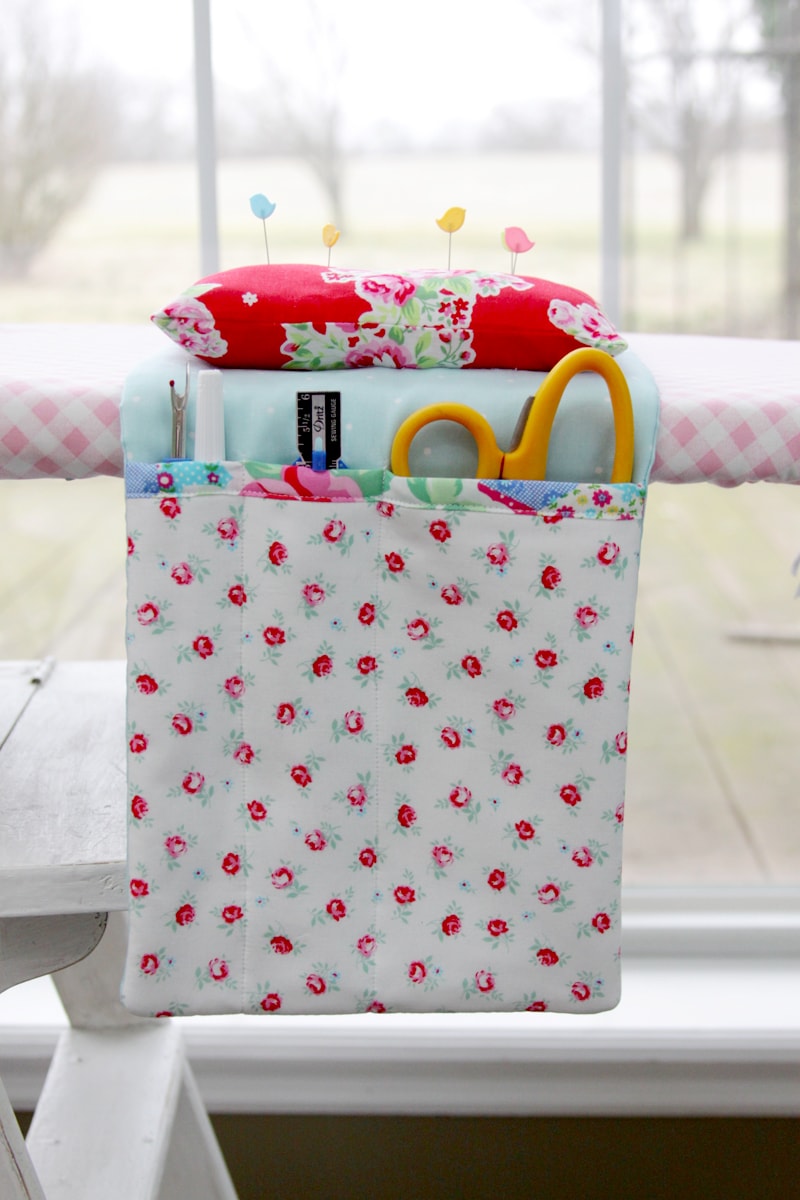
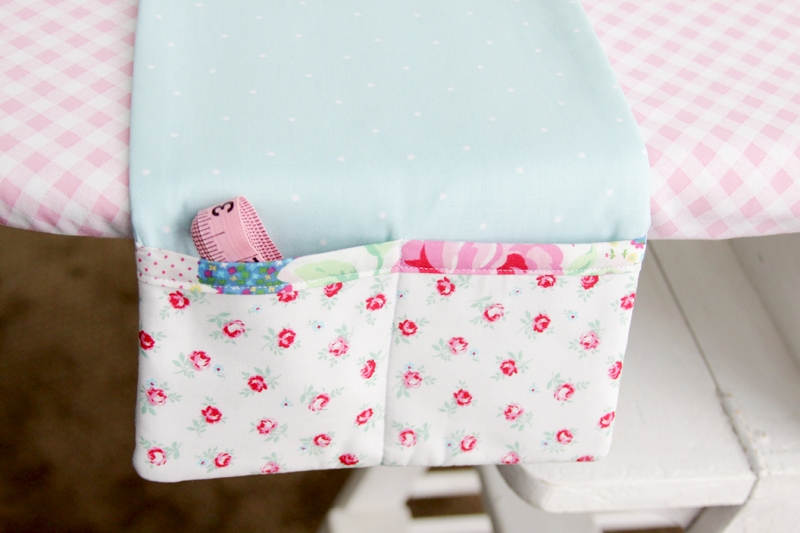
The back has a cute smaller pocket – perfect for holding measuring tapes or safety pins!
It’s so quick to sew up – so let’s get started!
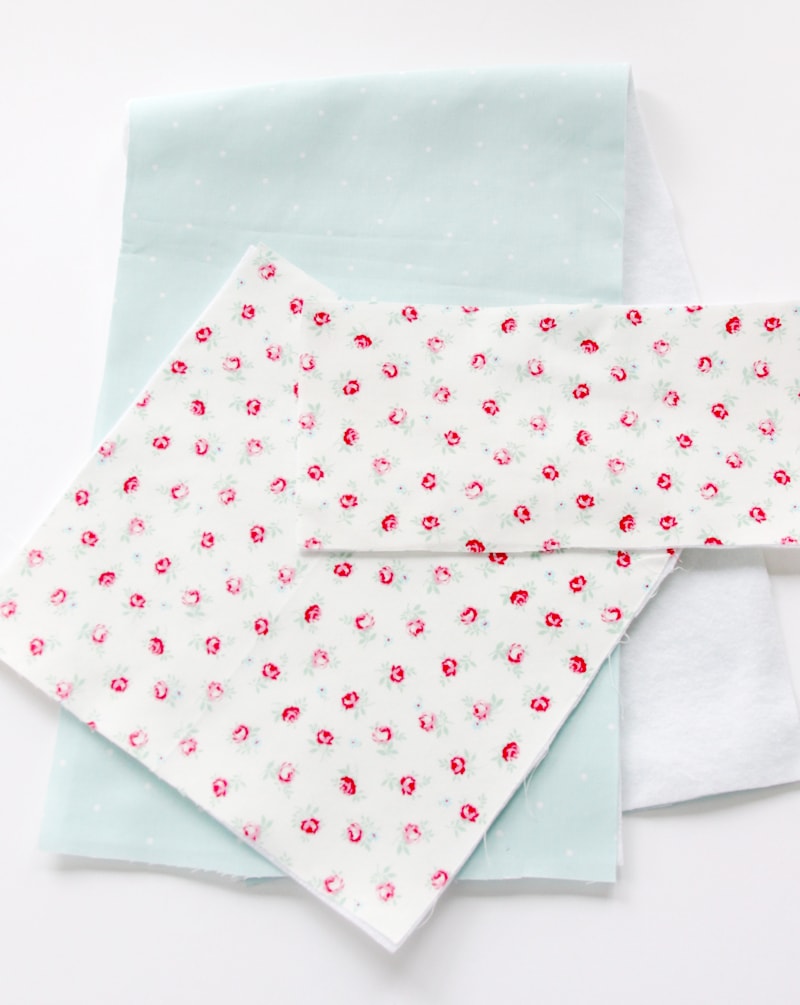
Materials:
- ½ yard for main fabric
- ¼ yard for pockets
- 4″ x 9″ piece for pocket edging
- 8″ x 8″ piece for pincushion
- ½ yard fusible fleece
- fiberfill
- needle & thread
Start by cutting out your fabric. My main piece is 9″ x 29″ but my ironing board is 13″ across at the base. If your board is wider or narrower, add or subtract inches in length if you need to.
Cut 2 pieces of main fabric 9″ x 29″. Cut one piece of fusible fleece this size also.
Cut 2 pieces of fabric and one piece of fusible fleece for large pocket 9″ x 8″.
Cut 2 pieces of fabric and one piece of fusible fleece for small pocket 9″ x 4 ½″.
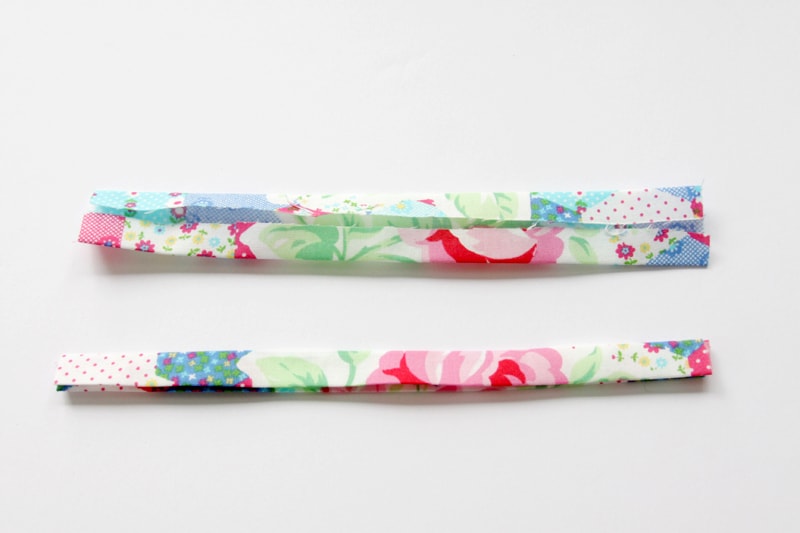
Cut 2 pieces of pocket edging 2″ x 9″.
Cut 2 pieces 8″ x 4″ for pincushion.
Iron the fusible fleece to the wrong side of one main fabric piece, one large pocket piece and one small pocket piece.
For each of the pocket edging pieces, iron the two long sides so they meet in the middle, then iron the piece in half again so the long pressed sides meet. You just made bias tape!
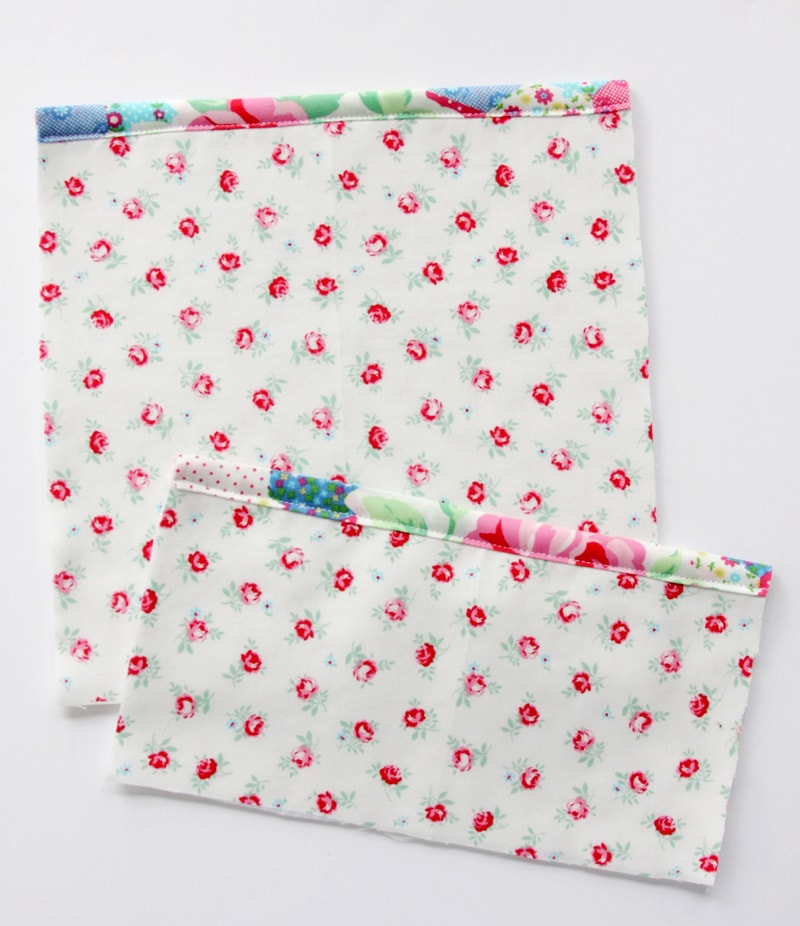
For each of the pocket pieces, place the two fabric pieces wrong sides together, so the fleece is in the center. Place the bias tape over the top edge of the fabrics and sew in place, close to the pressed edge.
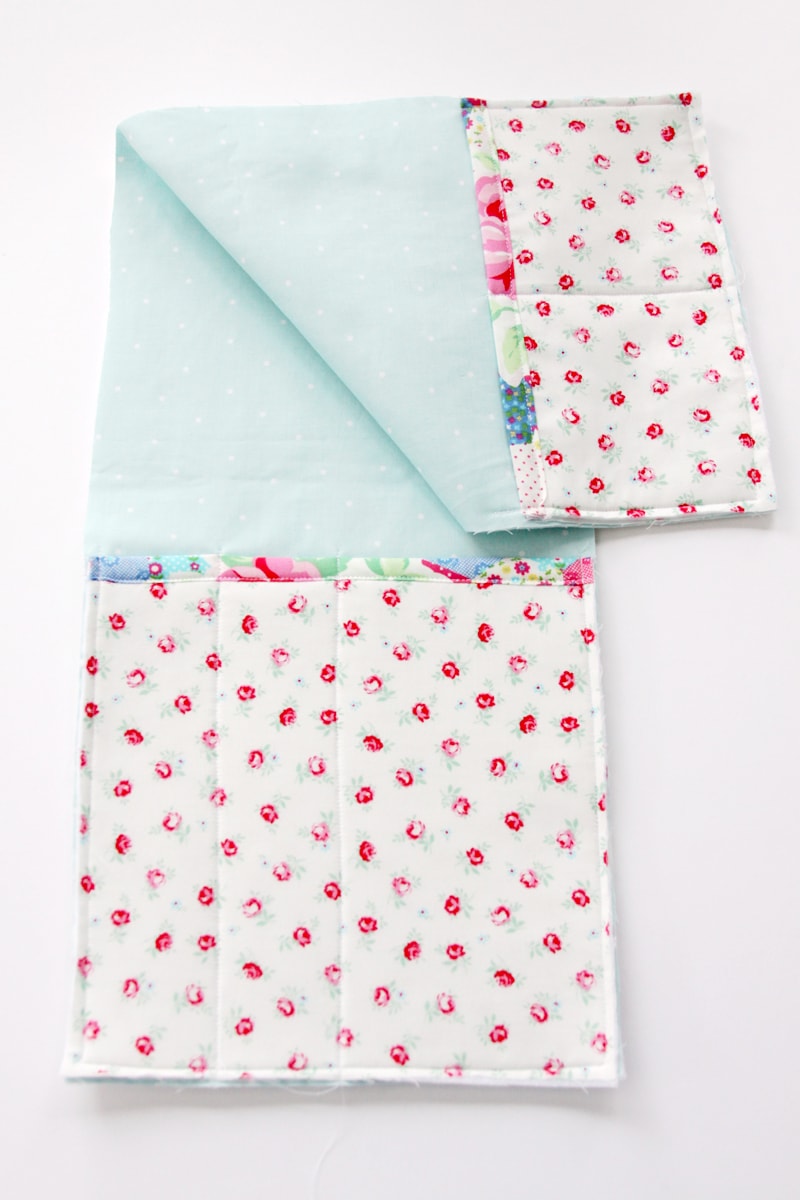
Place the large pocket at one end of the main fabric piece with the fleece, and the smaller pocket piece at the other end. The bias tape ends should be towards the center of the long main piece. Sew around the sides and bottom with a ¼″ seam allowance.
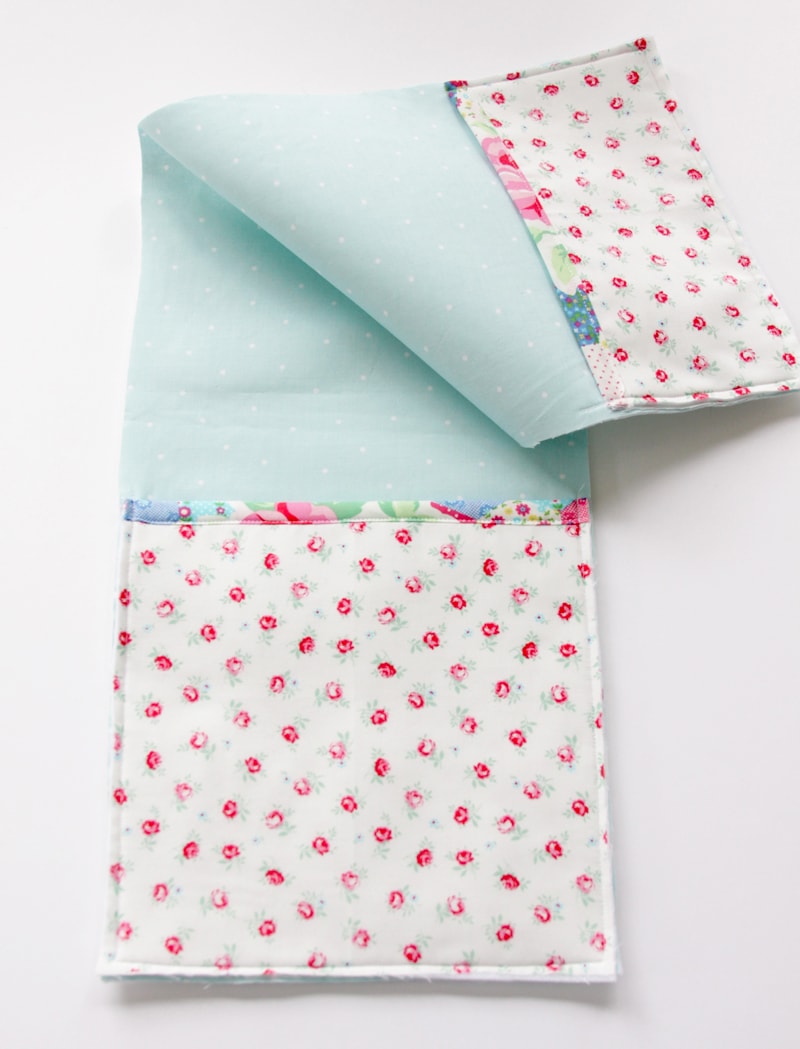
Decide where you’d like your pocket dividers. I did one seam down the center of each pocket, and a second seam on the long pocket on the left side, between the center and the side edge. Sew a straight line down from the top of the bias tape to the bottom of the pocket to divide the pocket.
Place the two pincushion pieces right sides together. Sew around the sides with a ½″ seam allowance, but leave a small opening of about 2″ on one long side. Clip the corners.
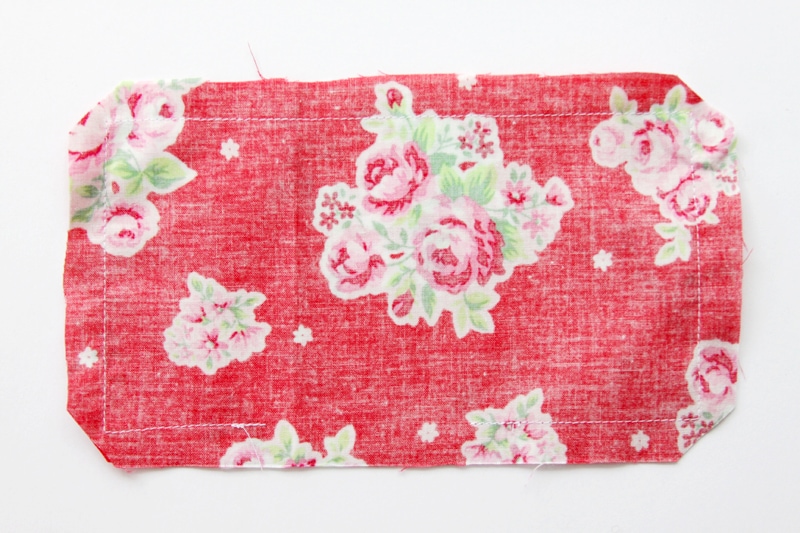
Turn the fabric right side out. Fill the pincushion with fiberfill and hand sew the opening closed.
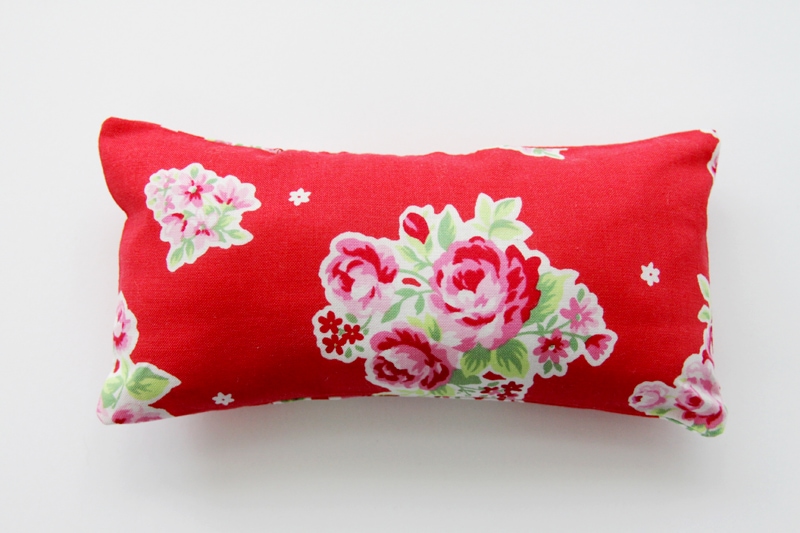
Hand sew the pincushion in place above the large pocket.
Place the remaining main fabric piece on top of this piece, so right sides are together. Pin the pieces together. Sew around all four sides with a ½″ seam allowance, leaving an opening for turning of about 4″. (You have to get that pincushion back through.) Clip the corners.
Turn the organizer right side out. You can use a chopstick or skewer to make sure the corners are nice and pointy. Press and then hand sew the opening closed.

That’s it!! So fun right?
I have this new vintage wooden ironing board and I love how cute it looks with it.
Plus now my things are all organized and neat! I love it when you have things cute and tidy. I hope you make one up!
___________________
I’m in love with your vintage ironing board…
I’m not a huge sewing person, but I want to be just so I can make and use this organizer!! Haha!
Thanks for sharing this with us Bev!! For more DIY projects, visit Bev over at Flamingo Toes!
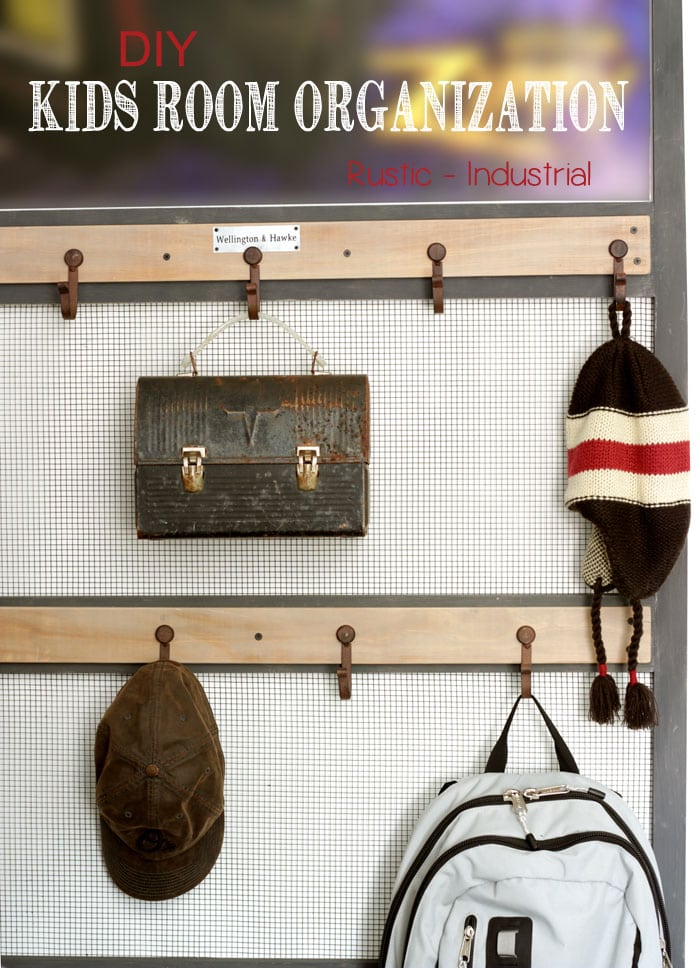
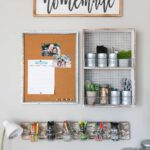
Check out this other DIY organization project:
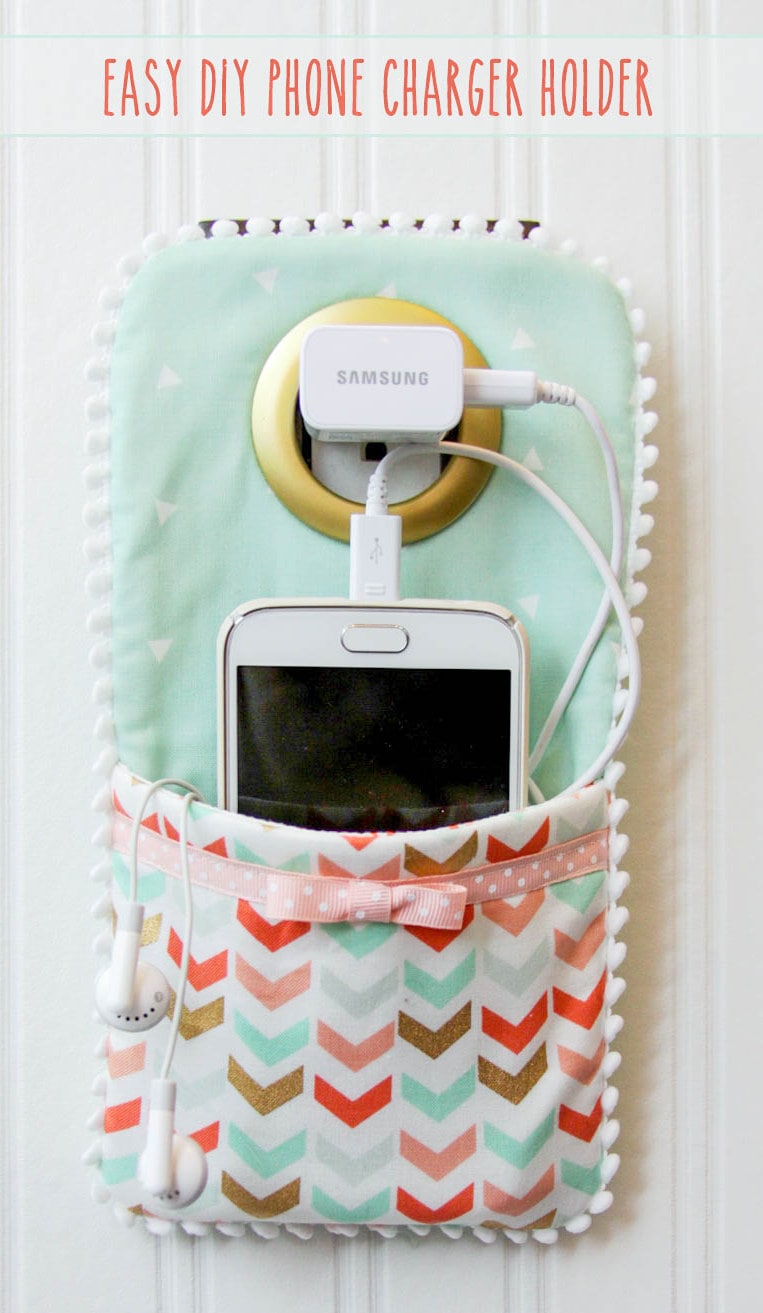
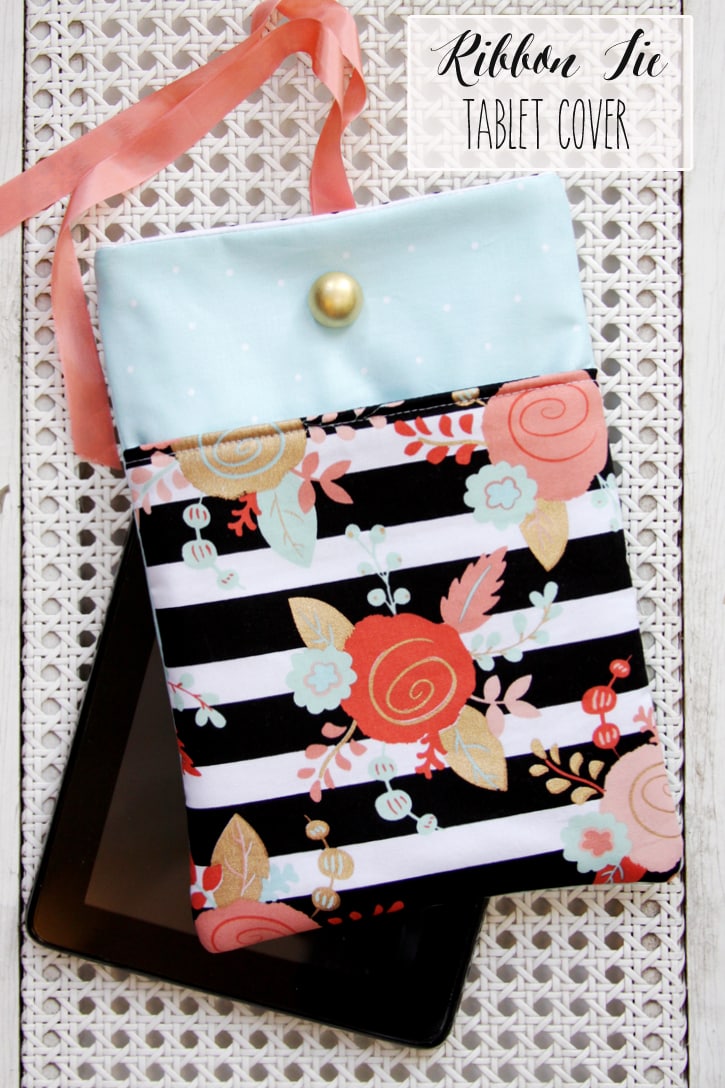
And these sewing projects…
For all DIY and tutorials, go HERE.
For all Organization ideas on the site go HERE.
And get weekly emails with monthly freebies by signing up for the Lil’ Luna newsletter. 🙂
For even more great ideas follow me on Facebook – Pinterest – Instagram – Twitter – Periscope – Snapchat.
Don’t miss a thing – Sign up for the Lil’ Luna Newsletter today!


I LOVE this idea! what a cute and fun little sewing project
What a fab idea. I think I’d end up with empty cute pockets and stuff all over still though lol. Did you know if you stuff wire wool inside your pin cushion you could sharpen your pins at the same time as looking mighty cute and organised 🙂
I need to make one of these pronto! When I’m sewing, my ironing board is always such a mess! Thanks for the idea!
Haha..whose isn’t?! I’d love to know how you like it!
I would like to know did you make the iron board stand or buy it some where?
Thanks
This is from a contributor, Bev. Here is her blog, if you’d like to ask her..http://www.flamingotoes.com/. Hope that helps!!
nice…thats creativity right there
Thanks so much for stopping by!
Loved the way you have used the ironing table… specially i loved the color combination with the table cloth…