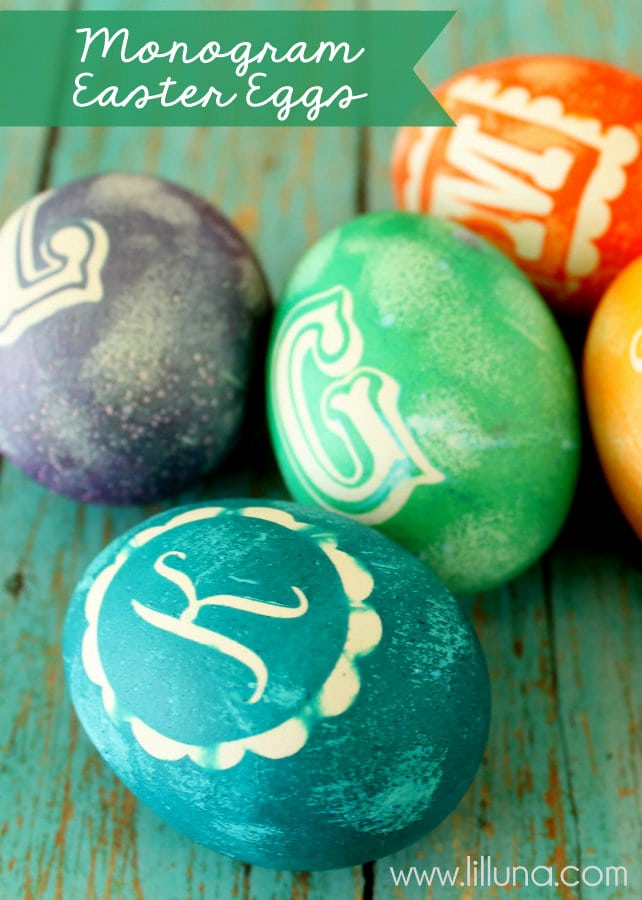
I’ve had too much fun coming up with some fun Easter egg decorating ideas, but I will admit that I don’t want to see another hard-boiled egg for awhile – LOL! I think we made almost 3 dozen this week. These Monogram Easter Eggs are another easy peasy way to decorate your eggs. I thought it would be a great idea if you had custom place settings for Easter Dinner with an egg at each plate. What do you think? Pretty fun, right?
Here’s how to do it:
SUPPLIES:
- Hard-boiled eggs
- Dye Kit
- Vinyl or stickers
DIRECTIONS:
- Boil your eggs (I have a tutorial on the site for Perfect Boiled Eggs!)
- Design your vinyl. I really like the font MASQUERADE that is available for download HERE. I also used the 09 Kut Ups font/dingbat that gave the cute designs around the eggs. That is available HERE. Cut, peel, and add adhesive to vinyl.
- Add vinyl/stickers to eggs. Make sure they stay really well by pressing on.
- Add eggs to dye cups (instructions on dye kits). Let set in there for awhile. Pull out and let dry.
- Peel off vinyl. Monograms won’t come out perfect but they’re close enough.
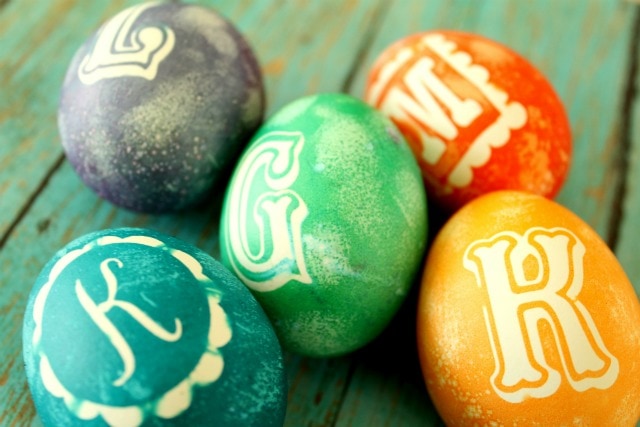
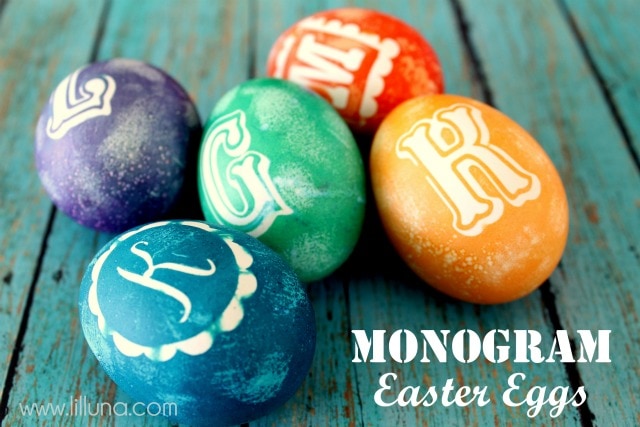
Cute and custom. What’s not to love? And these ones are perfectly safe to eat!! 😉


Another great tutorial 🙂 You adding way to many things to my to-do list! Pinning this one as well-thanks for sharing!
Kari
Newlyweds on a Budget
P.s. Are you going to the SNAP conference? I’ll be there and would love to meet you IRL!
Thank you, Kari! And yes, I’m totally going to SNAP! Come find me cuz I would love to meet you! It’s going to be so much fun! Are you going with anyone?
Super fun Kristyn! They turned out so cute! I made some similar last year and they were a big hit!
Thanks, girl!! You totally should have posted your eggs. I’m sure they were adorable!
I love these! Would look super cute with spring images as well 🙂 TFS
Great idea! Need to find me some Spring and Easter images to do that. Thank you for stopping by, and I hope you have a great day. XO
these are too cute. i love it! great spin on regular dyed easter eggs 🙂
Thanks for the kind words, Sally! They are so easy – you should try them out! Hope you have a great weekend. 🙂
You are so stinkin’ creative Kristyn! I love it!
You’re too sweet, my friend! Thanks again for hosting the play date this week. I could seriously chat with you gals forever! XO 🙂
How do you come up with these adorable ideas?! LOVE IT! thanks for sharing.
LOL! I find my inspiration every where. I just try to think of fun things I’ve never seen before. Thanks for checking everything out and for commenting all the time. I LOVE hearing from you! XO
It’s seemed like a chocolate looks delicious, Well thanks for this post! And for your willingness to share to us this kind of idea.
These are LOVELY! I especially like the bolder colors you chose. Sometimes pastels can get a little tiresome, right? You’ve inspired me!
Awww, thanks Briana!! I know Easter is filled with pastel colors, but I’m just not a pastel kind-of-gal. I love bright colors, no matter what holiday!! Plus, I think the monograms showed up even better with the bold colors. 🙂
These are really good and with this tutorial preaty easy to do i want an easter basket with some gift in them i am noww thinking of adding these to the basket with the letter of each person i am giving a gift to thx for the idea.
You are very welcome! They are definitely easy and just add the perfect, custom touch to a place setting or basket. Let me know if you try it out. Would love to see pics. Have a great Easter! XO
These are very cool
Thank you, Heather. So glad you like them. 🙂