This post may contain affiliate links. Please read our disclosure policy.
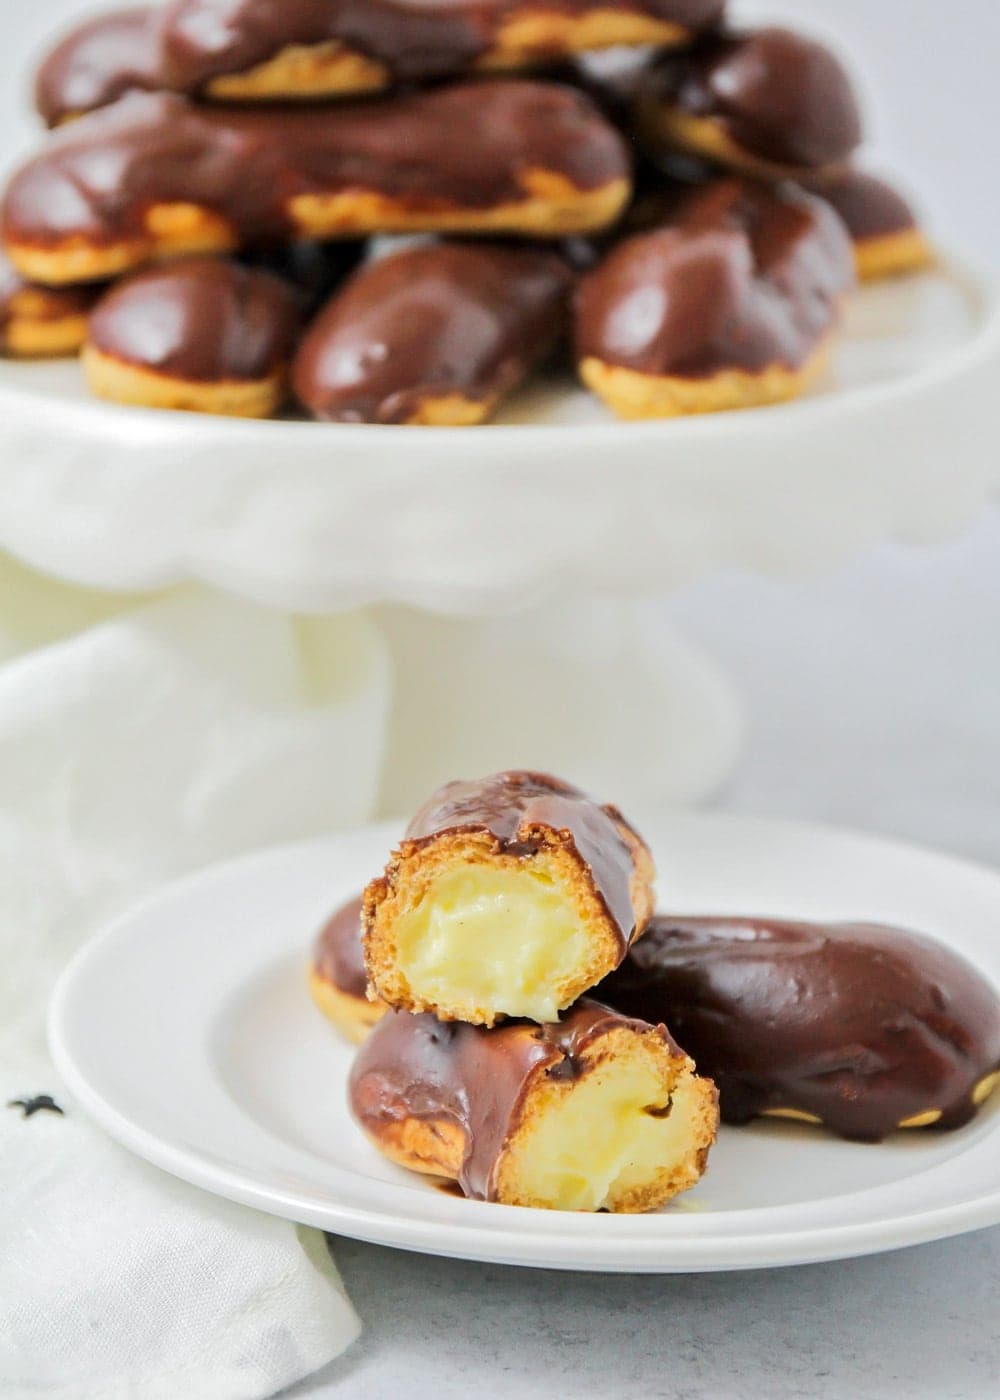
Make elegant bakery-style eclairs with this easy recipe! You’ll love these homemade eclairs filled with vanilla cream, and topped with chocolate glaze.
This is one of our favorite desserts to make for parties and showers. For more bakery-style desserts, try Cream Puffs or Shortbread Cookies.
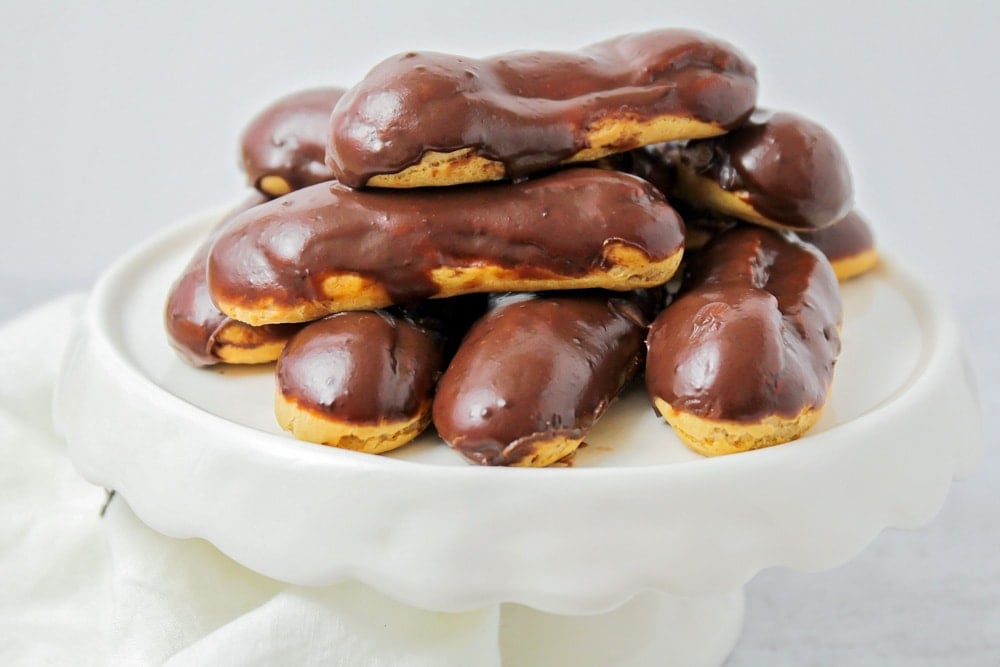
Delicious Chocolate Eclairs
Eclairs have always been the one thing I’ve been dying to master—and guess what? They’re pretty easy!
I was hesitant the first time I tried making them at home, but they were actually a huge success and my husband absolutely LOVED them!
Don’t be intimidated by the long list of steps in the recipe. I guarantee it’s easier than you think, and before you know it you’ll have whipped up a delicious batch of bakery-style pastries, filled with vanilla cream and topped with chocolate glaze!
How to Make Eclairs
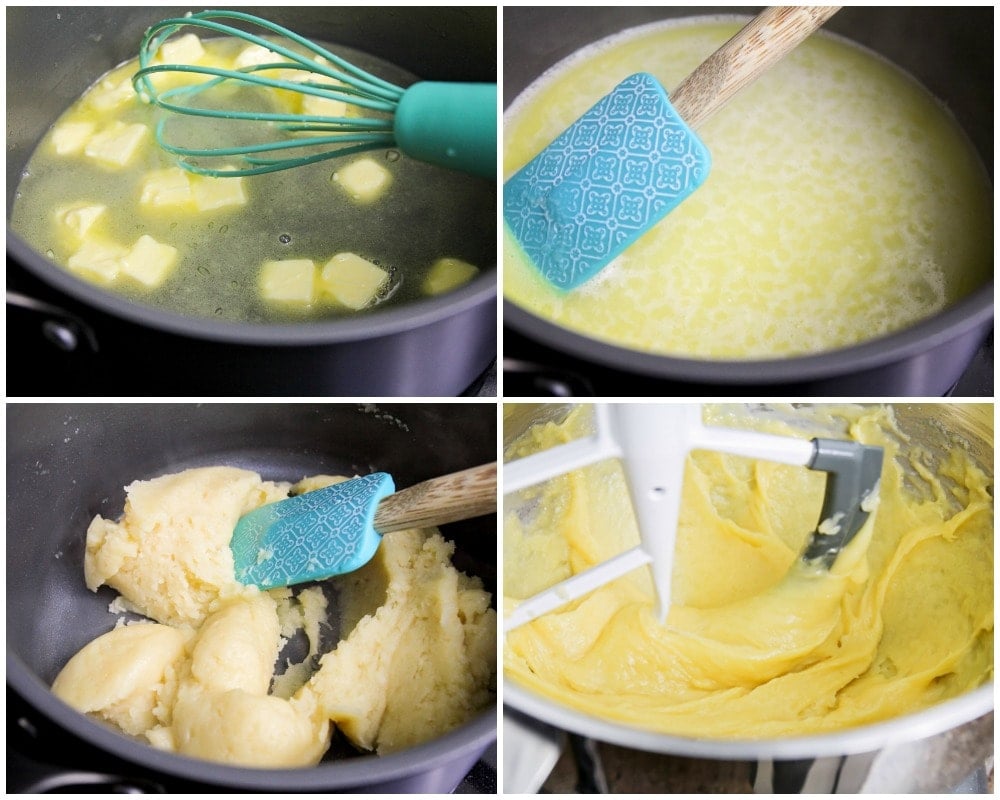
I started off with the actual pastry shell—a traditional Pâte â Choux (also known as “shoe paste”), which is not only used for eclairs but for cream puffs too! Then I did the filling next, and lastly the glaze.
Pâte â Choux. Over low heat, add butter, sugar, water and salt to a saucepan, stirring frequently. Turn heat up to a low boil, remove from head and add in flour. Stir vigorously until the mixture forms a thick paste and no flour pockets remain. Place over medium heat and cook for 1-2 minutes stirring constantly to prevent burning (a thin film might form on the bottom of your pan).
Place hot paste into the bowl of a stand mixer fitted with the paddle attachment. Beat on medium speed for 2 minutes until it becomes slightly cooler. Then add the eggs one at a time until incorporated. The mixture will look shiny and will stick to the sides of the bowl. Beat for an additional 2 minutes on medium.
Continued…
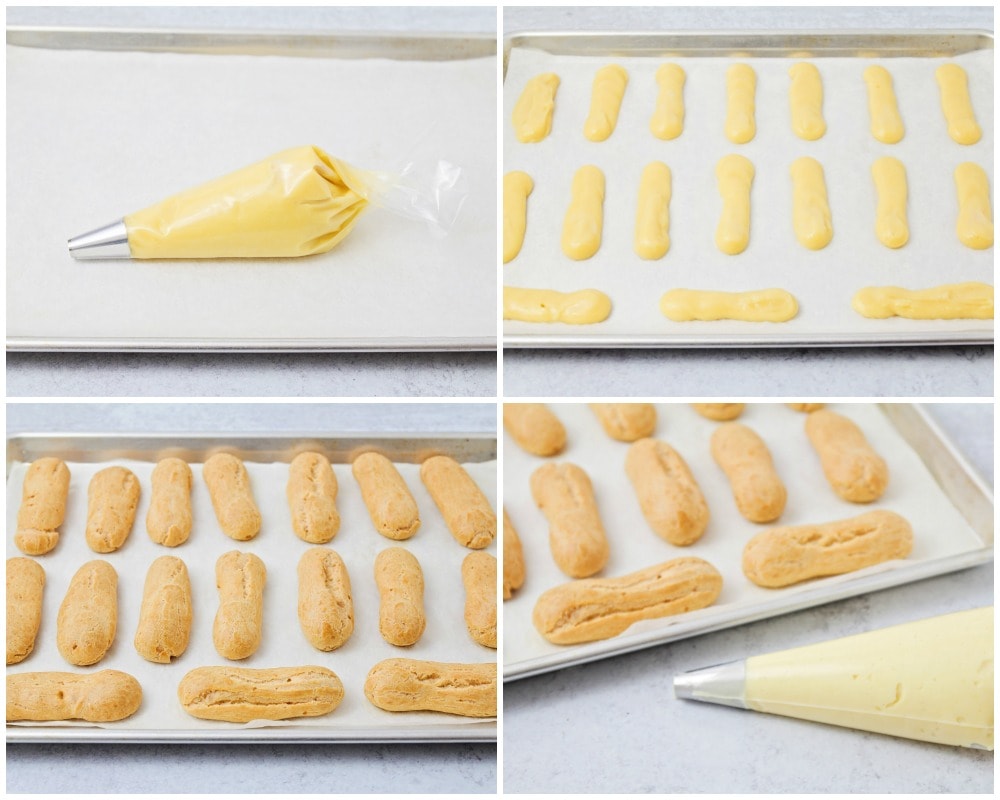
Making even eclairs: Grab a ruler and pencil. On one side of the parchment paper draw out the correct length and spacing for the eclairs. Flip the paper over. Use the pencil lines to help pipe out even eclairs. This will ensure they all cook at the same rate.
PIPE & BRUSH. Scoop dough into a large piping bag fitted with a large tip (½” in diameter). Pipe 4″-5″ logs onto the prepared baking sheet, spacing each two inches apart to prevent spreading and baking into each other. Using a pastry brush, gently and lightly coat each log with the beaten egg wash.
BAKE. Place in the oven and bake for 20 minutes. After 20 minutes, open the oven, rotate the pan and reduce the heat to 350˚F, bake for an additional 20 minutes. Reduce oven heat to 300˚F and bake for 20 more minutes to allow the pastry shells to dry out. That makes a total of 60 minutes or 1 hour at three separate temperatures.
Remove from the oven and allow to cool for 20 minutes.
Eclair filling
While the shells are in the oven, make the filling!
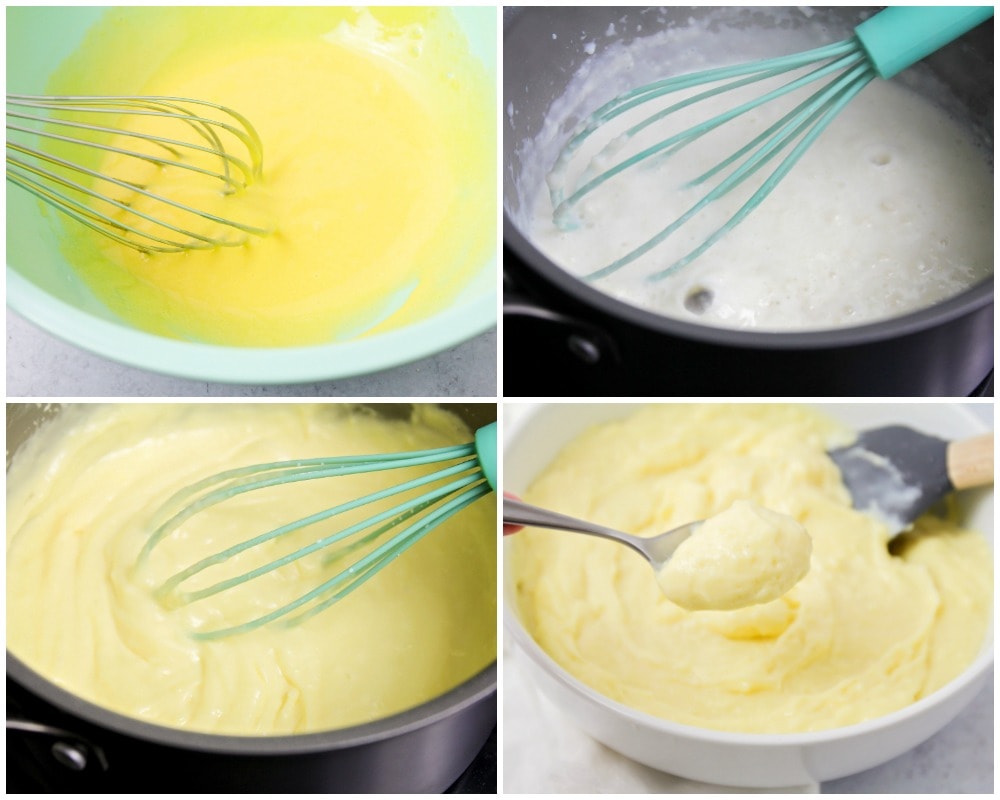
For the eclair filling, I made a really easy vanilla bean pastry cream. Instead of steeping vanilla beans, I used a heaping tablespoon of that gorgeous vanilla bean paste that you can find at most cooking stores. It helped cut down the cook time and gave it more of an intense flavor which I really loved! You could also fill these with raspberry jam or homemade whipped cream.
MIX. In a large mixing bowl, combine egg yolks and sugar, whisking until combined. Pour milk into a medium saucepan over medium heat, and bring to a low boil. Then add the flour. Gradually pour the hot milk into the egg/sugar mixture to temper it, whisking constantly to prevent the eggs from scrambling.
THICKEN. Return the mixture to the saucepan set over medium heat, add vanilla bean paste and butter, and cook the mixture until it becomes very thick. Pour through a mesh sieve (or fine wire strainer) into a bowl and set over an ice bath to cool (whisk for about 5 minutes or so). Store in the refrigerator until needed.
Tip: When cooking the cream be sure to stir constantly. If the cream becomes too thick, just add a pat of butter!
Assemble the eclairs
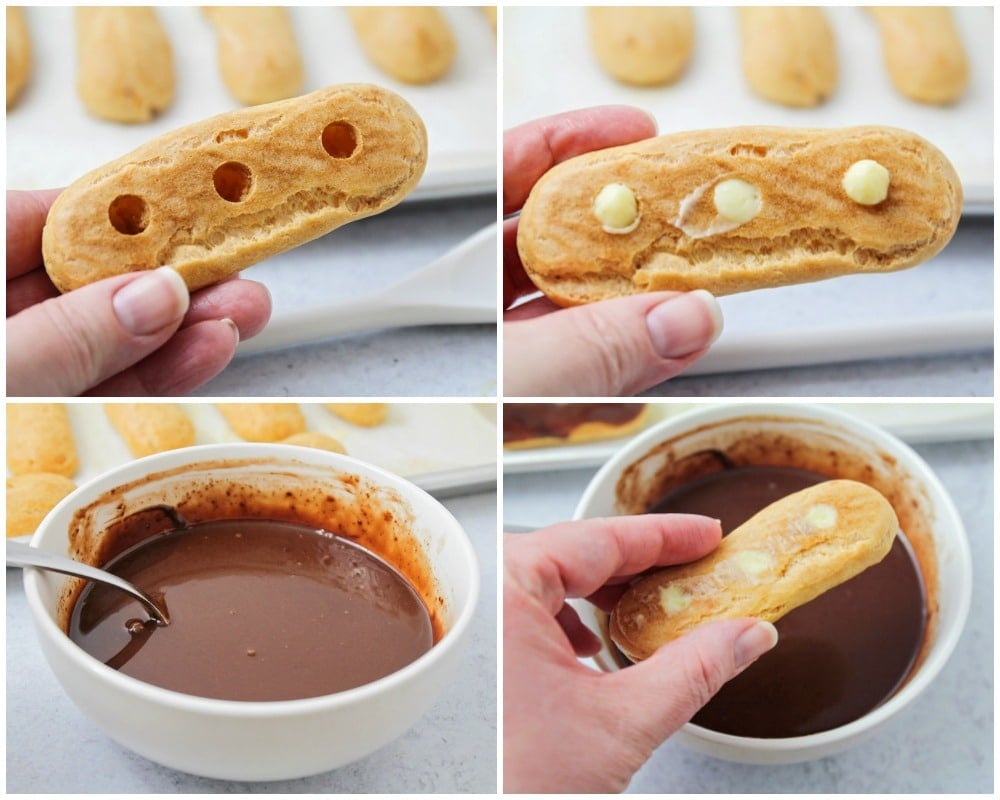
FILL. When the pastry shells have cooled, poke three holes into their bottoms. Place pastry cream into a large piping bag fitted with a small round tip and fill each hole.
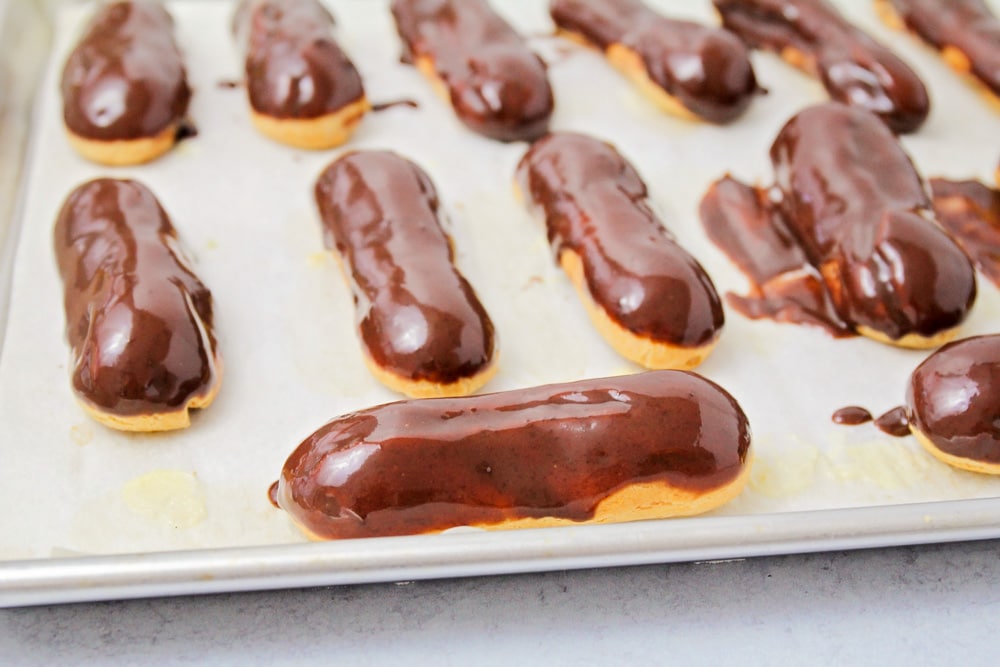
GLAZE. Once the shells are filled, heat the heavy whipping cream for the glaze in the microwave for 30 seconds. Stir in semi-sweet chocolate and salt. Dip each pastry into the chocolate glaze swirling to remove any excess chocolate. Set on the baking sheet and place in the refrigerator to set for about 30 minutes.
Tip: You can decorate the tops by adding a dash of chopped nuts or holiday sprinkles. Or, drizzle a design with a contrasting color (like white chocolate).
Storage Tips
- Shells: Store at room temperature for a day, or you can freeze the shells for up to a month. To thaw: place the frozen shells in a 300°F oven for 10 minutes. Fill with cream and add topping.
- Pastry Cream: Can be stored in the fridge for about 5 days. Be sure to place the piece of plastic wrap directly on top of the cream (so the plastic and cream are touching). This will help keep a skin from forming on top.
- Assembled Eclairs: should be refrigerated. They are best eaten within a day, but can last longer. Be aware that the cream can begin to soak into the shell causing it to become soft and limp.
One of the things that I love the most about this recipe is that you can prep the filling and glaze while the pastry shells bake. Then it’s just a matter of assembly and letting the glaze set up!
You’ll have elegant homemade eclairs in no time and people will be so impressed that you made them!
For more yummy pastries, check out:

Chocolate Eclair Recipe
Ingredients
Pâte â Choux
- 1 cup all-purpose flour
- 1 tbsp sugar
- 8 tbsp butter
- 4 eggs
- 1 cup water
- 1/2 tsp salt
Vanilla Bean Pastry Cream
- 1/4 cup all-purpose flour and 2 tbsp
- 6 tbsp sugar
- 2 tbsp butter
- 3 egg yolks
- 1 1/2 cup whole milk
- 1 tbsp vanilla bean paste
Chocolate Glaze
- 4 oz semi-sweet chocolate
- 1/2 cup heavy whipping cream plus more if needed
- pinch sea salt
Instructions
- Preheat oven to 400˚F. Line a baking sheet with parchment paper, set aside.
- To make the pâte â choux, place a medium size saucepan over low heat. Add butter, sugar, water and salt, stirring frequently. Turn heat up to a low boil, remove from head and add in flour. Stir vigorously until the mixture forms a thick paste and no flour pockets remain. Place over medium heat and cook for 1-2 minutes stirring constantly to prevent burning (a thin film might form on the bottom of your pan).
- Place hot paste into the bowl of a stand mixer fitted with the paddle attachment. Beat on medium speed for 2 minutes until it becomes slightly cooler. Then add the eggs one at a time until incorporated. The mixture will look shiny and will stick to the sides of the bowl. Beat for an additional 2 minutes on medium. Scoop dough into a large piping bag fitted with a large tip (a ½” in diameter). Pipe 4″-5″ logs onto the prepared baking sheet, spacing each two inches apart to prevent spreading and baking into each other. Using a pastry brush, gently and lightly coat each log with the beaten egg wash.
- Place in the oven and bake for 20 minutes. After 20 minutes, open the oven, rotate the pan and reduce the heat to 350˚F, bake for an additional 20 minutes. Reduce oven heat to 300˚F and bake for 20 more minutes to allow the pastry shells to dry out. That makes a total of 60 minutes or 1 hour at three separate temperatures. Remove from the oven and allow to cool for 20 minutes.
- Meanwhile to make the pastry cream, in a large mixing bowl, combine egg yolks and sugar, whisking until combined. Pour milk into a medium saucepan over medium heat, bring to a low boil then add the flour. Gradually pour the hot milk into the egg/sugar mixture to temper it, whisking constantly to prevent the eggs from scrambling. Return the mixture to the saucepan set over medium heat, add vanilla bean paste and butter, cook the mixture until it becomes very thick. Pour through a mesh sieve and set over an ice bath to cool (whisk for about 5 minutes or so). Store in the refrigerator until needed.
- When the pastry shells have cooled, poke three holes into their bottoms. Place pastry cream into a large piping bag fitted with a small round tip and fill each hole. Once the shells are filled, heat the heavy whipping cream for the glaze in the microwave for 30 seconds. Stir in semi-sweet chocolate and salt. Dip each pastry into the chocolate glaze swirling to remove any excess chocolate. Set on the baking sheet and place in the refrigerator to set for about 30 minutes.
Video
Nutrition
Nutrition information is automatically calculated, so should only be used as an approximation.



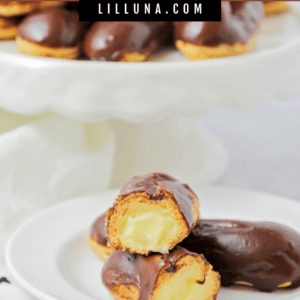
I love getting eclairs, but these are better, since I can make them at home! Love the creamy middle!
I have been trying to perfect these as well! Thank you for the helpful tips and recipe! Mine turned out perfectly this time!