This post may contain affiliate links. Please read our disclosure policy.
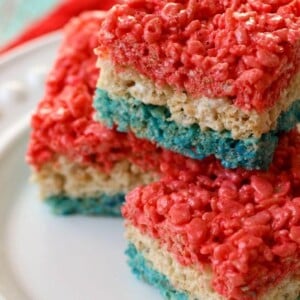
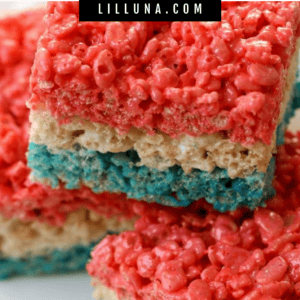
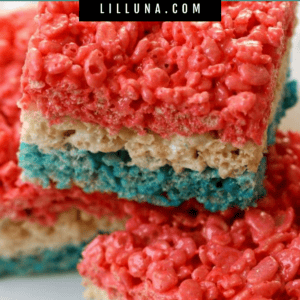
Delicious, simple and quick 4th of July Rice Krispie Treats are always a hit, and are festive for any patriotic occasion.
When we are looking for a fun and festive treat for Independence Day, we also like to make our 4th of July Cookies and American Flag Cake.

Patriotic Rice Krispie treats
Whenever we need to make a last-minute treat, we always opt for Rice Krispie Treats, because:
- I always have the ingredients on hand and
- They are SO easy and yummy!!
I used some red and blue food coloring to create these patriotic layers, and I love how these 4th of July rice krispie treats turned out!

How to Make 4th of July Rice Krispie Treats
- PREP. Separating your cereal and marshmallows into three (2 cups of rice krispies, and about 2 cups of marshmallows). You’re going to make one layer at a time.
- MARSHMALLOWS. Put the marshmallows in microwave safe bowls, and add 1 Tbsp margarine to each. Microwave one at a time for a few minutes until the marshmallows start to expand. Make sure they don’t overflow!
- DYE. In one bowl, mix in blue food coloring, and mix red in another (food coloring gel will be more vibrant). Add 2 cups of rice krispies to each bowl and stir with a rubber spatula until all the cereal is well coated.
- ASSEMBLE. Layer the cereal in a glass baking dish in whatever order you like (we started with blue, white, then red). To press the layers in evenly, you can use a sheet of wax paper on top of the marshmallow covered cereal, and then press with your hands. That way your hands don’t get so messy and the rice krispies won’t stick to you.
- COOL. Let all the layers cool before cutting into squares. Enjoy!

Tips + Variations
- Mini Marshmallows: Use normal sized or mini marshmallows as long as you have the amount the recipe calls for in each separate bowl.
- Pan Size: I use an 8×8 or a 9×9 glass pan. You can use 9×13, but the treats will be thinner. You can also double the recipe and use a 9×13 pan for more thick rice krispie treats.
- Shapes: Once the layers are cooled, use cookie cutters once the layers are cooled to cut out different shapes. I think stars would be fun for the 4th of July!
- To cook the marshmallows, I prefer the ease of microwaving the marshmallows, but if you would rather use the stove, by all means, you can! I would still recommend doing the three layers separately, that way you ensure each layer has the same amount of marshmallow coating.

Storing Info
STORE Fourth of July Rice Krispie treats in an airtight container, but only for about 2-3 days. Try and keep them in a container that will fit all of them just right, without much excess air. The more open space, the more likely they are to dry out.
Store them at room temperature and not in the fridge. Sticking a piece of sandwich bread into the container will help keep the rice krispie treats soft.
For more patriotic treats, check out:
- Patriotic Trail Mix
- American Flag Cake
- Red White and Blue Cake
- Patriotic Poke Cake
- 4th of July Cookies
4th of July Rice Krispies Treats
Ingredients
- 6 cups Rice Krispies Cereal (divided)
- 16 ounces marshmallows (divided)
- 3 tablespoons butter (divided)
- Food Coloring (red and blue/turquoise – I like Betty Crocker Gel Food Colors because the colors are brighter)
Instructions
- Gather your supplies and divide the Rice Krispies and marshmallows in three for the three layers (2 cups Rice Krispies and about 2 cups marshmallows for each layer).
- Add 2 marshmallows to a microwave safe bowl along with 1 tablespoon of butter for a few minutes or until they start to get big and almost touch the top of the microwave. Take them out, stir well and add the food coloring. (We started with the blue, then no food coloring and then the red).
- Then add 2 cups of Rice Krispies and stir well. Press into well greased 9×9 pan (a 9×13 works but makes thinner treats).
- Repeat with no food coloring and then the red food coloring layer. Let set and ENJOY!
Nutrition
Nutrition information is automatically calculated, so should only be used as an approximation.

I wasn’t able to start making these because the directions are unclear. Please consider revising them. It says to add two marshmallows, just 2? Or two cups? Super confusing when comparing to the ounces of ingredients listed.
Thank you for catching that, it should be 2 cups of mini marshmallows, and we will take a closer look at the directions to make them clearer!
I’m not sure what I did wrong but do not use a 9×13! You almost need a very small cake pan that’s more deep. My first set was so thin, they almost weren’t edible. When I was heating up the second round of mallows and butter, the butter completely burned. Or the marshmallows. I’m not sure which one but nonetheless, they burnt! Save yourself time and just buy the red and blue Rice Krispies and do it the normal way.
Thanks for the feedback and for giving the recipe a try!
Use a 9×13 glass pan but double the recipe. Melt the butter and marshmallows on the stove, stir until completely melted. Use Pam baking spray on your hands and stirring spoons so it doesn’t stick to your hands as much.