This post may contain affiliate links. Please read our disclosure policy.
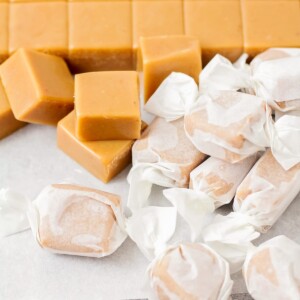
Buttery, soft, and chewy homemade caramel candy is the perfect treat to easily wrap in wax paper and gift to friends and family.
We love to add these homemade caramels to our neighbor treat plates along with Christmas Crack and Snowball Cookies. Everyone loves them!

Who Doesn’t Love Caramel?!
Have you ever tried a homemade caramel recipe before?
They’re one of those holiday treats that I’m always looking forward to, and they are a perfect candy for filling Christmas goodie plates.
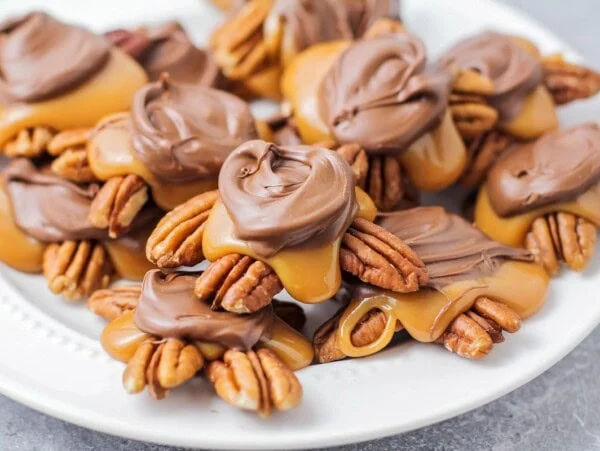
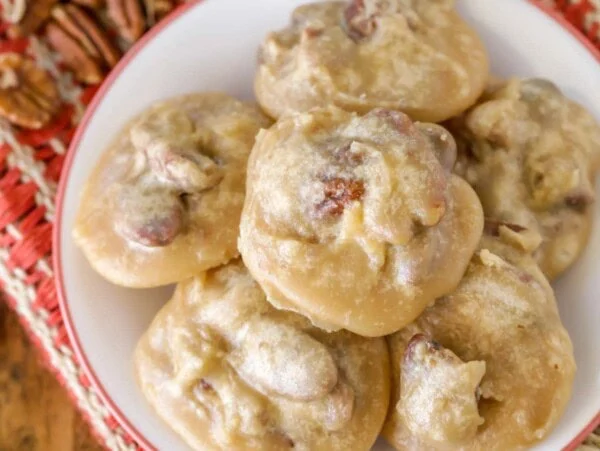
For more holiday goodie plate treats, try our Pecan Pralines, Rolo Pretzel Turtles, and White Choclate Cookie Dough Fudge. You’ll be a neighborhood favorite in no time!
Why we love them:
- Delicious! We love the buttery, creamy taste of these soft caramels.
- Easy. While they do take time, they’re quite simple and worth the effort
- Perfect for sharing. Cut them into pieces and wrap them in wax paper to gift during the holidays.


Ingredients
- heavy whipping cream
- white sugar
- light brown sugar – packed
- salt
- butter – unsalted (but salted can work as well)
- corn syrup – Use light corn syrup (colorless and moderately sweet), or dark corn syrup (provides a bit of color as well as a sweeter slightly smoky flavor).
- evaporated milk – Do not use sweetened condensed milk.
- vanilla extract


How to Make Caramel Candy
- PREP. Line a 9×13-inch pan with parchment paper and set aside.
- COMBINE. Add heavy cream, sugars, salt, butter, corn syrup, and evaporated milk to a medium pot over medium heat.
- HEAT. Attach a candy thermometer, and while whisking constantly, cook until temperature starts to boil and reaches 250°F (about 30 minutes).
- COOL. Once the mixture reaches 250°F, remove the pot from heat and stir in the vanilla.
- Pour the mixture into the parchment lined pan and let cool completely.
- Once cool, cut caramels with a sharp knife into squares (can get about 80 large caramels) and wrap in wax paper for storage.
Pro Tip!
Spray your baking pan and line it with wax paper. This makes it easy to lift the entire block of soft caramel candy out to be cut once set.


Don’t Have a Candy Thermometer?
Use the cold water test. All you need is a bowl of ice water. When you feel the caramel is ready, use a spoon to drop a dollop of caramel into a bowl of ice water.
- Hard ball stage: The caramel should solidify enough to roll it into a ball. If it is at the soft-ball stage, it won’t hold a shape, and needs to cook longer.
- Hard crack stage: If it solidifies to hard candy and breaks when forming a ball, it has cooked too long and will have a hard texture.

Recipe Tips
- Prep. Making caramels is all about timing. Pre-measure ingredients so they are ready to go from step to step.
- Gritty caramel occurs due to undissolved sugar crystals. Stirring frequently helps the sugar dissolve in the sauce.
- Variations.
- dip in melted chocolate (white or dark)
- sprinkle sea salt on top
- adding toasted coconut to the top
- add chopped nuts on top or mix them in at the same time as the vanilla

Storing Caramels
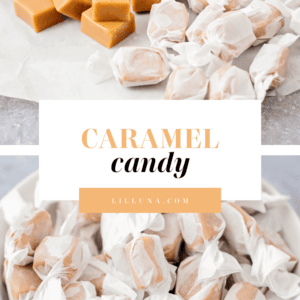
Wrap each caramel in wax paper. Be sure to cut the wax paper big enough that you can twist the ends closed, like a tootsie roll.
- STORE. Wrapped caramels can last at room temperature for about 2 weeks. Store unwrapped caramels in an airtight container, separating each layer with wax paper.
- FREEZE homemade caramel candy for 3-6 months. When ready to eat, remove them from the freezer and allow them time to thaw before serving.
- Sharing. This recipe mixes up quite a large batch, definitely enough to share with a friend or two. Some fun gift wrap ideas include:
- Fill a small mason jar and tie a festive ribbon around the top.
- Buy and fill up a holiday tin.
- Fill a brown lunch bag, fold over the top, and tie it with raffia.
- Use festive cardstock to cut out a gift bag.

For More Candy Recipes:
Turtles Candy
1 hr 25 mins

Toffee Recipe
2 hrs 25 mins
Pecan Pralines
25 mins
Butter Mints Recipe
13 hrs 12 mins
Caramel Candy Recipe
Video
Ingredients
- 1 pint heavy whipping cream
- 2 cups white sugar
- 1 cup packed brown sugar
- 1/2 – 1 teaspoon salt
- 1 cup butter
- 1 cup corn syrup
- 1 cup evaporated milk
- 1 teaspoon vanilla extract
Instructions
- Line a 12 x 15-inch rimmed pan with parchment paper and set aside.
- Add whipping cream, sugars, salt, butter, corn syrup, and evaporated milk to medium pot over medium heat.
- Attach a candy thermometer, and while whisking constantly, cook until temperature reaches 250°F (about 15 – 25 minutes).
- Once the mixture reaches 250°F, remove the pot from heat and stir in the vanilla.
- Pour the mixture into the parchment lined pan and let cool completely.
- Once cool, cut caramels into squares (can get about 80 large caramels) and wrap in wax paper for storage.
Notes
- STORE. Wrapped caramels can last at room temperature for about 2 weeks. Store unwrapped caramels in an airtight container, separating each layer with wax paper.
- FREEZE homemade caramel candy for 3-6 months. When ready to eat, remove them from the freezer and allow them time to thaw before serving.
- Sharing. This recipe mixes up quite a large batch, definitely enough to share with a friend or two. Some fun gift wrap id
- Fill a small mason jar and tie a festive ribbon around the top.
- Buy and fill up a holiday tin.
- Fill a brown lunch bag, fold over the top, and tie it with raffia.
- Use festive cardstock to cut out a gift bag.
Nutrition
Nutrition information is automatically calculated, so should only be used as an approximation.


I changed this recipe to 1 stick of butter and 1 can of evaporated milk, as 2 sticks of butter was too much for me. Delicious!
I’m happy to hear your adjustments produced a delicious result!
I’ve made some using sweet condensed milk instead of the whip cream. Then I used a mixer to whip up some powdered sugar, cream cheese, milk, and cinnamon. I added it to the recipe and now I have all of my friends, family, and even kids friends asking me to make them some cinnamon caramels. I bet it would also taste good coated in chocolate. I may try that with a few on my next batch.
I am making this today and couldn’t be more excited
Hope you enjoy!!
This was an easy and delicious recipe. I’m glad most of what was made was given to others because I almost ate rest by myself.