This post may contain affiliate links. Please read our disclosure policy.
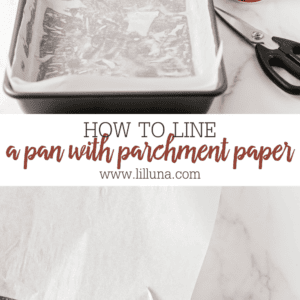
To prevent baked goods from sticking you’ll want to know how to line a pan with parchment paper! Use these simple steps.
The perfect Homemade Brownies and Easy Chocolate Cake require a lined pan for no sticking. Learn how to line a pan with parchment paper with these simple tips and tricks.

Key to Prevent Sticking!
Some baked goods, like cakes, tend to stick to the baking pan more than others do, in this case, I prefer to line the pan with parchment paper.
Not only does it help ensure that the baked recipe is removed intact, but the parchment paper acts as an insulator and helps keep a thicker crust from forming on baked goods that are more delicate. And bonus it makes for easy clean up.
Pay attention to the recipe instructions. Some baked goods, like angel food cake, need an ungreased and unlined pan in order for it to rise properly. While other items bake just fine, lining the pan simply makes it easier to remove the treat without it sticking to the pan.
When lining a pan, do not use wax paper as it can melt, or aluminum foil since it does not have the same nonstick properties that parchment paper has.

How to Line a Pan With Parchment Paper
When you don’t want a cake to stick use these simple steps! Here are the steps for square or rectangular pans:
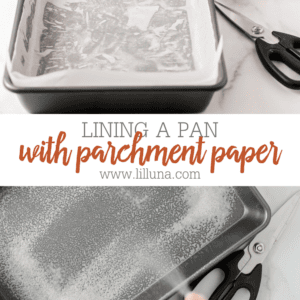
PARCHMENT PAPER. Cut the parchment paper to fit the baking pan.
OIL. Spray the pan with cooking spray. This helps hold the parchment paper in place.
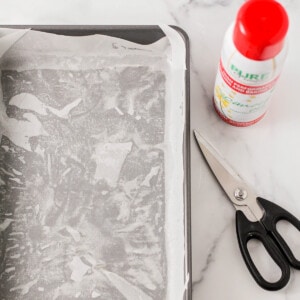
LINE. For each corner, use scissors to snip a 1-2 inch (depending on the height of the sides) cut from the corner toward the center.
Press the piece of parchment paper into the pan. Starting in the center smooth the parchment paper from the center outward and along the creases. When you get to the corners of the pan, overlap the flap where the cut edge is.

Parchment Paper Size
If your pan has 1-inch tall sides, then add 2 inches to the length and 2 inches to the width. If the sides of the pan are 2 inches in height then add 4 inches to the length and 4 inches to the width.
- 9x13x2 pan cut a piece of paper that is 13×17 inches
- 8x8x2 pan cut a piece of paper that is 12×12 inches
- 9x9x2 pan cut a piece of paper that is 13×13 inches
Pro tip. You can buy parchment paper sheets that are already precut to fit a 9×13 baking pan. Simply use a pair of scissors to cut each corner and it’s ready to be pressed into the pan and overlap the parchment flaps in each corner.

For a Bread Loaf Pan
Use these tips to easily line a bread pan!
PARCHMENT PAPER. Cut a piece of parchment paper that is longer than the length of the loaf pan. The width should be wide enough to cover the bottom and sides of the pan, with some excess to hang over the edges.
(A standard bread loaf pan is 8½ x 4½ x 2½ so you will need to cut your paper 8½ x 12 inches so you have enough for an overhang)
OIL. Grease the inside of the pan with cooking spray. This will help the parchment paper stick to the pan.
LINE. Place the parchment paper into the pan, making sure it completely covers the bottom and sides. The excess paper should hang over the edges of the pan.
Press the parchment paper firmly against the sides of the pan, ensuring it adheres well to the greased surface.

For a Round Cake Pan
When baking round cakes you typically only line the bottom of the pan.
PARCHMENT PAPER. Place the cake pan on a sheet of parchment paper. Use a pencil to trace around the bottom of the pan and cut the circle out of the paper.
OIL. Grease the pan with cooking spray. (This helps hold the parchment paper in place.)
LINE. Press the parchment paper into the bottom of the pan and smooth it out.

Recipe FAQ
If you don’t have parchment paper do not use wax paper. You can use a silpat mat or aluminum foil but you will need to spray the top of the foil to make it nonstick.
It depends on the specific baking instructions provided in the recipe. Often a recipe will direct you to grease a pan in this case you can line the pan with parchment paper. Some recipes, like angel food cake, require an ungreased pan so do not line the pan with parchment paper. While other, recipes only require lining the bottom of the pan, not the sides.
If you try to avoid using any linings, there is a tried and true method that bakers have been using for a long time. That is greasing the pan with butter or shortening and then adding a light layer of flour.
Recipes I Often Line the Pans For:
- Pumpkin Roll
- Chocolate Banana Bread
- Blondies
- M&M Brownies
- Key Lime Pie Bars
- Lemon Bars
- Vanilla Cake
- German Chocolate Cake
How to Line a Pan with Parchment Paper
Video
Ingredients
- cooking spray
Instructions
- Cut the parchment paper to fit the baking pan.
- Spray the pan with cooking spray. This helps hold the parchment paper in place.
- For each corner, use scissors to snip a 1-2 inch (depending on the height of the sides) cut from the corner toward the center.
- Press the piece of parchment paper into the pan. Starting in the center smooth the parchment paper from the center outward and along the creases. When you get to the corners of the pan, overlap the flap where the cut edge is.
Nutrition information is automatically calculated, so should only be used as an approximation.