This post may contain affiliate links. Please read our disclosure policy.
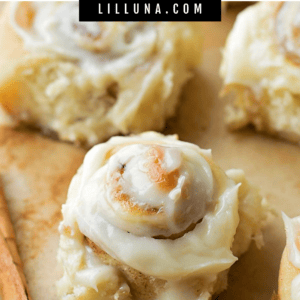
Give these 90 minute Mini Cinnamon Rolls a try and you’ll fall in love with their tender, sweet centers and irresistible cream cheese frosting!
If you ever need a variation of your classic Cinnamon Rolls, you can always try this bite sized version, or even our Maple Bacon Cinnamon Rolls!

Ready in Less than 90 Minutes!
I don’t know about you, but I absolutely adore cinnamon rolls! We make them for special occasions and they’re always the first thing to disappear. Instead of making big cinnamon rolls like usual, we decided to try Mini Cinnamon Rolls!
These are perfect for parties because one batch makes two dozen bite-size rolls. It’s the perfect gooey finger-food. But let’s be honest, you don’t need an excuse to make these yummy rolls—they’re also a great weekend breakfast treat.
They only require a few extra minutes of prep work than regular cinnamon rolls (you’ll use a pizza cutter to cut out strips vs. doing one big roll and slicing it), which is totally worth it, trust me! Plus, these mini cinnamon rolls are ready to go in a little under 90 minutes… not too shabby, right?

How to Make Them
DOUGH. In a large bowl or the bowl of a stand mixer, combine the flour, yeast and salt. In a small microwave safe bowl (or glass measuring cup), combine the sugar, butter, water and milk. Heat in the microwave until the mixture is hot and the butter is almost melted (it took about 1 minute on HIGH in my microwave). Let the mixture come down to 120 degrees. Gradually add the milk mixture into the flour mixture. Add the egg and mix until a soft and sticky dough forms.
OVEN. Preheat the oven to 200 degrees. Lightly grease a 9×13 baking dish.
KNEAD + REST. If using a stand mixer, switch to the dough hook and set on the lowest mixing setting for 4 minutes or until the dough becomes elastic or knead by hand on a lightly floured surface for 3-4 minutes. Cover the dough with plastic wrap and allow it to rest on the counter for 10 minutes.
FILLING. Once the dough has rested, roll it out on a lightly floured surface until it measures a 24×16 inch rectangle. Prepare the filling by combining all of the ingredients in a small mixing bowl except for the butter. Spread the butter over the top of the rolled dough, then cover with the filling.
CUT + ROLL. Using a pizza roller/cutter, to cut the long rectangle in half, and then each half into twelve pieces to make 24 strips. Roll each up into a tight roll.
Place the rolls into the prepared baking dish and gently place a piece of aluminum foil over top.
RISE. Turn OFF your oven and place the covered rolls inside to rise for 45 minutes.
BAKE. Remove the rolls from the oven and turn ON your oven to 375 degrees. Once heated, remove the foil and bake the rolls for 16-22 minutes or until the centers are lightly golden brown in color.
FROST. Remove from the oven and allow to cool for a few minutes before frosting. While rolls are cooling, prepare the frosting by combining all of the ingredients in a small mixing bowl and beating by hand or with a hand mixer until smooth. Spread over the tops of the rolls.

Tips for making Mini Cinnamon Rolls
Keep these tips in mind when making these delicious mini treats!
- After you heat the milk, sugar, butter, and milk in the microwave, let the mixture cool to about 120°F before gradually adding it to the flour mixture.
- If you aren’t using a stand mixer, just knead the dough by hand on a lightly floured surface for 3-4 minutes until it becomes elastic.
- When kneading the flour by hand just use a little flour to keep it from sticking to the counter. Too much added flour can cause the rolls to be dense and harder when baked.
- You can use all purpose or bread flour in the recipe.
- After kneading the dough, make sure you let it rest for the full 10 minutes.
- Wait to frost the mini cinnamon rolls until they’ve cooled.
Variations & Troubleshooting
Variations: My family loves these rolls as they are so we don’t often make any changes, but you certainly can. You can easily change the cream cheese topping for a simple vanilla glaze or a dusting of powdered sugar. You can also switch up the spices and include some of your favorites like nutmeg or use a pumpkin spice. Finally, if you are one of those odd people ? who like raisins in their rolls you can sprinkle some on before you roll them.
Why didn’t my rolls rise? These are some of the easiest rolls ever! However, with baking sometimes even the smallest change can cause problems. Here a couple common issues that can cause your rolls not to rise properly.
- Expired yeast or killing the yeast by using too hot/too cold water.
- Not allowing enough time for the dough to rise.
- The oven was hotter than 200°F when proofing your dough. If the oven is too hot the rolls will start baking which halt the rise. If you’re worried this will happen simply heat the oven to 200°F then turn it off while the rolls are rising. The oven will stay hot long enough for the rolls to rise.

Making Ahead & Storing Cinnamon Rolls
Make ahead: You can make and shape the dough ahead of time then store it to be baked later. I do have to caution that they don’t seem to rise quite as well this way as they do when baked right away. Even so, they still come out quite deliciously. You can keep the shaped rolls in the fridge or put them in the freezer.
- Fridge: Place the shaped rolls in a baking pan. Spray one side of plastic wrap with cooking spray and cover the rolls with the sprayed side down. (this will help keep the dough from sticking to the plastic when they rise.) Store in the fridge overnight. The dough will rise, but much more slowly. When you’re ready to bake them, remove the pan from the fridge and let the dough rise on the counter for 30-45 minutes.
- Freezer: Use a freezer safe baking pan to place your rolls in. Cover with plastic and then again with foil. Freeze for 1-2 months. When you’re ready to bake remove the foil and plastic. Spray one side of the plastic and then put it back on with the spayed side down. Allow the rolls to rise for several hours. You can speed up the rise time by placing the rolls in the oven. Preheat it to 200°F then turn it off. Don’t use a plastic cover instead place a bowl of hot water in the oven along with the rolls. Allow the rolls to thaw and rise. They should be bigger than their original size but not double in size.
Storage: You can store these frosted or unfrosted in an airtight container at room temperature for 3-4 days. They can also be frozen for up to 6 months. When freezing them be sure to wrap them in plastic wrap and then in foil or place them in a freezer Ziploc.
Reheat: Allow the frozen rolls to thaw and then reheat them in the oven. Preheat it to 275⁰F and heat for 10-15 minute or until warm throughout. You can also reheat them in the microwave. Just eat them before they cool otherwise they get pretty hard and stale.

The 90 minutes it takes to make these babies is TOTALLY worth it. I think your family will agree. 😉
For more cinnamon roll recipes, try:
- Cinnamon Roll Waffles
- Maple Bacon Cinnamon Rolls
- Super Soft Cinnamon Rolls
- Cinnamon Roll Bites
- One Hour Cinnamon Rolls
- Nutella Cinnamon Rolls

Mini Cinnamon Rolls Recipe
Equipment
Video
Ingredients
Cinnamon Roll
- 2¾ cups all-purpose flour
- ¼ cup sugar
- 2 tablespoons unsalted butter
- 1 egg
- 1 tablespoon instant yeast
- ½ cup water
- ¼ cup whole milk
- 1 teaspoon salt
Filling
- ¼ cup butter, melted
- ⅔ cup brown sugar
- 1¼ tablespoons cinnamon
- 1 teaspoon vanilla extract
Cream Cheese Frosting
- 4 ounces cream cheese, room temperature
- ¼ cup unsalted butter, room temperature
- 1 cup powdered sugar
- 1-2 tablespoons whole milk, (to desired thickness)
- ½ teaspoon vanilla extract
Instructions
- In a large bowl or the bowl of a stand mixer, combine the flour, yeast and salt.
- In a small microwave safe bowl (or glass measuring cup), combine the sugar, butter, water and milk. Heat in the microwave until the mixture is hot and the butter is almost melted (it took about 1 minute on HIGH in my microwave). Let the mixture come down to 120 degrees. Gradually add the milk mixture into the flour mixture. Add the egg and mix until a soft and sticky dough forms.
- Preheat the oven to 200 degrees F. Lightly grease a 9×13 baking dish.
- If using a stand mixer, switch to the dough hook and set on the lowest mixing setting for 4 minutes or until the dough becomes elastic or knead by hand on a lightly floured surface for 3-4 minutes. Cover the dough with plastic wrap and allow it to rest on the counter for 10 minutes.
- Once the dough has rested, roll it out on a lightly floured surface until it measures a 24×16 inch rectangle. Prepare the filling by combining all of the ingredients in a small mixing bowl except for the butter. Spread the butter over the top of the rolled dough, then cover with the filling. Using a pizza roller/cutter, to cut the long rectangle in half, and then each half into twelve pieces to make 24 strips. Roll each up into a tight roll.
- Place the rolls into the prepared baking dish and gently place a piece of aluminum foil over top. Turn OFF your oven and place the covered rolls inside to rise for 45 minutes.
- Remove the rolls from the oven and turn ON your oven to 375 degrees F. Once heated, remove the foil and bake the rolls for 16-22 minutes or until the centers are lightly golden brown in color.
- Remove from the oven and allow to cool for a few minutes before frosting. While rolls are cooling, prepare the frosting by combining all of the ingredients in a small mixing bowl and beating by hand or with a hand mixer until smooth. Spread over the tops of the rolls.
Nutrition
Nutrition information is automatically calculated, so should only be used as an approximation.


the cinnamon roll its self is great but absolutely no need for the yeast also the icing is pretty mid so find another recipe for that
If I want to measure the flour with grams (kitchen scale), should I do exactly 330 grams?
I’m making these tomorrow for a Christmas gathering on Sunday. Can I bake them completely and then store them in the fridge once cooled? It’s also an hour drive to my destination where I’ll reheat them and apply the frosting. What’s the best way to go about this? TIA!
Bake completely and let them cool fully. Store in the fridge in an airtight container or wrapped tight so they don’t dry out. You can warm them in the oven at low temp (about 275F) for 10 to 15 minutes or until warm. Once warm, spread on the frosting so it gets all melty and yummy right before serving.
The dough recipe calls for butter. Is that salted?
I noticed you specified unsalted butter for the frosting. Thanks!
I used unsalted for the rolls. Happy Baking!
Is the 24×16 the roll out suze for the single batch recipe?
Yes, for the one batch of mini cinnamon rolls the dough should be rolled out to 24 × 16 inches.
Can I bake them and then freeze them to warm up at a later date? What would that process look like? I need to make x200 for a Christmas Festival.
Yes, you can bake the rolls ahead and freeze them. Let them cool completely, then freeze them unfrosted in an airtight container or freezer bag with parchment between layers. When ready to serve, thaw overnight in the fridge, cover loosely with foil, and warm in the oven at 300°F for about 10 minutes. Add the frosting after reheating so it stays soft and fresh.
For the yeat do you not have to activate it? Or do you use instant yeast
This recipe uses instant yeast, so you do not need to activate it separately first. If you only have active dry yeast, you would want to dissolve it in the warm milk mixture first and let it sit for a few minutes until foamy before mixing it in.
Can you divide and freeze?
Yes, you can divide and freeze them! After shaping the rolls, place them on a baking sheet to flash-freeze, then transfer to an airtight container or freezer bag. When ready to bake, thaw overnight in the fridge, let rise until puffy, and bake as directed.
I just made these and they are delicious!! ! I had to add another few tablespoons of flour to make the dough more manageable in my climate right now (which I expected), and poured warm heavy cream on top right before they went in the oven to bake (a trick I’ve recently learned). Everything else I followed to the T and I couldn’t be happier with how they turned out!! This will replace my go-to recipe.
Great idea adjusting for your climate and adding warm cream before baking. That sounds like the perfect touch!
How much cream did you add?
Hi Natalie,
If I am making the dough ahead of time, do I skip the proofing in the oven step or do I proof in the oven and then store in the fridge overnight? Thank you!
I followed the recipe step by step. But my buns didn’t rise at all!
I’m so sorry to hear that. It really is a letdown when a recipe, especially a yeast-based one, doesn’t turn out.
The only thing I can think of is that the yeast wasn’t activated for some reason. Perhaps the wrong type of yeast was used, or it was too old, or maybe the room temperature was too cool for the dough to rise? I’m not entirely sure without more details.
I do have a “How to Activate Yeast” post https://lilluna.com/how-to-activate-yeast/ that you can read through, and I really hope you’ll give the recipe another chance!
Are we sure the dough should be 24 inches when rolled out? That seems off especially from the picture
Can you make these in bread machine ?
A full dough cycle on a bread machine uses a significantly longer kneading and rise time than this recipe calls for, which could affect the original texture. To adapt: add the liquid ingredients to the bread machine, then the dry ingredients, and finally make a well in the flour for the yeast. Use the ‘Dough’ setting to mix the ingredients, but pause the machine after only 8 minutes of kneading. Then, let the dough rest for 10 minutes before shaping into rolls.
How do you get them to not pop up in the middle during baking?
My middles pop up too! But, if you are worried they have risen too much…If the oven is too hot the rolls will start baking which halt the rise. If you’re worried this will happen simply heat the oven to 200°F then turn it off while the rolls are rising. The oven will stay hot long enough for the rolls to rise.
At what stage should I freeze these? Before I bake?
These are amazing!!! Way better than any store bought.
La caca est verry delishous est la butt cheeks
Oui Oui
These were a hit! Followed the recipe almost exactly. The only thing I didn’t do was add milk to the frosting (mine didn’t need it). Will definitely make again!
Would appreciate more detail on cutting the rolls. If you roll the dough into a 16 x 24 rectangle and cut 24 one inch strips. they would be 16″ inches long. But in the picture it looks like you cut the
rectangle in half and maybe made each roll 2″ x 8″. Is that correct? I did not rate them because I have not made them yet.
Yes, you could cut the rectangle in half and then make 12-13 cuts (which would result in 24-26 total pieces), like the picture shows. Hope you enjoy the cinnamon rolls!
Can i use regular yeast instead of instant? I’m guessing it’ll just take longer to rise? And still 1 T of reg yeast (Also is the proofing time just until they double in size?) thanks!!
Yes!! It might just take a bit longer, but going with the double in size rule is perfect.
Great recipe. Can I bake in muffin tins for individual servings on a buffet?
Yes, you could!
Under the filling, it says 1 tbsp cinammon and 1 tsp (blank) what is the missing ingredient?
Oh thank you for catching that. No missing ingredient, looks like we just need to take that off. The 1 tsp is the vanilla which you can see on the next line. We’ll get it updated!
HELP! What is the best way to store these? My daughter and I just made them and they are amazing! Just want to make sure they keep!💕
Oh I’m so glad you enjoyed them!! You can store these frosted or unfrosted in an airtight container at room temperature for 3-4 days. They can also be frozen for up to 6 months. When freezing them be sure to wrap them in plastic wrap and then in foil or place them in a freezer Ziploc.
Thank you so much! We have made them 3 times! They are amazing!
I needed to feed a crowd at church, and these were a hit! I’ve never read a recipe for cinnamon rolls where you add vanilla to the filling, so I tried it and it kicked it up a notch in richness… wow! Thanks for posting the recipe.
These were the worst rolls I’ve ever made – followed recipe to a tee. I was timid about a no rise recipe but I thought I’d give it a try – never again
I’m sorry to hear you didn’t have a good experience with the recipe. Thanks for the feedback and for giving it a try!
Can you make these regular sized rolls instead of mini? Is there anything that needs to be changed except for making them bigger?
Yes you could! We also have a cinnamon roll recipe for regular size rolls, if you want to check that out: https://lilluna.com/cinnamon-rolls/. And this one is for one-hour cinnamon rolls (also very delicious!!) https://lilluna.com/one-hour-cinnamon-rolls/
This recipe is a keeper. I made a double batch for a church brunch. It took me a little longer since it was a new recipe to ms. Totally forgot to add the eggs and didn’t have whole milk, so I used half and half. And yet, they were still amazing. Your recipes are the bomb! ❤❤❤
we
No pictures were attache here regarding how to cut the strips. Had to YouTube it. But overall they turned out well.
Thanks for the feedback. Glad to hear the cinnamon rolls turned out!!
Can I use active dry yeast instead of instant?
My first time baking cinnamon rolls, and certainly not the last! I baked these scrumptious delicacies yesterday, and I didn’t have enough for my friends and family, especially because it’s almost Christmas, so I decided to bake another batch! Not difficult to make, and is so delicious. Gone in less than a day after baking! Totally recommended. (.^.)
Wonderful recipe!! I had never made cinnamon rolls before but had to cook for 150 college students today and decided to give it a try to go with the chili. I made 3 double batches and came out with about 150. They were incredible. I usually have issues hand kneading with a new recipe but this one worked perfectly as stated. Thank you!!!
You’re welcome! I’m so glad the recipe worked well, especially to make that many! So glad they were a hit!
Can I make the dough and save it overnight then put the cinnamon spread on it the next day to bake?
You should be able to assemble completely, put in the pan cover in wrap and foil then do the final proof in the refrigerator overnight (no more than 12 hours though.) In the morning, remove rolls from the fridge and allow to come to room temperature and rise for 1 ½ to 2 hours, or until doubled. Then bake as instructed above.
In the recipe, it states “1 tbsp cinnamon and 1 tsp”. What is missing after the”1 tsp”? or is the “1 tsp” just a stray typo?
Just a typo! Thanks for catching that.
When I mix the first time can I still use the electric mixer?
You could try, up to the point where you switch to the dough hook. You can also just do it by hand and use a wooden spoon or danish dough whisk.
Soo cute and delicious
Curious as too what, in the filling ingredients, comes after 1 tsp of Cinnamon and 1 tsp??? then comes on the next line 1 tsp of Vanilla? Was that just a misprint or is there a missing ingredient?
Just a misprint! Thanks for catching that. We’ll get it updated.
I made it and both of my kids loved them so much and that’s saying something .I’m taking them to soccer as a snack now
not just for my kids but the whole team .Plus my husband loved them to.
Same my kids loved them too.
Nice!! I hope the team likes them! Thank you!!
TOOK MUCH LONGER LIKE 25 MINS TO BAKE-GOOD
Super fantastic and super delicious!
christmas is coming up and i want to make these, am I able to use active dry instead of instant?
Yes! It may take a bit longer to rise initially, but they can be interchanged.
Just ok.
These were absolutely delish!!! Whole family (20 people) were raving. I just mixed all of the filling together cause it’s easier for me but also double the filing cause it’s delicious 🙂 thanks for the recipe!
Do I have to activate the yeast before making the dough? Or can I just use dry yeast by itself?
I can’t wait to try these for Easter morning! I have never made homemade from scratch cinnamon rolls before so I am a little hesitant but super excited! This may be a dumb question but when you say to mix the butter, sugar, milks, and water until the butter is almost melted and then let it cool, do you mix all of this after heating and if so by hand or via mixer? Also when you then add the milk mixture and flour mixture and eggs, do you mix by hand or mixer. Thanks!!
Hi Haley! I hope that the cinnamon rolls turned out well. It’s always a little intimidating to bake from scratch, but hopefully this recipe was simple enough. 🙂 To answer your question (and you may have figured it out already) but I combine all those ingredients in a microwave safe bowl and just mix with a spoon. Then when I add that milk mixture to the flour, I do it in the mixer. However, you could totally do it all by hand and then just knead yourself rather than having the mixer knead for you. We’d love to hear how the cinnamon rolls turned out!
I hosted a small brunch for my mom-friends and needed a small treat for them and they ALL said that these were their favorite thing on the table! Thank you!!!
Can these be made ahead of time and frozen?
You bet! We have some tips on how to freeze and then how to cook after they have been frozen in the post. 🙂
We loved these mini rolls! They were super easy and my daughter thought they were adorable. We plan on making them again for a holiday breakfast.
LOVE these so much!! I made them for my son’s birthday and they all requested them for Christmas morning!
Haven’t made these yet, as I am confused with the directions. Says it makes 24. Cut the 16×24 into one inch strips. That means that you would have 24 16 inch strips that you would roll up. However, the picture shows 13 strips cut in half. That would make 26. How do I cut the rectangle to get the right strip dimensions?
Good question! You could honestly do it either way and the rolls would turn out delicious. I’d probably suggest doing what the directions say. Cut 24 16 inch strips. If you did end up cutting the 16 in side into long strips, then you could cut those in half like in the picture. But I’d suggest follow the directions in the recipe.
Love these!
The mini cinnamon rolls are the best..
So delicious!!!!!
Making these on Christmas morning — my go-to recipe for every special morning! Love it and so easy to follow!
Can you make the dough 3 days before hand and refrigerate it? Then bake them? Planning in making for my daughter’s bake sale but want to make sure she can help me prepare them
If you are refrigerating, I’d only recommend doing that overnight. I would recommend freezing them if you are making 3 days in advance. So follow all the steps up through step 5. Then freeze. When you are ready to bake, pull the rolls out and let them thaw and do the second rise on the counter for a few hours. Then pick up with step 7 and finish baking/frosting. There are a few more make ahead tips in the recipe post too. Hope you enjoy the rolls!
These were a big hit with the baseball team. I used them for a snack with a tag that said let’s keep rolling through the season! I think I need more practice baking… but everyone LOVED them!
Making these again for Christmas breakfast. Yum!
What’s not to love about cinnamon rolls?! I try lots ofCinnamon roll Recipes and this has quickly
Become a favorite! Ooey and gooey!
Delightful!! I brought these to mother/ son bowling a while back and I was the most loved mom there! I’ve made these time and time again and they are fail proof and always devoured!
These were wonderful! Had multiple people coming over and saying they were the best cinnamon rolls they’ve ever had. Great recipe, thank you!
You are welcome! I love to hear that! Thank you so much for letting me know!
I have made these and love them! I am wondering if it would be possible to make the dough and refrigerate/freeze it for when I want to make these in a pinch. Do you think that would work?
Thank you! You can make and shape the dough ahead of time then store it to be baked later. I do have to caution that they don’t seem to rise quite as well this way as they do when baked right away. Even so, they still come out quite deliciously. You can keep the shaped rolls in the fridge or put them in the freezer. Fridge: Place the shaped rolls in a baking pan. Spray one side of plastic wrap with cooking spray and cover the rolls with the sprayed side down. (this will help keep the dough from sticking to the plastic when they rise.) Store in the fridge overnight. The dough will rise, but much more slowly. When you’re ready to bake them, remove the pan from the fridge and let the dough rise on the counter for 30-45 minutes. Freezer: Use a freezer safe baking pan to place your rolls in. Cover with plastic and then again with foil. Freeze for 1-2 months. When you’re ready to bake remove the foil and plastic. Spray one side of the plastic and then put it back on with the spayed side down. Allow the rolls to rise for several hours. You can speed up the rise time by placing the rolls in the oven. Preheat it to 200°F then turn it off. Don’t use a plastic cover instead place a bowl of hot water in the oven along with the rolls. Allow the rolls to thaw and rise. They should be bigger than their original size but not double in size.
Just love your cinnamon bun recipe. I use the very dark brown sugar which gives it a caramel taste.I also use
my mixture of Garam Masala (this mixture i make from scratch I dont buy it ready made) plus the fine cinnamon which gives it that oriental flavour. I made some the weekend shared with the neighbour and family. Next time I double the amount because they are devine and not enough !!!
All the best
June
Sounds yum! I’m so glad you like these! Thank you so much!
Love your cinnamon buns delicious this is the third time baking them. I always like to present as gifts or share with neighbors. I love them but have to watch my diet.
Thanks for you great effort to share.
Best and kind regards
June
Awe, thank you so much!! They so make great gifts!
Tried. both me and my family loved it. thanks a lot for sharing the recipe?
You are so welcome 🙂 I am so glad your family liked it!
is this instant yeast?
Yes 🙂 Enjoy!!
Hi!
this may be a silly questions lol but, When you say to spread the butter overtop of the rolled dough, do you melt the butter first?
can’t wait to try!
Yes, melted 🙂 I sure hope you like them! Thank you!
Can i use bread flour for the all purpose flour?
You sure could 🙂 Enjoy!
THESE WERE SUCH A HIT!!!! I BARELY GOT TO EAT ANY. i MADE THE MISTAKE OF POSTING THESE ON SOCIAL MEDIA AND NEXT THING I KNEW ALL MY FRIENDS WERE SHOWING UP AT MY HOUSE TO TEST THEM OUT. WILL BE SAVING THIS RECIPE
Haha..I love that!! Thank you for sharing that!
Really yummy! 100% RECOMMEND. I think ACCIDENTALLY burnt mine a little bit so they are a bit dry but still taste amazing! I DIDN’T use the cream cheese icing instead i used a normal glaze icing and it still tastes really good. Really good, thanks for the recipe!
You are so welcome!! Thank you so much for saying that! Using a glaze icing is just as yummy 🙂
So perfect for any occasion. The right size and so delicious. You will love these perfect lIttle cinnamon rolls!
Cutting strips with a pizza cutter is a nice trick for these. I love how little and delicious these are.
Perfect for breakfast or for a yummy treat! These really are SO GOOD!
Mini cinnamon rolls are the best!! They really are the perfect size, where I don’t feel guilty eating the whole thing. They are so so & gooey!
Excellent recipe!! Will make again and again. Delish.
I was not able to get the dough rolled out thin large enough for The recipe, but Still made a ton of mini rolls. I baked them in a slightly smaller pan becAuse of this, but still turned out Fine.
So happy you liked the recipe! Thank you for trying it!
Best recipe ever! Mine came out delicious and PERFECT
I love to hear that! Thank you for letting me know that!
Hi, I made these rolls for my daughter birthday party ..they taste so delicious but my concern was that the dough turned out too hard and I even couldn’t even roll it out easily big enough to have 24 pieces.I don’t have stand mixer so i knead the dough by hand an dit was really hard.
I am thinking maybe 2 and 3/4 flour is too much that cause this problem..Could you please advise me how I can fix this problem for the next try .
That is the amount of flour I use & never have that issue, so I am trying think what would have made it too hard. I know if you knead dough to much, the dough does get tougher. Do you think that might have been the issue? I am glad they still tasted good.
120 FahrenHite or celcius, please?
Fahrenheit 🙂
I dont noRmally Go tO the website to leave a review but i have to… THESE CINNAMON ROLLS were amAzing!!! A huge hit! And so easy! Thank you! Im keeping this recipe to be used many many times again!
Yay!! I love hearing that. Thank you for leaving a review & for trying them!!
Eeeek!! Any thoughts on why my rolls turned out giant (but delicIous)?
Hmm..Maybe you just cut them bigger or didn’t roll them tight? The bigger, the better!! LOL!
These look amazing! How do these do when made ahead of time and froze? Making for wedding desserts table so anything I can make ahead of time is a huge bonus!
I haven’t tried freezing them, so honestly, I am not sure when the best time to freeze cinnamon roll dough. I would think, right before you’d bake them.
This was just what i was looking for. DELIcious! Perfect size FOR kids or part of a brunch…or anytime!
Glad you found it!! Thanks so much!
What about making the dougH in a bread machine? I have a stand mixer but typically do dough in my handy brEAdmaKer.
You totally could. I do not have one, but it will work 🙂
Can you make the dough ahead of time (like the night before) or do you think they would rise too much if you did?
I know there are recipes that you can make the night before, but I haven’t honestly tried with this recipe. I am not sure what would happen to the dough. I guess there’s one way to find out 😉
These are awesome. Quick and easy, plus delicious equals a recipe keeper.
The only question I have is what other spice becomes cinnamon do you recommend for this recipe? Your instructions say a teaspoon of cinnamon and a teaspoon of …. but nothing listed. I did a pumpkin spice combo of nutmeg, cloves and allspice along with the cinnamon. So good!
You could add another spice, the recipe is the 1 tablespoon of cinnamon plus 1 teaspoon. That’s what that is 🙂
Looking them very attractive! Only eating them!!! 😀 I will try to making it. Thank you for sharing the post for us.
Glad to share 🙂 I hope you like them!!
I’ve prepared your recipe and I must say it was great! My kids were delighted.
Thanks!
Love to hear that!! Glad your kids liked them! Thank you for sharing!
Have you ever tried making these in a muffin pan (mini or regular)?
I have not. I need to try!
Plan on making these ahead for an event for 100 people, would it work to make, rise, freeze then bake day of the event
Oh, man I wish I knew for sure. I haven’t tried it that way. Has anyone tried freezing them, after they rose?
Mine have never responded quite as well this way (freezing before baking). I’ve had good luck when I bake them completely, let them cool to room temperature, then wrap well in plastic wrap and aluminum foil. Then freeze.
On the day I want to prepare them, I set them out to defrost, then warm up in oven, then frost. It’s worked the best for me that way. Hope this helps!
Thanks so much for sharing that!
This dish looks delicious and attractive. I will try to make it. Thanks for sharing the recipe.
They are seriously so good! Thanks so much & hope you like them!
Cinnamon rolls are my favorite. I will prepare this recipe tonight and keep you posted.
Please do! I’d love to know what you think! Thank you 🙂
This looks amazing! I will definately give it a try!
I hope I will manage as I am not a great cook!
You can do it! 🙂 Good luck!
I want to make them today. I will go to the supermarket right now to buy what I need. I hope I can make them like those in the pictures. I will let you know. Thank you!
Good luck!! Let me know 🙂
This sounds amazing! 🙂
I would love for you to Link Up with me at my weekly Link Up:
https://www.pluckys-secondthought.com/cooking-and-crafting-with-j-j-link-up-91-and-90-features/
I would also love for you to share this with my Facebook Group:
https://www.facebook.com/groups/pluckyrecipescraftstips/
They are the best! Thanks so much for stopping by!
it look delicious! I gotta make them for breakfast soon.
Please do and let me know what you think 🙂 I hope you like them!
These rolls look so cute and delish!!! I gotta make them for breakfast soon.
They are the perfect breakfast treat! I hope you like them! Thanks!