This post may contain affiliate links. Please read our disclosure policy.
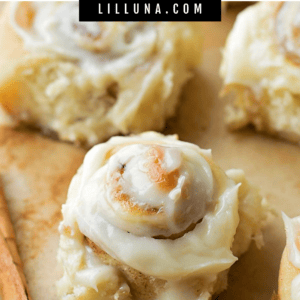
Give these 90 minute Mini Cinnamon Rolls a try and you’ll fall in love with their tender, sweet centers and irresistible cream cheese frosting!
If you ever need a variation of your classic Cinnamon Rolls, you can always try this bite sized version, or even our Maple Bacon Cinnamon Rolls!

Ready in Less than 90 Minutes!
I don’t know about you, but I absolutely adore cinnamon rolls! We make them for special occasions and they’re always the first thing to disappear. Instead of making big cinnamon rolls like usual, we decided to try Mini Cinnamon Rolls!
These are perfect for parties because one batch makes two dozen bite-size rolls. It’s the perfect gooey finger-food. But let’s be honest, you don’t need an excuse to make these yummy rolls—they’re also a great weekend breakfast treat.
They only require a few extra minutes of prep work than regular cinnamon rolls (you’ll use a pizza cutter to cut out strips vs. doing one big roll and slicing it), which is totally worth it, trust me! Plus, these mini cinnamon rolls are ready to go in a little under 90 minutes… not too shabby, right?

How to Make Them
DOUGH. In a large bowl or the bowl of a stand mixer, combine the flour, yeast and salt. In a small microwave safe bowl (or glass measuring cup), combine the sugar, butter, water and milk. Heat in the microwave until the mixture is hot and the butter is almost melted (it took about 1 minute on HIGH in my microwave). Let the mixture come down to 120 degrees. Gradually add the milk mixture into the flour mixture. Add the egg and mix until a soft and sticky dough forms.
OVEN. Preheat the ovEn to 200 degrees.
KNEAD + REST. If using a stand mixer, switch to the dough hook and set on the lowest mixing setting for 4 minutes or until the dough becomes elastic or knead by hand on a lightly floured surface for 3-4 minutes. Cover the dough with plastic wrap and allow it to rest on the counter for 10 minutes.
FILLING. Once the dough has rested, roll it out on a lightly floured surface until it measures a 24×16 inch rectangle. Prepare the filling by combining all of the ingredients in a small mixing bowl except for the butter. Spread the butter over the top of the rolled dough, then cover with the filling.
CUT + ROLL. Using a pizza roller/cutter, cut out 24 strips of dough (show in pictures below). Roll each up into a tight roll.
Place the rolls into a lightly greased 9×13 baking dish and gently place a piece of aluminum foil over top.
RISE. Turn OFF your oven and place the covered rolls inside to rise for 45 minutes.
BAKE. Remove the rolls from the oven and turn ON your oven to 375 degrees. Once heated, remove the foil and bake the rolls for 15-18 minutes or until the centers are lightly golden brown in color.
FROST. Remove from the oven and allow to cool for a few minutes before frosting. While rolls are cooling, prepare the frosting by combining all of the ingredients in a small mixing bowl and beating by hand or with a hand mixer until smooth. Spread over the tops of the rolls.

Tips for making Mini Cinnamon Rolls
Keep these tips in mind when making these delicious mini treats!
- After you heat the milk, sugar, butter, and milk in the microwave, let the mixture cool to about 120°F before gradually adding it to the flour mixture.
- If you aren’t using a stand mixer, just knead the dough by hand on a lightly floured surface for 3-4 minutes until it becomes elastic.
- When kneading the flour by hand just use a little flour to keep it from sticking to the counter. Too much added flour can cause the rolls to be dense and harder when baked.
- You can use all purpose or bread flour in the recipe.
- After kneading the dough, make sure you let it rest for the full 10 minutes.
- Wait to frost the mini cinnamon rolls until they’ve cooled.
Variations & Troubleshooting
Variations: My family loves these rolls as they are so we don’t often make any changes, but you certainly can. You can easily change the cream cheese topping for a simple vanilla glaze or a dusting of powdered sugar. You can also switch up the spices and include some of your favorites like nutmeg or use a pumpkin spice. Finally, if you are one of those odd people ? who like raisins in their rolls you can sprinkle some on before you roll them.
Why didn’t my rolls rise? These are some of the easiest rolls ever! However, with baking sometimes even the smallest change can cause problems. Here a couple common issues that can cause your rolls not to rise properly.
- Expired yeast or killing the yeast by using too hot/too cold water.
- Not allowing enough time for the dough to rise.
- The oven was hotter than 200°F when proofing your dough. If the oven is too hot the rolls will start baking which halt the rise. If you’re worried this will happen simply heat the oven to 200°F then turn it off while the rolls are rising. The oven will stay hot long enough for the rolls to rise.

Making Ahead & Storing Cinnamon Rolls
Make ahead: You can make and shape the dough ahead of time then store it to be baked later. I do have to caution that they don’t seem to rise quite as well this way as they do when baked right away. Even so, they still come out quite deliciously. You can keep the shaped rolls in the fridge or put them in the freezer.
- Fridge: Place the shaped rolls in a baking pan. Spray one side of plastic wrap with cooking spray and cover the rolls with the sprayed side down. (this will help keep the dough from sticking to the plastic when they rise.) Store in the fridge overnight. The dough will rise, but much more slowly. When you’re ready to bake them, remove the pan from the fridge and let the dough rise on the counter for 30-45 minutes.
- Freezer: Use a freezer safe baking pan to place your rolls in. Cover with plastic and then again with foil. Freeze for 1-2 months. When you’re ready to bake remove the foil and plastic. Spray one side of the plastic and then put it back on with the spayed side down. Allow the rolls to rise for several hours. You can speed up the rise time by placing the rolls in the oven. Preheat it to 200°F then turn it off. Don’t use a plastic cover instead place a bowl of hot water in the oven along with the rolls. Allow the rolls to thaw and rise. They should be bigger than their original size but not double in size.
Storage: You can store these frosted or unfrosted in an airtight container at room temperature for 3-4 days. They can also be frozen for up to 6 months. When freezing them be sure to wrap them in plastic wrap and then in foil or place them in a freezer Ziploc.
Reheat: Allow the frozen rolls to thaw and then reheat them in the oven. Preheat it to 275⁰F and heat for 10-15 minute or until warm throughout. You can also reheat them in the microwave. Just eat them before they cool otherwise they get pretty hard and stale.

The 90 minutes it takes to make these babies is TOTALLY worth it. I think your family will agree. 😉
For more cinnamon roll recipes, try:
- Cinnamon Roll Waffles
- Maple Bacon Cinnamon Rolls
- Super Soft Cinnamon Rolls
- Cinnamon Roll Bites
- One Hour Cinnamon Rolls
- Nutella Cinnamon Rolls

Mini Cinnamon Rolls Recipe
Equipment
Video
Ingredients
Cinnamon Roll
- 2¾ cups all-purpose flour
- ¼ cup sugar
- 2 tablespoons unsalted butter
- 1 egg
- 1 tablespoon instant yeast
- ½ cup water
- ¼ cup whole milk
- 1 teaspoon salt
Filling
- ¼ cup butter, melted
- ⅔ cup brown sugar
- 1¼ tablespoons cinnamon
- 1 teaspoon vanilla extract
Cream Cheese Frosting
- 4 ounces cream cheese, room temperature
- ¼ cup unsalted butter, room temperature
- 1 cup powdered sugar
- 1-2 tablespoons whole milk, (to desired thickness)
- ½ teaspoon vanilla extract
Instructions
- In a large bowl or the bowl of a stand mixer, combine the flour, yeast and salt.
- In a small microwave safe bowl (or glass measuring cup), combine the sugar, butter, water and milk. Heat in the microwave until the mixture is hot and the butter is almost melted (it took about 1 minute on HIGH in my microwave). Let the mixture come down to 120 degrees. Gradually add the milk mixture into the flour mixture. Add the egg and mix until a soft and sticky dough forms.
- Preheat the oven to 200 degrees F.
- If using a stand mixer, switch to the dough hook and set on the lowest mixing setting for 4 minutes or until the dough becomes elastic or knead by hand on a lightly floured surface for 3-4 minutes. Cover the dough with plastic wrap and allow it to rest on the counter for 10 minutes.
- Once the dough has rested, roll it out on a lightly floured surface until it measures a 24×16 inch rectangle. Prepare the filling by combining all of the ingredients in a small mixing bowl except for the butter. Spread the butter over the top of the rolled dough, then cover with the filling. Using a pizza roller/cutter, cut out 24 strips of dough (show in pictures below). Roll each up into a tight roll.
- Place the rolls into a lightly greased 9×13 baking dish and gently place a piece of aluminum foil over top. Turn OFF your oven and place the covered rolls inside to rise for 45 minutes.
- Remove the rolls from the oven and turn ON your oven to 375 degrees F. Once heated, remove the foil and bake the rolls for 15-18 minutes or until the centers are lightly golden brown in color.
- Remove from the oven and allow to cool for a few minutes before frosting. While rolls are cooling, prepare the frosting by combining all of the ingredients in a small mixing bowl and beating by hand or with a hand mixer until smooth. Spread over the tops of the rolls.
Nutrition
Nutrition information is automatically calculated, so should only be used as an approximation.


These were a big hit with the baseball team. I used them for a snack with a tag that said let’s keep rolling through the season! I think I need more practice baking… but everyone LOVED them!
Making these again for Christmas breakfast. Yum!
What’s not to love about cinnamon rolls?! I try lots ofCinnamon roll Recipes and this has quickly
Become a favorite! Ooey and gooey!
Delightful!! I brought these to mother/ son bowling a while back and I was the most loved mom there! I’ve made these time and time again and they are fail proof and always devoured!
These were wonderful! Had multiple people coming over and saying they were the best cinnamon rolls they’ve ever had. Great recipe, thank you!
You are welcome! I love to hear that! Thank you so much for letting me know!
I have made these and love them! I am wondering if it would be possible to make the dough and refrigerate/freeze it for when I want to make these in a pinch. Do you think that would work?
Thank you! You can make and shape the dough ahead of time then store it to be baked later. I do have to caution that they don’t seem to rise quite as well this way as they do when baked right away. Even so, they still come out quite deliciously. You can keep the shaped rolls in the fridge or put them in the freezer. Fridge: Place the shaped rolls in a baking pan. Spray one side of plastic wrap with cooking spray and cover the rolls with the sprayed side down. (this will help keep the dough from sticking to the plastic when they rise.) Store in the fridge overnight. The dough will rise, but much more slowly. When you’re ready to bake them, remove the pan from the fridge and let the dough rise on the counter for 30-45 minutes. Freezer: Use a freezer safe baking pan to place your rolls in. Cover with plastic and then again with foil. Freeze for 1-2 months. When you’re ready to bake remove the foil and plastic. Spray one side of the plastic and then put it back on with the spayed side down. Allow the rolls to rise for several hours. You can speed up the rise time by placing the rolls in the oven. Preheat it to 200°F then turn it off. Don’t use a plastic cover instead place a bowl of hot water in the oven along with the rolls. Allow the rolls to thaw and rise. They should be bigger than their original size but not double in size.
Just love your cinnamon bun recipe. I use the very dark brown sugar which gives it a caramel taste.I also use
my mixture of Garam Masala (this mixture i make from scratch I dont buy it ready made) plus the fine cinnamon which gives it that oriental flavour. I made some the weekend shared with the neighbour and family. Next time I double the amount because they are devine and not enough !!!
All the best
June
Sounds yum! I’m so glad you like these! Thank you so much!
Love your cinnamon buns delicious this is the third time baking them. I always like to present as gifts or share with neighbors. I love them but have to watch my diet.
Thanks for you great effort to share.
Best and kind regards
June
Awe, thank you so much!! They so make great gifts!
Tried. both me and my family loved it. thanks a lot for sharing the recipe?
You are so welcome 🙂 I am so glad your family liked it!
is this instant yeast?
Yes 🙂 Enjoy!!