While we lived in Texas, a wonderful friend of mine kindly showed us how she makes her famous pies. The one she’s most famous for? Her apple pie recipe – the quintessential American dessert!
With all of her tips and this no-fail recipe, we can guarantee that this apple pie recipe will be perfect for your upcoming fall, Thanksgiving or Christmas gatherings and is sure to steal the show.
Why we think you’ll love it:
- Classic comfort. This apple pie recipe delivers all the warmth and nostalgia of a quintessential American dessert.
- Easy elegance. Flaky crust and a perfectly spiced apple filling create an impressive yet achievable best pie recipe.
- Endless variations. Get creative! This recipe is a wonderful base to explore different apple varieties, spices, or even a lattice crust design.
Apple Pie Ingredients and Substitutions
Pie Crust
- 1 cup butter-flavored shortening – unflavored shortening will also work or use an equal amount of butter.
- 2½ cups all-purpose flour
- ½ teaspoon salt
- 1 large egg
- ½ cup cold water use ice if necessary
- 1 tablespoon apple cider vinegar
Apple Pie Filling Ingredients
- 6-8 high-quality apples (we prefer Gala and Granny Smith apples) – I think the best apples for pie are a mixture, as each variety will add sweet or tart flavors. Depending on how big they are, you will need 6 to 8 total apples.
- Sweet apples: Gala, Fuji, Honeycrisp, Golden Delicious
- Tart apples: Granny Smith, Cortland, Melrose, Winesap
- Sweet & tart apples: Jazz, Pink Lady, Jonagold
- ¾ cup granulated sugar
- ½ teaspoon ground cinnamon
- ⅛ teaspoon ground nutmeg
- 3 tablespoons cornstarch
- 1 cup unfiltered apple cider – the jugs sold in the fall are the best, but apple juice works as well
- 2 tablespoons bottled lemon juice – or fresh lemon juice
Additional Ingredients
- whole milk
- coarse/turbinado sugar


How to Make Apple Pie Crust
- DOUGH. Stir 2½ cups flour and ½ teaspoon salt together.
- Gently blend 1 cup shortening into the flour mixture with your hands or a pastry cutter until the mixture is crumbly and chunky.
- When coarsely mixed, set this mixture aside.
- Beat 1 egg and ½ cup cold water together. Add 1 tablespoon apple cider vinegar to the egg mixture.
- Pour the liquid mixture into the flour mixture and lightly fold them together. Let it sit for a few minutes to let the water start to absorb.
- SHAPE. Using your hands again, mix until a dough forms.
- If it is still too crumbly to become cohesive, add 1-3 tablespoons of cold water. Be careful to not over mix as overworking pie crust makes it tough, or add too much water because the dough will become too sticky.
- When it becomes a workable dough, check to make sure you can see marbling from the shortening – if you can, you’re going to have a yummy, flaky crust.
- Score the dough down the middle with the edge of your hand and pull it apart into two pieces.
- CHILL. Shape them into two round discs, wrap them in plastic wrap, and then chill them for one hour in the refrigerator (if you’re in a hurry you can put them in the freezer for half an hour).


Make The Filling
- SAUCE. While the dough is chilling, make the apple filling. In a heavy saucepan, whisk ¾ cup sugar, ½ teaspoon cinnamon, ⅛ teaspoon nutmeg, and 3 tablespoons cornstarch.
- Stir in 1 cup apple cider and 2 tablespoons lemon juice. Cook on medium heat until thick and bubbly. When finished, scoop the sauce into a bowl and chill in the refrigerator.
- APPLES. Peel, core, and slice 6-8 apples into about ¼ inch slices and place them in a microwave-safe bowl. (We love to use this Apple Peeler + Corer and this Apple Slicer to do this). When they are all cut, cover the bowl with plastic wrap and microwave for 2 minutes.
- Stir the apples and microwave for another 1-2 minutes. Stir in the cooled sauce and place back in the refrigerator.


How to Assemble Apple Pie
- ROLL. To make the bottom pie crust, take one of the cooled dough disks out of the fridge.
- On a floured surface, ruse a rolling pin to roll the dough from the center out into a circle until about ⅜ of an inch thick.
- Make sure the dough is about 1-½ inches larger than the pie pan all the way around.
- FOLD. Carefully fold the dough in half and then in fourths to pick it up and transfer it to your pie pan.
- Press the dough into the pan to remove any air pockets. Put the bottom crust in the freezer for 10-15 minutes to get it cold again.
- FILL. Pour the apple filling into the bottom pie crust. Carefully move apple slices around until all the sides are filled and the top is even, without any apples sticking up which would protrude through the crust.
- Put it back in the refrigerator while you roll out the other dough disk.
- TOP. Decide what style top you want to make.

Make a Traditional Crust
- TRIM. For a traditional top crust, lay the rolled-out dough on top of your pie. Trim any side with excess dough to just even it up, but still leave as much length as you can.
- CRIMP. Roll the two crusts together, bottom side up all the way around, then crimp the edges. Use a sharp knife to cut slits in the top crust to allow air to escape.
- SEASON. Brush it lightly with whole milk, avoiding the crimped edges, and sprinkle with coarse sugar.


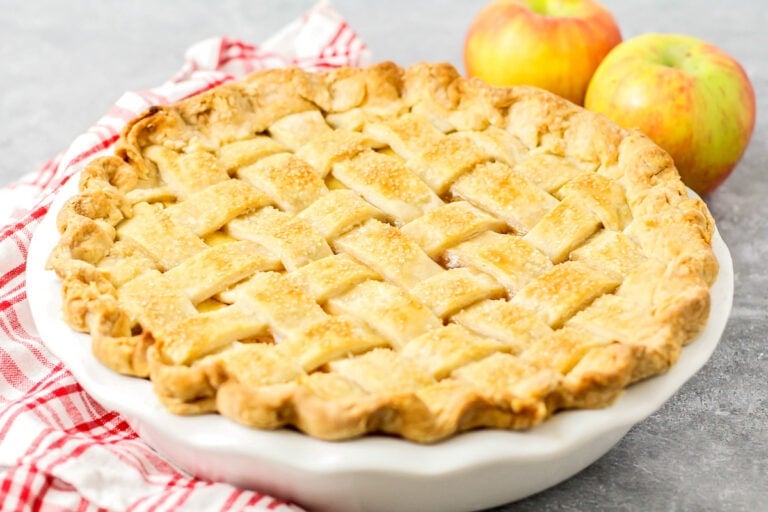
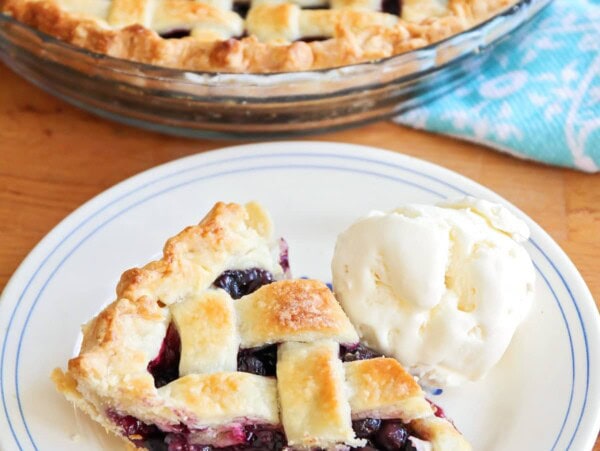
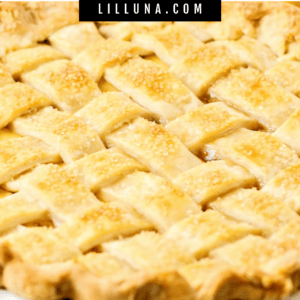
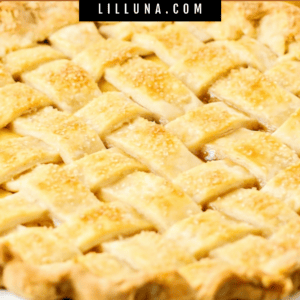
Make a Lattice Crust
- CUT. For a lattice top crust, roll the dough out, cut it into 1-inch strips with a pizza cutter.
- WEAVE. Alternate laying the strips down in a lattice pattern. Trim the strips to the length of the bottom crust and roll the bottom crust up, tucking the strips in as you go. Crimp the edges.
- SEASON. There is no need to cut slits in the dough. Gently rub milk onto the top with your fingers and sprinkle with coarse sugar.

Bake the Apple Pie
- BAKE. Bake at 400°F for 20 minutes, then reduce the heat to 350°F and bake for an additional 30-40 minutes until the crust is golden brown.
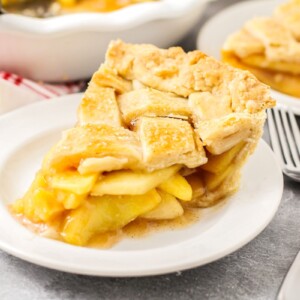
- COOL. Allow the pie to cool and rest at least for an hour or two before cutting it to allow the juices to thicken.
- SERVE. Serve on its own, drizzled with Caramel Sauce, add a big scoop of Vanilla Ice Cream, or a dollop of Whipped Cream!!
Pro Tip: A Perfect Crust
- The pie is done when the pie crust browns and the filling in the center is bubbly. Sometimes the filling can bubble right out of the pan, causing a sticky, smoky mess on the bottom of the oven.
- Place a baking sheet lined with foil on the bottom oven rack while it’s preheating to catch spills.
- If the crust browns more quickly than the pie is baking, tent a piece of tin foil over the top for the remainder of the baking time.
FREE DOWNLOAD: APPLE PIE RECIPE PDF

Apple Pie Recipe
Equipment
Video
Ingredients
Pie Crust
- 1 cup butter-flavored shortening
- 2½ cups all-purpose flour
- ½ teaspoon salt
- 1 egg
- ½ cup cold water, use ice if necessary
- 1 tablespoon apple cider vinegar
Apple Filling Ingredients
- 6-8 high-quality apples, we prefer Gala and Granny Smith
- ¾ cup sugar
- ½ teaspoon cinnamon
- ⅛ teaspoon nutmeg
- 3 tablespoons cornstarch
- 1 cup unfiltered apple cider, the jugs sold in the fall are the best, but apple juice works as well
- 2 tablespoons bottled lemon juice
Additional Ingredients
- whole milk
- coarse/turbinado sugar
Instructions
Pie Crust
- Stir flour and salt together.
- Gently blend shortening into the flour mixture with your hands or a pastry cutter until the mixture is crumbly and chunky. When coarsely mixed, set this mixture aside.
- Beat egg and cold water together. Add apple cider vinegar to the egg mixture. Pour the liquid mixture into the flour mixture and lightly fold them together.
- Let it sit for a few minutes to let the water start to absorb. Using your hands again, mix until a dough forms.
- If it is still too crumbly to become cohesive, add 1-3 tablespoons of cold water. Be careful to not over mix as overworking pie crust makes it tough, or add too much water because the dough will become too sticky.
- When it becomes a workable dough, check to make sure you can see marbling from the shortening – if you can, you’re going to have a yummy, flaky crust.
- Score the dough down the middle with the edge of your hand and pull it apart into two pieces.
- Shape them into two round discs, wrap them in plastic wrap, and then chill them for one hour in the refrigerator (if you’re in a hurry you can put them in the freezer for half an hour).
Pie Filling
- While the dough is chilling, make the apple filling. In a heavy saucepan, whisk sugar, cinnamon, nutmeg, and cornstarch.
- Stir in apple cider and lemon juice. Cook on medium heat until thick and bubbly. When finished, scoop the sauce into a bowl and chill in the refrigerator.
- Peel, core, and slice apples into about ¼ inch slices and place them in a microwave-safe bowl. (We love to use this Apple Peeler + Corer and this Apple Slicer to do this).
- When they are all cut, cover the bowl with plastic wrap and microwave for 2 minutes. Stir the apples and microwave for another 1-2 minutes. Stir in the cooled sauce and place back in the refrigerator.
Assemble the Pie
- To make the bottom pie crust, take one of the cooled dough disks out of the fridge. On a floured surface, roll the dough from the center out into a circle until about ⅜ of an inch thick.
- Make sure the dough is about 1-½ inches larger than the pie pan all the way around.
- Carefully fold the dough in half and then in fourths to pick it up and transfer it to your pie pan. Press the dough into the pan to remove any air pockets.
- Put the bottom crust in the freezer for 10-15 minutes to get it cold again.
- Pour the apple filling into the bottom pie crust. Carefully move apple slices around until all the sides are filled and the top is even, without any apples sticking up which would protrude through the crust.
- Put it back in the refrigerator while you roll out the other dough disk.
- Decide what style top you want to make.
Simple Top Crust
- For a traditional top crust, lay the rolled-out dough on top of your pie. Trim any side with excess dough to just even it up, but still leave as much length as you can.
- Roll the two crusts together, bottom side up all the way around, then crimp the edges. Cut slits in the top crust to allow air to escape. Brush it lightly with whole milk, avoiding the crimped edges, and sprinkle with coarse sugar.
Lattice Crust
- For a lattice top crust, roll the dough out, cut it into 1-inch strips with a pizza cutter. Alternate laying the strips down in a lattice pattern. Trim the strips to the length of the bottom crust and roll the bottom crust up, tucking the strips in as you go. Crimp the edges.
- There is no need to cut slits in the dough. Gently rub milk onto the top with your fingers and sprinkle with coarse sugar.
Bake
- Bake at 400°F for 20 minutes, then reduce the heat to 350°F and bake for an additional 30-40 minutes until the crust is golden brown.
- Allow the pie to cool and rest at least for an hour or two before cutting it to allow the juices to thicken.
- Serve on its own, drizzled with Caramel Sauce, add a scoop of Vanilla Ice Cream, or a dollop of Whipped Cream!!
Notes
Nutrition
Nutrition information is automatically calculated, so should only be used as an approximation.
Recipe FAQ
Freeze for up to 2 months before using it.
Wrap the ball of dough tightly in plastic wrap and place it in the freezer. Thaw in the refrigerator before use.
Assemble the pie and place the pie in the freezer, uncovered, for 2-3 hours.
Once partially frozen, tightly wrap the entire pie in plastic wrap, making sure all sides are well sealed to prevent freezer burn. For extra protection against freezer burn, you can wrap the pie again in a layer of aluminum foil after wrapping it in plastic wrap.
Label and store for up to 3 months. To bake the pie, transfer it from the freezer to the refrigerator and thaw overnight. Thawing slowly in the refrigerator helps maintain the texture of the crust and filling. Bake according to the recipe directions.
Keep baked apple pies at room temperature for up to two days. If the pie has been sliced, cover it loosely with foil or plastic wrap.
To keep for an extra 2-3 days, store it in the fridge, covered with foil or plastic wrap.
Cool the favorite apple pie completely before wrapping it and storing it in the freezer for up to 4 months.
More Like This
Apple Recipes
Apple Cobbler Recipe
1 hr 20 mins
Dutch Apple Pie
1 hr 45 mins

Apple Crumble Pie
55 mins
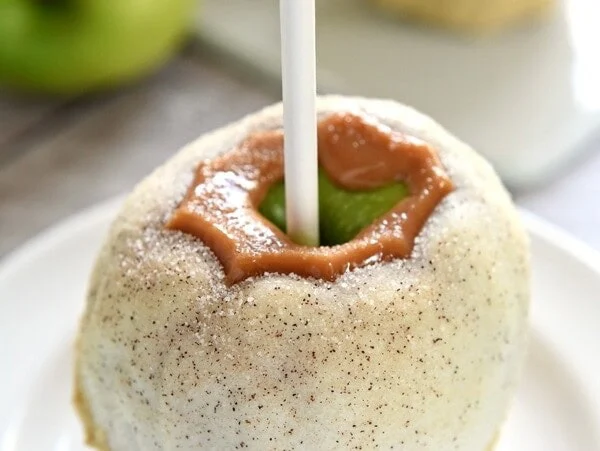
Apple Pie Caramel Apple
18 mins
Fruit Pies
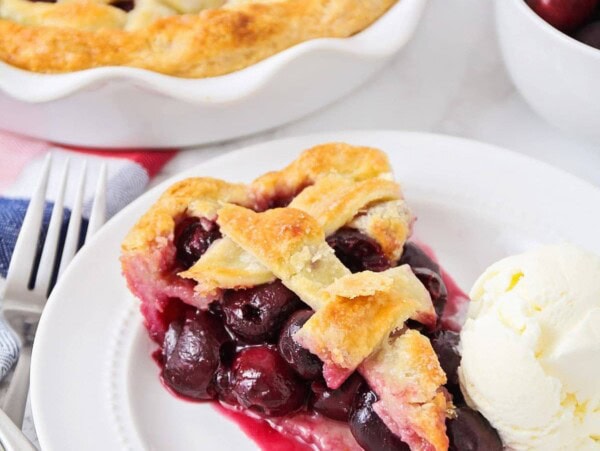
Cherry Pie Recipe
1 hr 50 mins
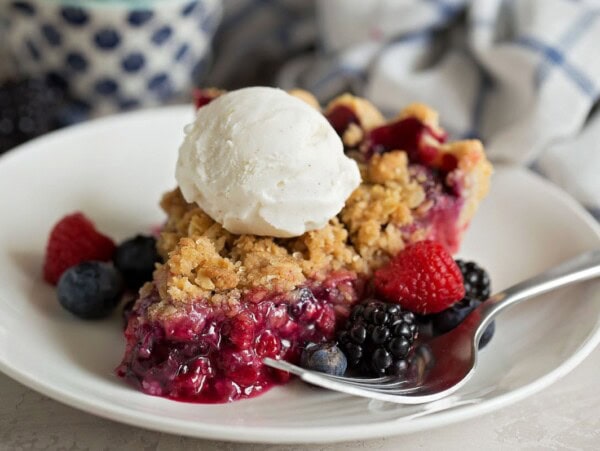
Triple Berry Pie
1 hr 30 mins
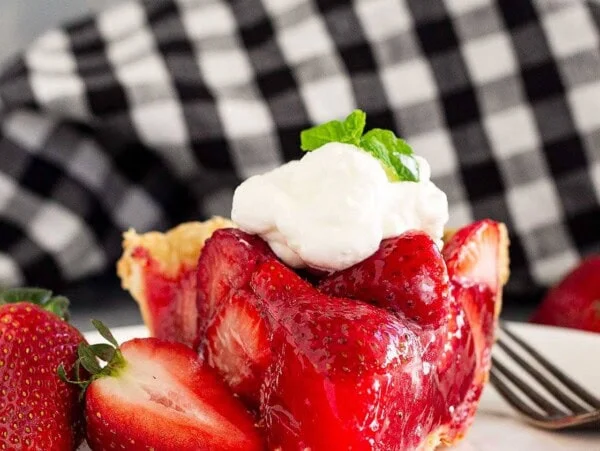
Strawberry Pie
50 mins
Blueberry Pie
1 hr 25 mins
Collections


This recipe was originally published October 2015.
Recipe from my friend, Loni.

Love this recipe and have made it a ton of times, but I no longer have a microwave! How else can I soften the apple slices? Stovetop?
Yes, place the sliced apple in saucepan over medium and let the apples gently simmer. Start timing once they begin to sizzle and release a little juice, then cook for about 5-7 minutes until they’re tender but not too soft.
Can I use butter or plain shortening if I don’t have butter flavored shortening?
The type of apple that one uses makes a huge difference. I had access to some beautiful honey crisp apples. Followed the recipe above and the pie looked amazing. The main difference was that the apples were still crunchy after microwaving and cooking them in the oven according to the instructions above. Even after placing the pie back in the oven at 350 degrees for an hour, the apple filling is STILL crunchy!!! Next time I’ll use granny smith and imperial apples. The crust was amazing and I really liked making the apple cider/sugar/cornstarch mixture to mix into the prepared apples.
Love this pie. I made several to freeze.. BUT How can I bake from frozen?!
Thanks!!
So you’ll want to bake it at 425 degrees for about 10 minutes, then drop the temp to 375 degrees and bake for another 45-50 minutes. Hope that helps!
So delicious!!
Can i exchange shortening for real butter. Grated into the flour ?
Wonderful and so delicious
😊
I’ve tried many different pie crust recipes and yours is the best! I used all Granny Smith apples and next time I would combine with a sweeter apple. But thanks for such an easy and flaky pie crust! You’re the best!
Excellent!! Is my go to recipe for apple pie.
Oh I’m so happy to hear that! Glad you love the pie!