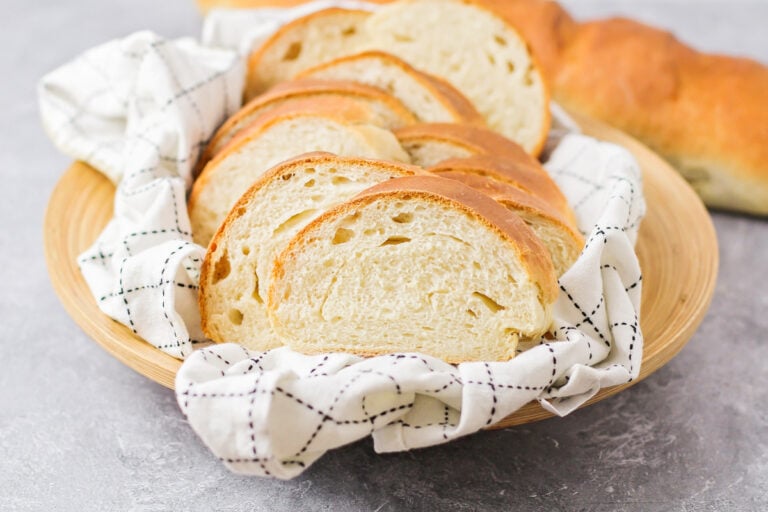
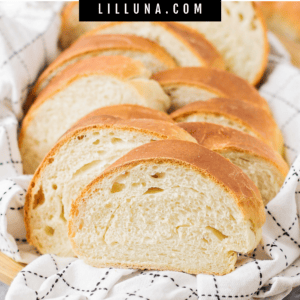
If you are looking for a simple, homemade Italian Bread Recipe, this is one we keep in regular rotation at our house. It is easy, uses pantry staples, and makes two beautiful loaves that are perfect for weeknight dinners or family gatherings.
With a golden crust and a soft, fluffy inside, it is perfect for serving with pasta, soup, salad, or just warm with butter. And what we love most about it is how simple the ingredients are, but the results feel bakery-worthy.
So don’t let the yeast intimidate you. Of all the yeast breads you could try to master, this one is one of the simplest!
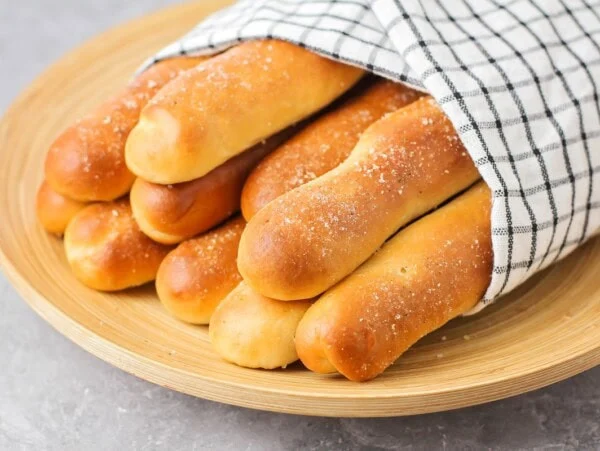
If you love this recipe, you should also try Homemade Dinner Rolls, French Bread, and Homemade Breadsticks, all favorites that disappear fast at our table.
Why we think you’ll love it:
- Pantry staple magic. The ingredients are simple and most likely already in your pantry, making it budget friendly and convenient.
- Easy steps. Simple steps and forgiving dough make this a great first yeast bread that turns out reliably.
- Versatile favorite. Perfect alongside pasta, soups, sandwiches, or served warm with butter for an easy side.

Italian Bread Ingredients
- Very warm water (2 cups): Activates the yeast and helps the dough come together smoothly. Warm, not hot, water helps create a better rise. Water should be between 105°F and 115°F.
- Instant yeast (5 teaspoons): Helps the bread rise quickly and gives it that light, fluffy texture. Instant yeast saves time since it does not require proofing separately. See How to Activate Yeast.
- Sugar (1 tablespoon): Feeds the yeast and adds a very subtle sweetness that balances the flavor of the bread.
- Vegetable oil (2 tablespoons): Adds moisture and tenderness to the crumb, keeping the bread soft even the next day. You can substitute olive oil for a slightly richer flavor.
- Salt (1 tablespoon): Enhances the overall flavor and strengthens the dough structure for better texture.
- All purpose flour (5 cups): Forms the base of the dough and gives the bread its classic chewy bite. Bread flour can be used for an even chewier, bakery style loaf.
- Optional: butter to brush on top of baked loaves
How to Make Italian Bread


DOUGH. Whisk warm water, instant yeast, sugar, oil, and 2 cups of flour in a large bowl till smooth. Let sit in a warm place till bubbly, about 30 minutes.
Add salt and 1½ cups flour and mix. Continue mixing in flour until no longer sticky and a soft dough is formed.

RISE. Knead for a couple of minutes on a lightly floured surface till smooth. Return to bowl. Cover and let rise till doubled, about an hour.
Placing the dough near a warm window, crock pot, or oven can help it rise faster.
When it looks like it has doubled in size poke it with your finger. If the dough springs back and fills in the dent, let it rise longer. If the dent stays, it’s ready.


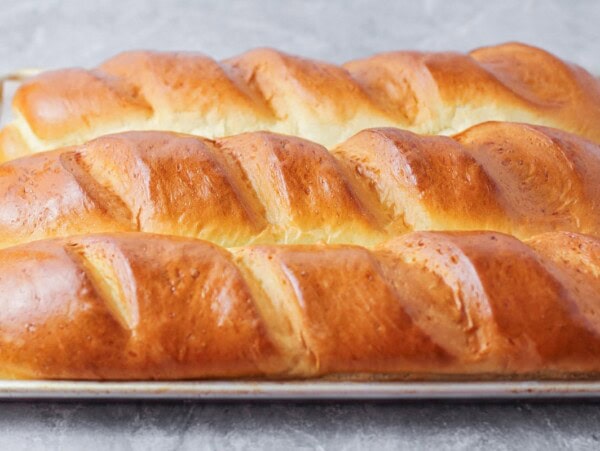
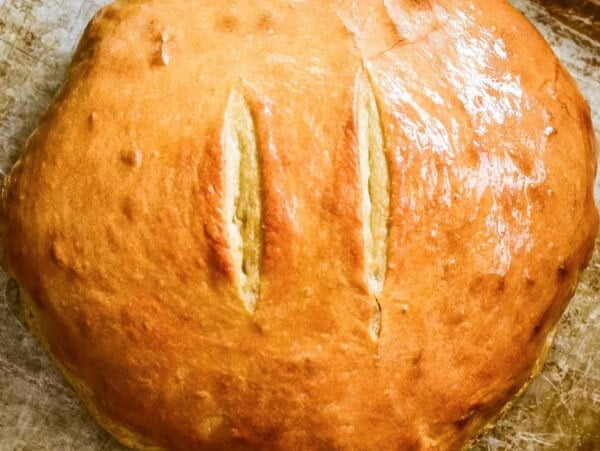
SHAPE. Divide the dough in half and roll each piece into a long loaf about 12 inches long. Place both loaves on a greased baking pan.

SCORE. Use a sharp blade or scissors to make 3-4 shallow (¼ to ½ inch) slits on the top of the dough before baking. This allows air to escape without cracking the bread.
2nd RISE. Cover with a tea towel and let loaves rise till doubled (about 30-45 minutes).
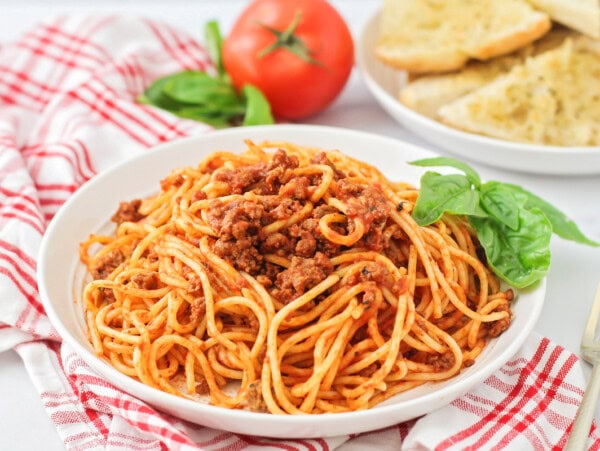
BAKE. Bake in an oven preheated to 375°F for about 30 minutes or until the crust is golden brown. Let the loaves cool on wire racks. Serve this Italian bread recipe warm on its own or with your favorite pastas and lasagnas.


Kristyn’s Recipe Tips
- Activate first by adding the yeast and sugar to the warm water. Let it sit for about 5 minutes until bubbly. At this point, you can add the yeast mixture to the other ingredients.
- Knead by hand (fold and press the dough repeatedly) for a few minutes, or a quicker way is to use a stand mixer fitted with the dough hook attachment.
- Let the dough rise in a warm, draft free spot like inside an oven with the light on for more reliable results.
- Do not add all the flour at once; adding it gradually helps you avoid a dense loaf.
- Brush the baked loaves lightly with butter for a softer crust and extra flavor.
- Slice only after the bread has cooled slightly so the inside texture sets properly.
Italian Bread Recipe
Video
Ingredients
- 2 cups very warm water
- 5 teaspoons instant yeast
- 1 tablespoon sugar
- 2 tablespoons vegetable oil
- 1 tablespoon salt
- 5 cups all purpose flour
Instructions
- Whisk water, yeast, sugar, oil, and 2 cups of flour in a large bowl till smooth. Let sit in a warm place till bubbly, about 30 minutes. Add the salt and add enough flour to make a soft dough.
- Knead a few times on a floured counter till smooth. Return to bowl. Cover and let rise till doubled, about an hour.
- When it looks like it has doubled in size poke it with your finger. If the dough springs back and fills in the dent, let it rise longer. If the dent stays, it's ready.
- Divide the dough in half and roll each piece into a long loaf about 12 inches long. Place both loaves on a greased baking pan.
- Cut a few diagonal slits across the top of each loaf. Cover and let loaves rise till doubled, 30-45 minutes.
- Bake in an oven preheated to 375°F for about 30 minutes or till the crust is golden brown.
Notes
- Activate first by adding the yeast and sugar to the warm water. Let it sit for about 5 minutes until bubbly. At this point, you can add the yeast mixture to the other ingredients.
- Knead by hand (fold and press the dough repeatedly) for a few minutes, or a quicker way is to use a stand mixer fitted with the dough hook attachment.
- Let the dough rise in a warm, draft free spot like inside an oven with the light on for more reliable results.
- Do not add all the flour at once; adding it gradually helps you avoid a dense loaf.
- Brush the baked loaves lightly with butter for a softer crust and extra flavor.
- Slice only after the bread has cooled slightly so the inside texture sets properly.
- This bread freezes beautifully. Wrap cooled loaves tightly and freeze up to 3 months for easy make ahead meals.
Nutrition
Nutrition information is automatically calculated, so should only be used as an approximation.
Recipe FAQ
Shape the loaves of dough, but don’t let them rise. Instead, freeze until solid, then wrap with plastic wrap and again with foil, and freeze for up to 3 months.
To bake, unwrap a loaf, place it on a baking sheet, and cover it loosely with a tea towel. Let the dough rise until doubled, add scoring slices, and bake.
To keep your loaves fresh for as long as possible, wrap them with plastic and store them at room temperature for 2-3 days, or wrap them again with foil and freeze them for 3 months.
More Like This
Main Dish


More Bread
Homemade French Bread
1 hr 15 mins

Focaccia Bread
8 hrs 55 mins
Sourdough Bread
8 hrs 40 mins
Olive Garden Breadsticks
2 hrs 27 mins
Collections


This recipe was first shared November, 2019.


It does not show how to print the recipe
If you scroll down to the recipe card you will see 4 icons (a heart, a star, a pin, and a printer) in the top right corner. Press the printer and you should be able to print the recipe.
DOUGH. Whisk 2 cups warm water, 5 tablespoons instant yeast, 1 tablespoon sugar, 2 tablespoons oil, and 2 cups of flour in a large bowl till smooth.
Just so you know you say to use 5 Tablespoons of yeast in the instruction section.
Thanks for catching that and I’ve updated the post.
The recipe calls for 5 cups of flour but per instructions you mix 2 cups and then add flour as needed to form the dough. Do you use the whole 5 cups?
Yes, you’ll end up using most, if not all….Whisk 2 cups warm water, 5 tablespoons instant yeast, 1 tablespoon sugar, 2 tablespoons oil, and 2 cups of flour in a large bowl till smooth. Let sit in a warm place till bubbly, about 30 minutes.
Add 1 tablespoon salt and 1½ cups flour and mix. Continue mixing in flour until no longer sticky and a soft dough is formed.
I’ve made this recipe multiple times and my family loves. It’s easy to make so we can have fresh bread for our meal.
Taste was great, maybe use a little less salt next time I try. I did have an issue with the loaves coming out a little more flat. It may be because I may have over proofed the dough. I went by time rather than looks. I brushed with melted butter when it came out of the oven. It’s very tasty..
Are you supposed to put water in a shallow pan when you bake it
You could if you want a crustier loaf, but it’s not necessary for this recipe.
Nice one…
This one didn’t work well for me. I needed way more flour, almost double, to get a workable dough.
Great recipe.
At what temperature should the warm water be at?
I would say between 105 and 110 degrees.
Easy & delicious!
It came out looking amazing, I just feel like it was a little too much salt but my mother loves the bread and it smells amazing.
One thing that I would have added, the placement of the oven rack. Make sure that your rack is in the middle of the oven, so that you get an even crisp of top and bottom. Mine was extra tough on the bottom because I had the rack a notch or two below center. At least that is what i’m guessing.
That’s great feedback. Thank you!
I also read your comment and thank you for stating this.
This was the worst bread recipe ever! I must be the only one who wasn’t impressed. It was SO sticky, and I mean sticky, not just tacky. I had to keep adding flour to make it even manageable, and ended up throwing it away and using a different recipe. Sorry, this just didn’t work for me.
Thanks for the feedback and for giving the recipe a try. Sorry to hear it didn’t turn out well for you!
If i make one loaf instead of divide two, do i need to bake longer or same time?
You will need to bake it a bit longer so the center isn’t undercooked.
thank you so much for the recipe
I made this bread so many times, over the last few years, it’s that good. I added Italian herbs to it, just enough to flavor it. I don’t make it any other way. Thank you foyears, r sharing.
That would be so yummy!! I am so glad you like it!! Thank you!
Mine didn’t brown. Is there a reason?
So there could be a few reasons why bread doesn’t brown properly… the most common are: Oven temperatures are too low, the dough was over or under-proofed (which means it didn’t rise enough or rose a little too much). Sometimes a good egg wash can help with the browning too. This recipe doesn’t call for an egg wash, but you can definitely add one. And that would help with browning. You’d just crack and egg and whisk it in a bowl. Then at step 4, brush the egg on top of the dough after cutting slits in the loaves, before that second rise. Hope that might help!
I love bread so much. Do you? Well, If you are this is perfect for you! But if you’re not. Well, I invite you to try this Italian Bread that only requires a few ingredients to make.
Homemade bread is the best! This Italian bread was so easy to make and it turned out perfectly, thank you!
My family couldn’t believe I made this bread from scratch! Everyone thought it was amazing. And it was surprisingly easy to make!
Taste was good, used about 4.5 cups of flour. They came out a bit flat though… not sure if I did something wrong :/
To much salt for our liking. I also used active dry yeast. Not thinking, 5 teaspoons was wayyyy to much, lol, it ballooned out after rising half in a loaf pan (for sandwich bread). The texture was very good for making sandwich bread & the other half for making hamburger buns. I’ll just adjust the salt amount.
You can definitely adjust the salt! Thanks for the feedback and for giving the recipe a try!
This is a family favorite.
I used a mix of both, worked out perfectly.
My favorite bread recipe by far. Delicious!
Can you use a combination of bread flour and all purpose flour to make this?
I personally haven’t tried, but I don’t see why not.
Love it…had company and they loved it with my pasta.
Have made this recipe several times. I absolutely love how easy it is. I decided to make pumpkin soup for dinner and couldn’t be bothered to go and buy bread. I had all the ingredients to make bread nothing better than homemade bread especially when you have this recipe. Thank you.
Love that this recipe makes 2 loaves. I’ve been eating one immediately and freezing the other until we need it. So simple and satisfying!
If I only have bread flour would that substitution be ok?
Yes, that should be fine for a bread recipe!
This bread is delicious and so easy to make.
But I’m wondering if that carb count is correct. Oh………I hope not.
The nutrition facts are for the whole recipe… which makes 2 large loaves. I’m glad to hear you enjoy the bread!!
This is the first new-to-me bread recipe that I made on the first day of the new year and I’m so glad I did. I’ve been making bread for 50 years so I’m always thrilled to find a new one that my family loves. I made this to go with a big pot of potato soup and it was perfect. Incredibly easy too. I brushed the loaves with an egg white wash and they looked spectacular! Thank you so much for getting me off to an auspicious start in the new year.
You’re welcome!! That’s amazing that you’ve been making bread for all the years. We’re so glad you tried this recipe. Thanks for sharing. 🙂
Easy and delicious
Thank you!
Are you sure it needs that much salt???
We enjoy it with that amount of salt, but you can certainly adjust to your liking. 🙂
After the first 30 minute rest, you add the rest of the flour? It’s kind of unclear
Yes! So start with the 2 cups of flour, let it sit for 30 minutes and then add enough flour to create a soft dough… it could be the rest of the 3 cups… might not quite need that much, depending on weather/temperature/etc. Hopefully that helps clear up any confusion. 🙂
I am assuming the calorie count is for the whole loaf??
Correct! For the whole recipe. Definitely not for just one slice. 😉
The best ever! Oh my goodness, it is perfect. Thank you
You are welcome! I am so glad you think so 🙂 Thank you!
Rave reviews from the family when they tried this bread. Yummy and so easy!
Happy to hear that! Thank you for letting me know!
Can I use a plastic bowl
Delicious. My go to bread recipe!
Happy to hear that! Thank you!
Hi! This is my first time ever attempting to bake bread. I’m only on step 2 but I wasn’t able to get all of the flour (the final 3 cups) to mix in smoothly. It seems like there is too much flour. any thoughts? Thank you!
No, it’s definitely not too much. Did you knead it enough? I am sorry, I wish I knew for sure.
Super easy and absolutely delicious. This is my favourite, and only, bread recipe.
That makes me happy to hear! Thank you so much!!
So far my dough is not rising well. This is my 2nd bread attempt. I really like this recipe so far. I kind of think my issue may be temperature? Would temp affect the rise? I also didn’t use instant yeast. That could be a thing too? ❤️
Those two things could have easily affected it or also bad yeast. Make sure your yeast is fresh…that is key. Hopefully, you perfect it 🙂
Italian bread recipe sounds great. Looking forward to making some to share.
Thank you! We love it & it’s a great recipe to share with others 🙂
What a wonder and easy and delicious recipe! Will be a staple in my kitchen. ThAnk you.
You are so welcome! Thank you for saying that!
I love this recipe! i have probably made this about 3 times and it turned out great everytime. but yesterday i made it and it DIDN’T turn out right i cried 🙁 i always follow the recipe exact. my dough WASN’T bubbly for the 30 min rest and it didnt rise for the rise time. can you tell me what went wrong? thank you for this lovely recipe
You are so welcome! So sorry, it didn’t work out. I hate when that happens! I’m guessing it had to do with the yeast. Maybe it wasn’t fresh enough? I’m just guessing, but that’s what I would think.
This is a hit with my whole family, including my super picky daughter. My son likes to eat with toasted with jam and my husband loves when i use it to make french toast!
Yay, I am glad she likes it! Toasted with jam is delicious!
Thank you so much! This was my first time ever attempting to bake bread (other than the old bread machines).
it was so easy & came out great!
THanks for sharing it!
Good job! I am so glad you tried it! Thank you for letting me know 🙂
The hardest part is waiting for the bread to rise. Im too impatient! Its worth the wait though.
This italian bread was so simple and delicious – could not get enough!
I love homemade bread. This Italian bread recipe is super easy and fantastic! Thanks for sharing. 🙂
So soft AND Fluffy! Loved this with butter and jam!
We have used this recipe for so many things..garlic bread, sandwiches, hot bread with butter. IT IS SO SOFT & MELTS IN YOUR MOUTH!
Theres nothing like homemade bread in the winter time! Or anytime. Easy To make!
This is a MUSt try recipe
Thank you so much for sharing that!!