This post may contain affiliate links. Please read our disclosure policy.
Mini lemon drop cakes are drenched in a mouthwatering lemon glaze making them delicious and addicting and perfectly sweet + tangy!
We love all things mini like fruit tarts, cinnamon rolls, and donuts. These mini Lemon Drop cakes are a perfect treat for lemon fans.

Easy Lemon Drop Cakes
I am a huge fan of all things lemon, and these Mini Lemon Drop Cakes are my latest experiment.
The original recipe called for a cake mix, but it made 75 lemon drops. I didn’t need that many, so I decided to come up with my own recipe. I am thrilled with how they turned out.
I took them to a bridal shower, and they were a big hit! They are soft and buttery, and the lemon glaze soaks into every nook and cranny, making every bite delectable. Be careful, they are hard to stop eating!
Fresh lemon zest is the secret to incredible lemon flavor, so don’t leave it out. If you love lemons, you are really in for a treat!
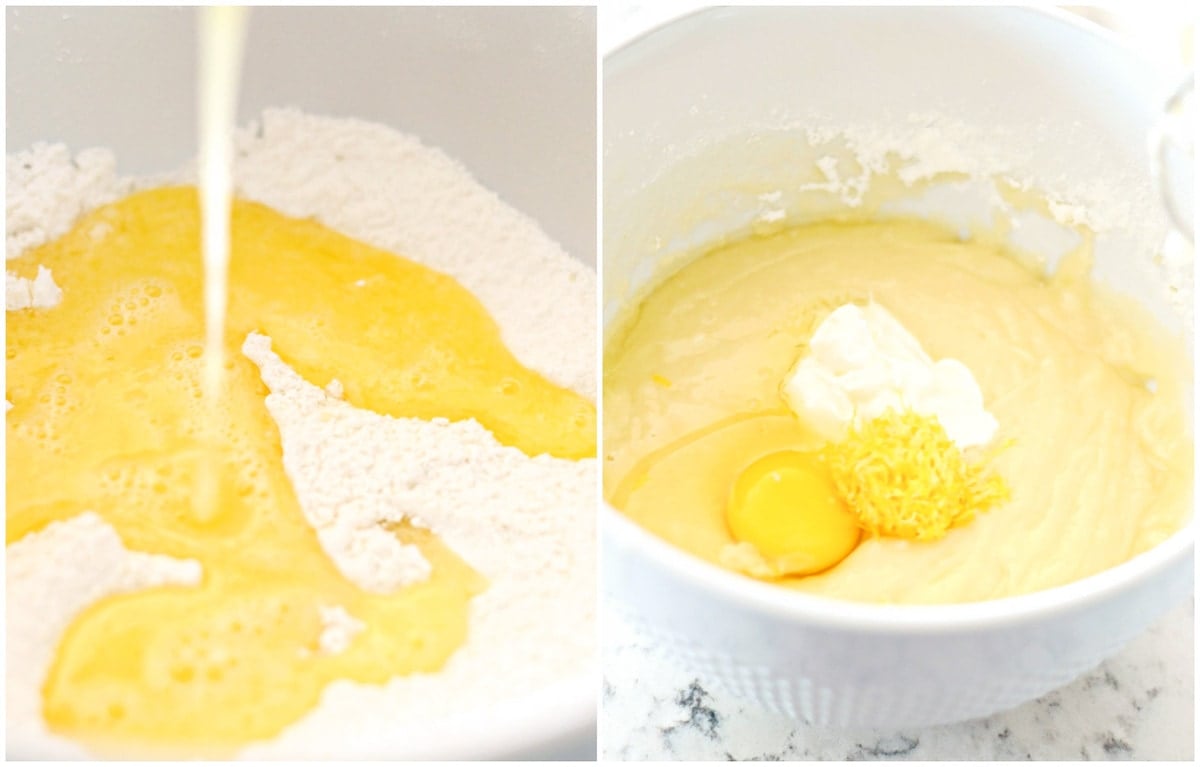
How to Make Lemon Drops
PREP. Spray mini muffin pans with non-stick spray; set aside.
DRY INGREDIENTS. Whisk together flour, sugar, salt, and baking soda in a mixing bowl; set aside.
WET INGREDIENTS. Melt butter in a small saucepan over medium heat. Add water and bring to a boil.
COMBINE. Pour hot mixture over dry ingredients and beat with a hand beater till barely blended. Beat in the sour cream, egg, zest, and lemon juice till smooth.
BAKE. Scoop batter into muffin pans. Bake at 325° for about 12 minutes. Let cool for 5 minutes, then turn onto cooling racks. Cool completely before glazing.
MIX. Whisk all glaze ingredients together in a small mixing bowl. Heat for about 10 seconds in the microwave till glaze is very thin.
GLAZE. Dip lemon drops top side down into the glaze. Let excess glaze drip off into the bowl, then invert lemon drops bottom side down onto cooling racks. (Place waxed paper underneath the cooling racks for easier clean up.) Let sit till glaze hardens.

SToring Info
These mini lemon drop cakes might just be the perfect lemony dessert! Here are a few helpful tips you might like before you get started with baking them:
STORE covered on your countertop at room temperature if you plan to eat within a few days.
FREEZE them before you add the glaze. Flash freeze the cakes on a baking sheet for about an hour and then add them to a freezer safe container or Ziploc bag. They will store well frozen for up to 3 months. When you are ready to eat them just thaw out on your countertop and then make the glaze and dip your cakes.
If you love lemon, Here are a few more recipes to try:

Lemon Drop Mini Cakes
Ingredients
- 1 cup all-purpose flour
- 1 cup sugar
- 1/2 tsp salt
- 1/2 tsp baking soda
- 1/2 cup butter
- 1/2 cup water
- 1/4 cup sour cream
- 1 whole egg
- 1 Tbsp fresh lemon zest
- 1 Tbsp fresh lemon juice
Lemon Glaze
- 1 1/2 cups powdered sugar
- 1 tsp fresh lemon zest
- 1 Tbsp butter, melted
- 2 Tbsp fresh lemon juice
- 2 Tbsp milk
Instructions
- Spray mini muffin pans with non-stick spray; set aside.
- Whisk together flour, sugar, salt, and baking soda in a mixing bowl; set aside.
- Melt butter in a small saucepan over medium heat. Add water and bring to a boil.
- Pour hot mixture over dry ingredients and beat with a hand beater till barely blended. Beat in the sour cream, egg, zest, and lemon juice till smooth.
- Scoop batter into muffin pans. Bake at 325° for about 12 minutes. Let cool for 5 minutes, then turn onto cooling racks. Cool completely before glazing.
- Dip lemon drops top side down into the glaze. Let excess glaze drip off into the bowl, then invert lemon drops bottom side down onto cooling racks. (Place waxed paper underneath the cooling racks for easier clean up.) Let sit till glaze hardens.
Lemon Glaze
- Whisk all glaze ingredients together in a small mixing bowl. Heat for about 10 seconds in the microwave till glaze is very thin.
Nutrition
Nutrition information is automatically calculated, so should only be used as an approximation.





I need to glaze these the day before serving due to timing. Will the glaze harden?
They should be ok if you are just making them the day before.
Delicious…. everyone’s loves them
I also use a silicone mini muffin pan.. do not spry… they pop right out
Made this today in both mini muffins and cake pan – both turned out so moist and delicious! I used up a whole lemon in one recipe, and substituted full cream yoghurt for the sour cream.
This was the most popular dessert at the Derby Party last weekend! I have been asked to make it agai for Mother’s Day.
I had the exact same issue. Very frustrating. I had to dig them out…but they were tasty even though I couldn’t glaze them. I’m trying again. 🙂
Thanks for the feedback and for giving the recipe a try!
I took one star off because there definitely should be an instruction to grease AND FLOUR the pans. I’ve made these four times. The first three times, even though it’s not called for, I floured the pans. This time I didn’t, and EVERY SINGLE ONE stuck to the pan. You may get away with this if you have very high-end, expensive pans or brand new pans, but that’s not what most of us have. Other than that, I love them enough to make them four times.
Glad you still liked them! We got away with just spraying out pans, but yes, you might need to flour them as well.
Made these tonight! Absolutely delish! Served with Vanilla Ice Cream and Raspberry sauce! Stellar Dessert! Mine stuck to the pan also, and I had to cook them about 3 min longer than the recipe suggested. I didn’t have any trouble getting them out with a butter knife. They still looked great! Just an extra step.
Made these tonight! Absolutely delish! Served with Vanilla Ice Cream and Raspberry sauce! Stellar Dessert!
I so wanted these to look like the pictured lemon drop cakes but they were a complete disaster! I double greased my mini muffin tin and NOT ONE came out of the pan . This method should be removed from the recipe.
Thanks for the feedback. We haven’t had any trouble with it coming out of the pan using that method, so I’m sorry to hear it gave you trouble! Thanks for giving the recipe a try!
The flavor isn’t bad, and they’re not too difficult to make. But not one… Not even one came out of the pan when I took it upside down. After that, I used a knife around the edges and particularly perfect shape. Spoon to try and take them out not one came out usable.
I tried to send you a photo, but your comment line doesn’t allow it. So I wasted an hour or so of my time, cleaning up my kitchen, and ended up with a product that I couldn’t use. I wanted this for my husband’s wake, but I’ll try with the recipe that I’m sure it will work. I’m pretty and
I’m sorry to hear they stuck to the pan for you. If you read up in the comments, there has been some different non-stick methods/recipes shared. Might be worth trying? Thanks for giving the recipe a try and for your feedback.