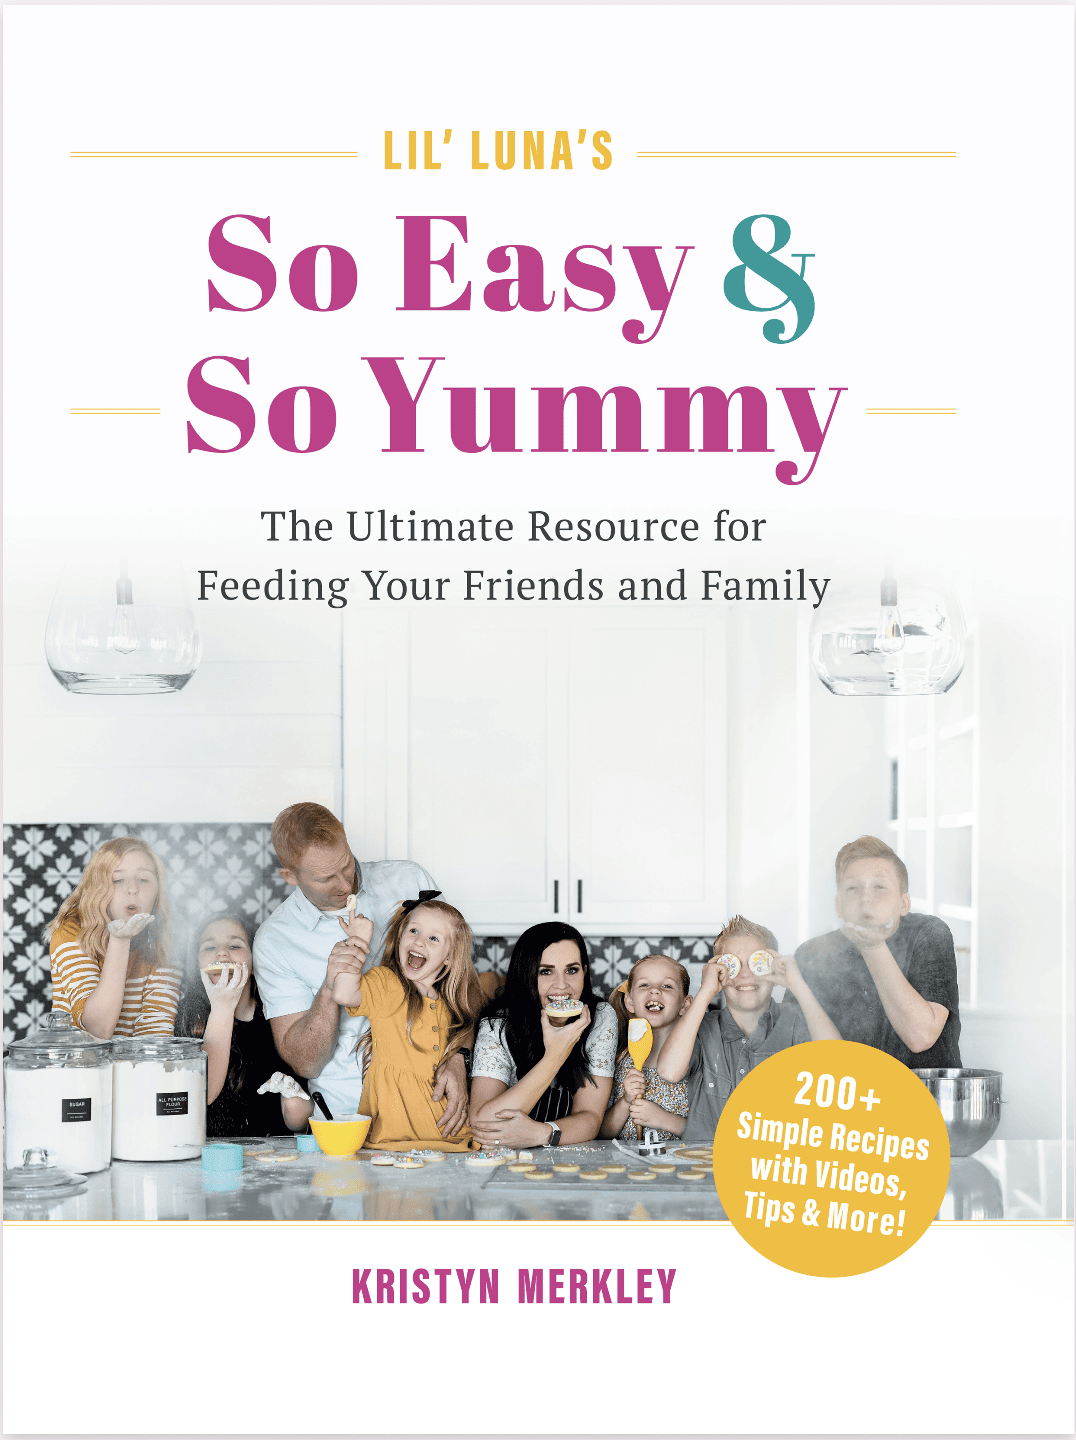
This post may contain affiliate links. Please read our disclosure policy.
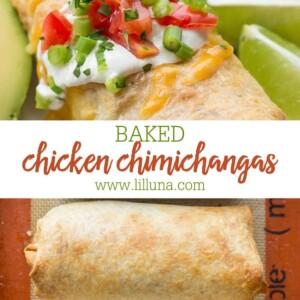
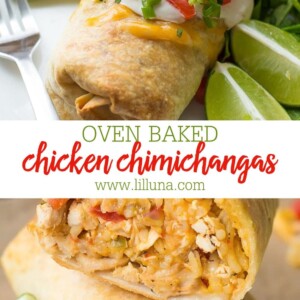
Baked Chicken Chimichangas are like a crispy burrito, stuffed with chicken + cheese. Everyone will love this simple restaurant-style recipe!
Crispy, Baked Chicken Chimichangas are simple to make and are so delicious! Packed full of your favorite fillings, these Chimis are great for dinner and are perfect served with some homemade Salsa and Guacamole!

A family favorite!
Our family loves good Mexican food! Being Hispanic, Mexican food was something I grew up on. One of our favorite dishes happens to be Chimichangas!
Our favorite Chimis have chicken, but we also love making shredded beef and bean versions as well.
What are chimichangas? A Chimichanga is a deep-fried burrito that is popular in Tex-Mex, Southwestern U.S. cuisine, especially here in Arizona.
Customize the flavor to suit your tastes by using your favorite salsa (we use a traditional medium salsa, however, salsa verde would be delicious too)!
They’re easy to whip up thanks to Knorr® Rice Sides ™. You need just 8 ingredients and 30 minutes for these delicious Baked Chimichangas. Simple, right?!

How to Make Chimichangas
This is a very simple Baked Chimichanga version. Yes, these can be fried, but we prefer this lighter, healthier version.
PREP. Preheat the oven to 425°F.
CHICKEN MIXTURE. In a large bowl, combine the cooked, shredded chicken with salsa, cumin, and oregano. Set aside.
RICE. Prepare your Knorr® Fiesta Sides™rice according to package directions (cover and simmer for 7 minutes) or rice recipe. Remove from heat.
WRAP & BAKE. Stir in the chicken mixture and cheese. Divide the mixture between Flour Tortillas, wrap and place seam-side down on a lined baking sheet. Brush with the remaining oil and bake in the oven for 20 minutes or until golden brown and crispy.
TOPPINGS. Serve with your favorite toppings: shredded cheese, sour cream, chopped tomato, chopped cilantro, chopped green onion, chopped lettuce, salsa, guacamole, and lime wedges.
Variations
Here are our favorite ways to change up the recipe:
- Cheese. Substitute or pair with cheddar cheese, mozzarella cheese, or a fiesta cheese blend.
- Sauce. Add a few tablespoons of enchilada sauce to the mixture or drizzle the sauce over the Baked Chimichanga.
- Meat. The chicken can be substituted with an equal amount of shredded pork or beef.
- Tortilla. These bake best in a flour tortilla, but if frying you can use either flour or corn tortillas.

Recipe Tips
Folding a Baked Chimichanga. It’s just like folding a burrito. Place the meat and rice in the middle of the open tortilla. Fold up the bottom of the tortilla over that mixture, then fold both sides in towards the middle and roll up.
Fry Chimichangas. Baking is perfect for getting the same great taste, without added calories. However, if you’re feeling a little indulgent you can easily fry the Chimichangas instead.
- Heat a skillet over medium heat and add 2 inches of vegetable oil.
- Place the filled and folded Chimichanga seam side down in the oil.
- Turn every 30 seconds until golden brown on all sides. Enjoy!
Air fryer. Aside from baking, the air fryer is another great way to get a crisp Chimichanga without frying it in oil.
- Fold the Chimichangas as directed and spray/brush each side with olive oil.
- Working in batches, fry the chimichangas at 400°F for 8-9 minutes, flipping halfway.

Storing Info + Side Ideas
FREEZE. Baked Chicken Chimichangas make a perfect freezer meal. They do not need to be pre-baked.
Wrap each individual Chimichanga in foil, put them in a freezer bag, and label them. Freeze for up to 6 months.
To reheat Oven Baked Chimichangas.
- Microwave. Warm them up in 30-second increments to a minute.
- Oven. Pull the desired amount out of the freezer. Preheat the oven and bake at 425°F. If frozen, bake for 35-40 minutes. If thawed, bake for 20-25 minutes.
Re-brush them with oil to make them crispier.
What to serve with chimichangas? Here are some of our favorites:
- Sour Cream Rice
- Homemade Salsa
- Homemade Flour Tortillas
- Easy Refried Beans
- Homemade Pico de Gallo
- Black Bean and Corn Salsa
- Cafe Rio Cilantro Ranch Dressing

Recipe FAQ
They’re similar in that they’re made from a folded flour tortilla usually filled with meat, cheese, and other ingredients. The main difference is that chimichangas are deep fried, although in this case it’s baked. 😉
Instead of using packaged rice, you can use homemade. We love to use leftover Spanish Rice in ours! It ends up being about 2 1/2 cups prepared (or half that unprepared).
Place the meat and rice in the middle of the open flour tortilla. Fold up the bottom of the tortilla over that mixture, then fold both sides in towards the middle and roll up.
For more chimi & BURRO recipes, try:
- Bean Chimichangas
- Green Chili Smothered Burritos
- BBQ Chicken Burritos
- Breakfast Burrito
- Green Chili Burrito
- Cheesecake Chimichanga
- Chimichanga

Baked Chicken Chimichanga Recipe
Ingredients
- 1 1/2 cup chicken cooked and shredded
- 2/3 cup salsa
- 1 1/2 tsp ground cumin
- 1 tsp dried oregano
- 2 tbsp canola or vegetable oil divided
- 1 package Knorr® Fiesta Sides™ – Spanish Rice
- 1 1/4 cup colby jack cheese shredded
- 4 flour tortillas burrito sized
Instructions
- Preheat the oven to 425°F.
- In a large bowl, combine the cooked, shredded chicken with salsa, cumin, and oregano. Set aside.
- Prepare your Knorr® Fiesta Sides™rice according to package directions (cover and simmer for 7 minutes) or rice recipe. Remove from heat.
- Stir in the chicken mixture and cheese. Divide the mixture between flour tortillas, wrap and place seam-side down on a lined baking sheet. Brush with the remaining oil and bake in the oven for 20 minutes or until golden brown and crispy.
Video
Nutrition
Nutrition information is automatically calculated, so should only be used as an approximation.
What will you make with Knorr Rice Sides? Tag your creations with #Knorr – we’d love to see them! For more simple & tasty Knorr® inspired recipes hop on over to Allrecipes.com. Also, be sure to follow Knorr® on Pinterest!!
I cannot get your Chimichanga recipe to show on your website. I can see other recipes on your site….strange.
Hmm..that’s interesting. It pulls up on my end. I hope you can get it!
Amazing Recipe! I love chicken but the way your making “BAKED CHICKEN CHIMICHANGAS” is so yummy and so delicious.
Thank you so much!!
Wanted to try SOmething new, this is an amazing addition to our cookbook. The one thinG i did differently is cooked the chicken in an instapot with chicken broth, This made the chicken juicy aNd very easy to shred. I also split the chicken/rice mixture into 2 bowls so i could use the salsa i like for me and the Spicy salsa for my husband. Overall great meal, pretty easy to make. Turned out Excellent!
That is perfect! Thank you for sharing what you did! Happy you liked it!
This recipe is delish. And once I made this my mind just started going a mile a minute with ideas for fillings from breakfast to dessert. It’s just my Husband & I now at home now that the kid’s are grown, so it’s great to have a recipe like this that’s perfect for the Freezer. Thank you for your Wonderful Site you created & all your Delicious Recipes that you took the time to test & share with us.
God Bless From Wisconsin 💛
Thank you so much for your sweet words. I’m glad you enjoyed the recipe and can freeze it! I imagine cooking changes a bit going from feeding a growing family to just the two of you now. Thank you again!!
THEY LOOKS YUMMY!! THANK YOU FOR SHARING.. ?
You are so welcome!! They are! I hope you think so, too!
We loved them! Topped with low-fat sour cream, avocado, and cilantro! I used 5 burrito tortillas to decrease the amount of calories in each. I used canned chicken because of the covid-19 quarantine and we both really loved them. I wrapped 2 in tinfoil and froze them to be heated up at a later date! Thank you! This was a great meal and so easy to make with non-perishables. 🙂
Sounds great!! Thanks for sharing what you did!
nice racipee! so yummy
Thank you so much for sharing that!!
I must try this , I love to eat Different delicious food. Thanks for sharing.
You are welcome & I do too! Hope you like these 🙂
LOve this MEal! So Easy and Delicious!
Happy you do! Thank you for letting me know 🙂
Love this recipe. Made it several times. I also add refried beans to it.
Adding beans is a great addition! I am happy you liked them! Thank you!
Love this recipe. Made it several times. I also add refried beans to it.
Refried beans would be great! So happy you liked it! Thank you for letting me know!