This post may contain affiliate links. Please read our disclosure policy.
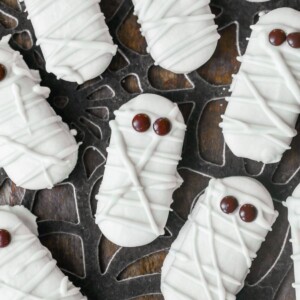
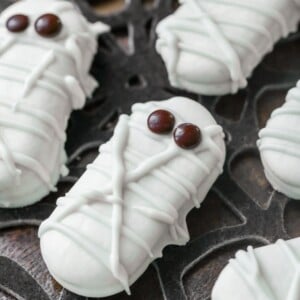
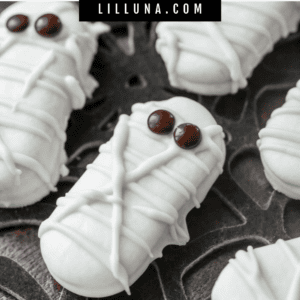
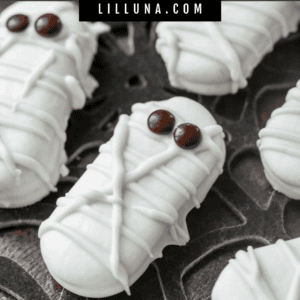
Not so creepy Mummy Cookies are a simple, delicious, and cute treat idea for Halloween!
Mummies, Frankenstein, and Monsters—you can never have too many monsters!! All of these Halloween treats make such cute and delicious party favors or neighbor gifts.

Calling all the monsters
We love to make monsters at Halloween. Some of our favs are Monster Rice Krispie Treats and Monster Suckers.
Today’s recipe stars one of my favorite Halloween monsters – mummies!! We made these Mummy Cookies and they were super easy and super tasty! They’d be great for Halloween parties.
They are perfect for placing in party favor bags and sharing. They are so simple that the kids can even pitch in and enjoy the process!

Just dip & Decorate!
CANDY COATING. Begin by melting candy coating as directed on package.
COOKIE. Place cookie in melted candy using a fork and making sure all sides are coated. Set on waxed paper and repeat for all cookies.
SET. Let candy coating set (in the fridge for half hour) or on the counter for at least 1 hour.
DECORATE. Melt more candy coating and place in a Ziploc bag. Snip edge and drizzle over cookies. Add mini M&Ms as eyes. Let set. ENJOY!
Variations:
- Look for cookies that have an oblong oval shape such as Milano cookies, Keebler EL fudge cookies, Nabisco Nutter Butter Cookie
- Instead of using mini brown M&M’s you can use candy eyeballs or even red hot candies.
- Instead of white candy coating you can also use white chocolate chips and add a bit of coconut oil to help get the chocolate smooth.

Tips for melting candy coating:
The key to melt candy wafers is to melt them at low heat and slowly.
- Microwave: This is a very quick way to heat the chocolate. I would recommend only heating enough chips to coat a few cookies at a time. Set the microwave to 50% power and heat the candy wafers in 30 second increments. Stir after every 30 seconds. Repeat until smooth.
- Stovetop: Place the candy in a small saucepan and heat over medium low heat until smooth. Stirring constantly.
- Double boiler: This is a great way to heat a larger batch of coating because the coating can stay hot without fear of it being burned. If you do not have a double boiler then you can make one using a saucepan and a metal bowl. Add 2 inches of water to the saucepan, place the metal bowl on top of the saucepan, add the candy coating to the bowl and bring the water to a boil. Once boiling you can turn down the heat. Stir until the coating is smooth.

Storing Info
STORE cookies in an airtight container for up to 2 weeks (once the coating has hardened).
To FREEZE these cookies, let them solidify before you place them in an airtight bag in the freezer for up to 4 months. Let them thaw to room temperature before eating.

Serve these cookies with a fun halloween drink, like:
- Witches Brew
- Boo-Nilla Ghost Milkshakes
- Witches Potions Drink
- Slushy Punch
- Ghoul Aid
- Halloween Hot Chocolate
- Halloween Punch
Mummy Halloween Cookies
Ingredients
- 26 Vienna Fingers vanilla cookies
- 2 bags white candy coating
- 52 Mini M&Ms
Instructions
- Begin by melting candy coating as directed on package.
- Place cookie in melted candy using a fork and making sure all sides are coated. Set on waxed paper and repeat for all cookies.
- Let candy coating set (in the fridge for half hour) or on the counter for at least 1 hour.
- Melt more candy coating and place in a ziploc bag. Snip edge and drizzle over cookies. Add mini M&Ms as eyes. Let set. ENJOY!
Notes
- Microwave: This is a very quick way to heat the chocolate. I would recommend only heating enough chips to coat a few cookies at a time. Set the microwave to 50% power and heat the candy wafers in 30 second increments. Stir after every 30 seconds. Repeat until smooth.
- Stovetop: Place the candy in a small saucepan and heat over medium low heat until smooth. Stirring constantly.
- Double boiler: This is a great way to heat a larger batch of coating because the coating can stay hot without fear of it being burned. If you do not have a double boiler then you can make one using a saucepan and a metal bowl. Add 2 inches of water to the saucepan, place the metal bowl on top of the saucepan, add the candy coating to the bowl and bring the water to a boil. Once boiling you can turn down the heat. Stir until the coating is smooth.
Nutrition
Nutrition information is automatically calculated, so should only be used as an approximation.

So I love the Keebler elf cookies and they work really well to make these. I also use the doubler broiler method you suggest in the post. It keeps the candy perfectly melted. Without worry it will burn or seize. Thanks for the idea.
Easy and so delicious. The cutest mummies ever!
These cookies were so much fun to make and the kids decorated them in all sorts of fun ways, this is such a great weekend treat and activity to do with kiddos!
Yes, these are perfect cookies to get the kiddos involved in helping!
We just made these as a trial for Halloween and they came out perfectly! We’ll definitely be making these for our party. Thanks so much!
You’re welcome!! I’m so glad they turned out well and you can use them for your party! Enjoy!
Oh, I love these!! Can’t wait to make them this year!
I’m in charge of a treat for a Halloween party & these are going to be a hit!! What an easy & festive way to decorate these cookies!
Thanks for the mommy cookies recipe.More power to you
You’re welcome!! Hope you’ll give them a try sometime 🙂
Awesome Recipe ! Gonna try this today Fingers crossed
Good luck!! Thanks for giving them a try! Hope you like!
Thanks for sharing yours Recipe Mummy Cookies …..
You’re welcome!! Thank You!!
Awesome …!!! Thank you so much, Lil’ Luna